Overview
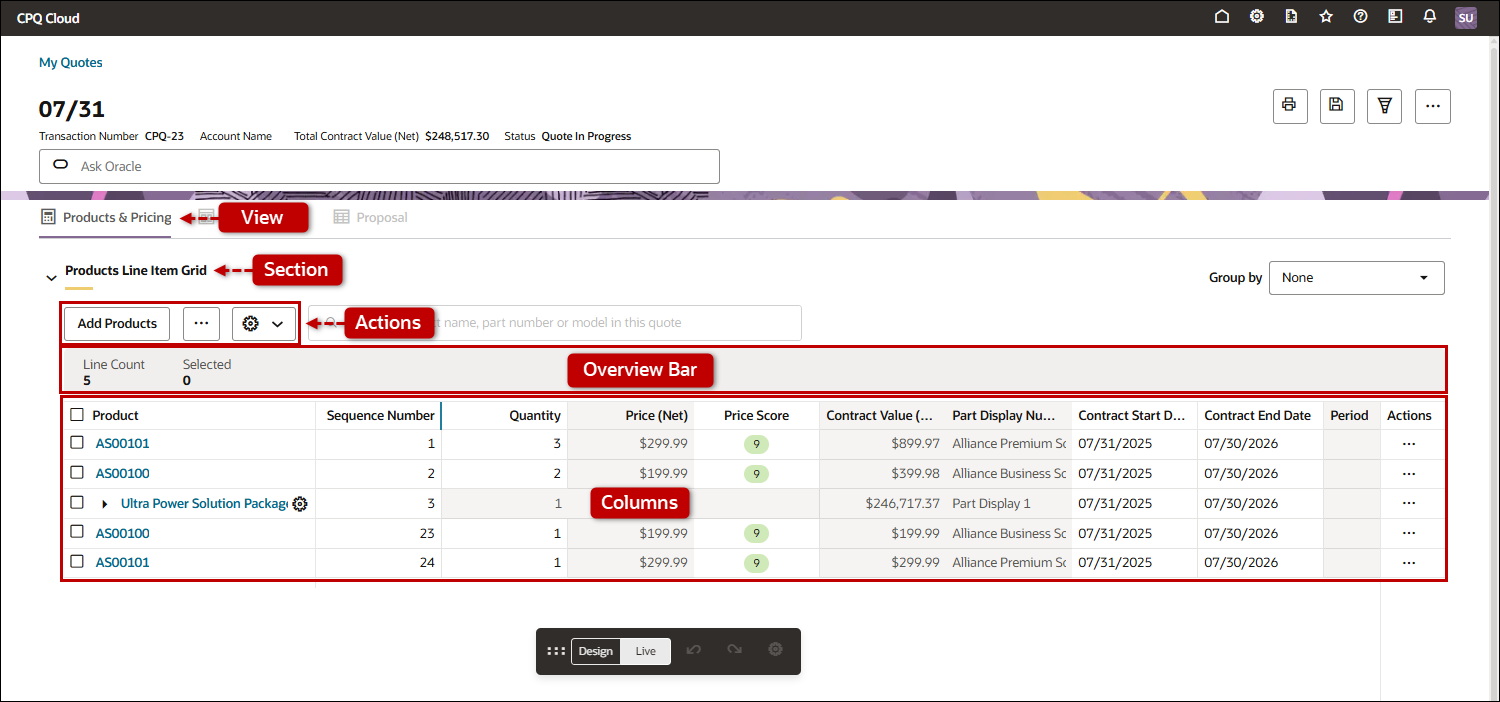
This topic describes how to customize the Redwood Quote Line Item Grid. Settings for the Line Item Grid are managed in the following categories:
-
Section: Settings in this area control the behavior of the line item grid container. It includes settings for pagination, line item grouping, etc.
-
Actions: Settings in this area control behavior of row actions, add products, primary actions, and more actions.
-
Overview Bar: This area identifies which attributes are displayed in the line item grid overview.
-
Columns: Settings in this area control the behavior of price waterfall, the primary column, and which attributes are included in the line item grid. This includes Individual attribute settings to control if attributes are editable, included in the price waterfall, and aggregation (Totals).
Administration
![]() Customize Line Item Grid Section
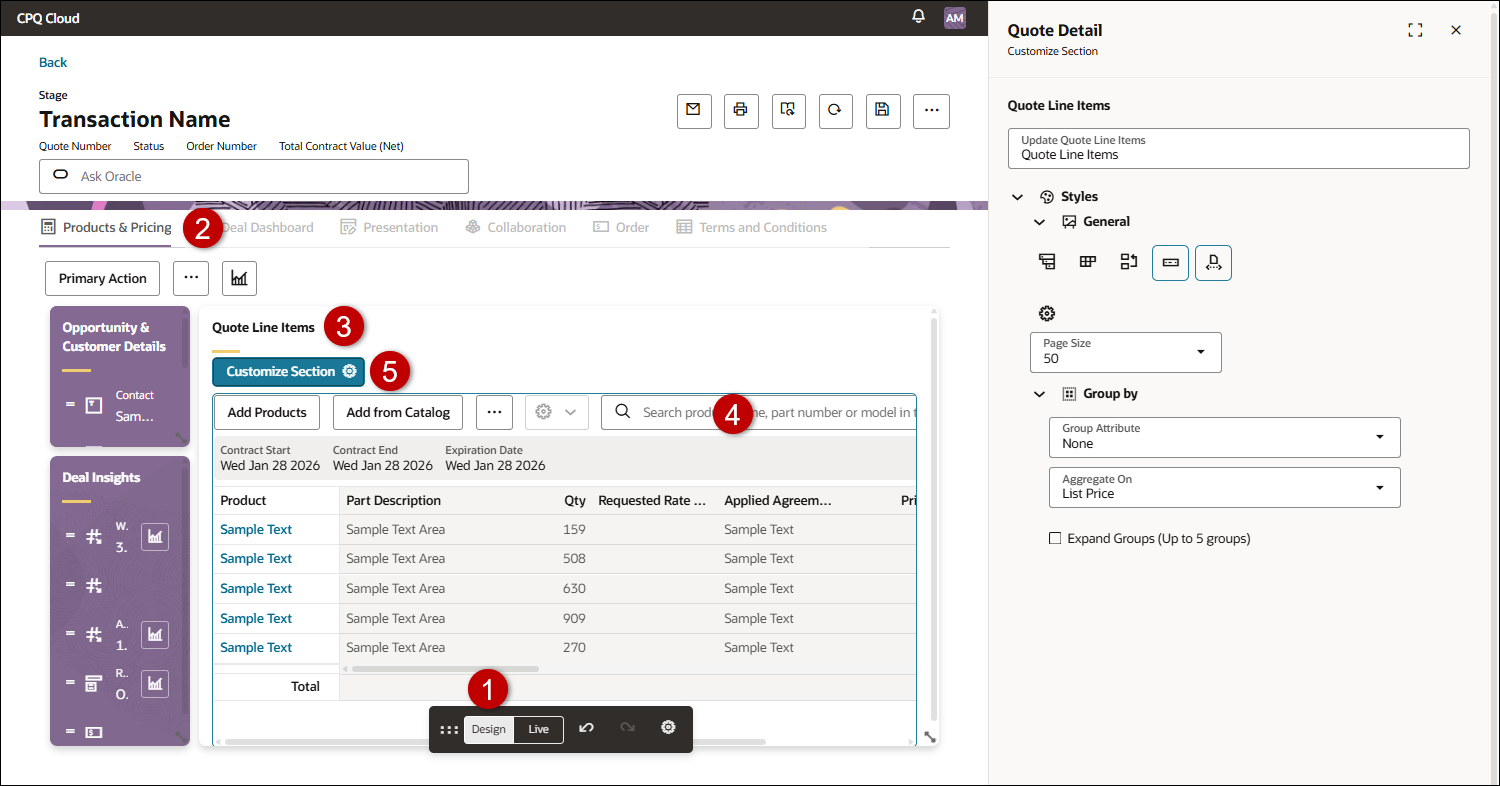
Customize Line Item Grid Section
-
Open or create a Redwood quote, navigate to the Line Item Grid, then click Design.
-
Click inside the LIG section.
-
Click Customize Section

-
Click in the Label field to customize the section name.
-
Click the Translation
 icon to provide a translation.
-
-
Expand Styles to customize Line Item Grid section styles.
-
Expand General Settings to customize expansion, card view, row reordering, overview bar, and pagination.
-
Click the Expand All
 icon to enable or disable auto expansion of hierarchical products.
 -
Click the Card View
 icon to enable or disable Card View for line items.
-
If enabled, click Card Configuration to specify Primary, Secondary, and Tertiary attributes
-
-
Click the Row Reorder
 icon to enable or disable reordering of line items.
 -
Click the Overview Bar
 icon to display or hide the Line Item Grid Overview Bar.
 -
Click the Paginate
 icon to enable or disable Line Item Grid pagination.
-
If enabled, select the pagination Page Size.
-
-
-
Expand Group By to customize grouping and aggregation.
-
Group Attribute: Select a default Menu or Boolean grouping attribute.
-
Aggregate On: Select a default attribute to aggregate.
-
Expand Groups: Enable this option to automatically expand grouped sections (max 5 groups).
-
![]() Customize Line Item Grid Actions (Row Actions, Add Products, Primary Action, More Actions)
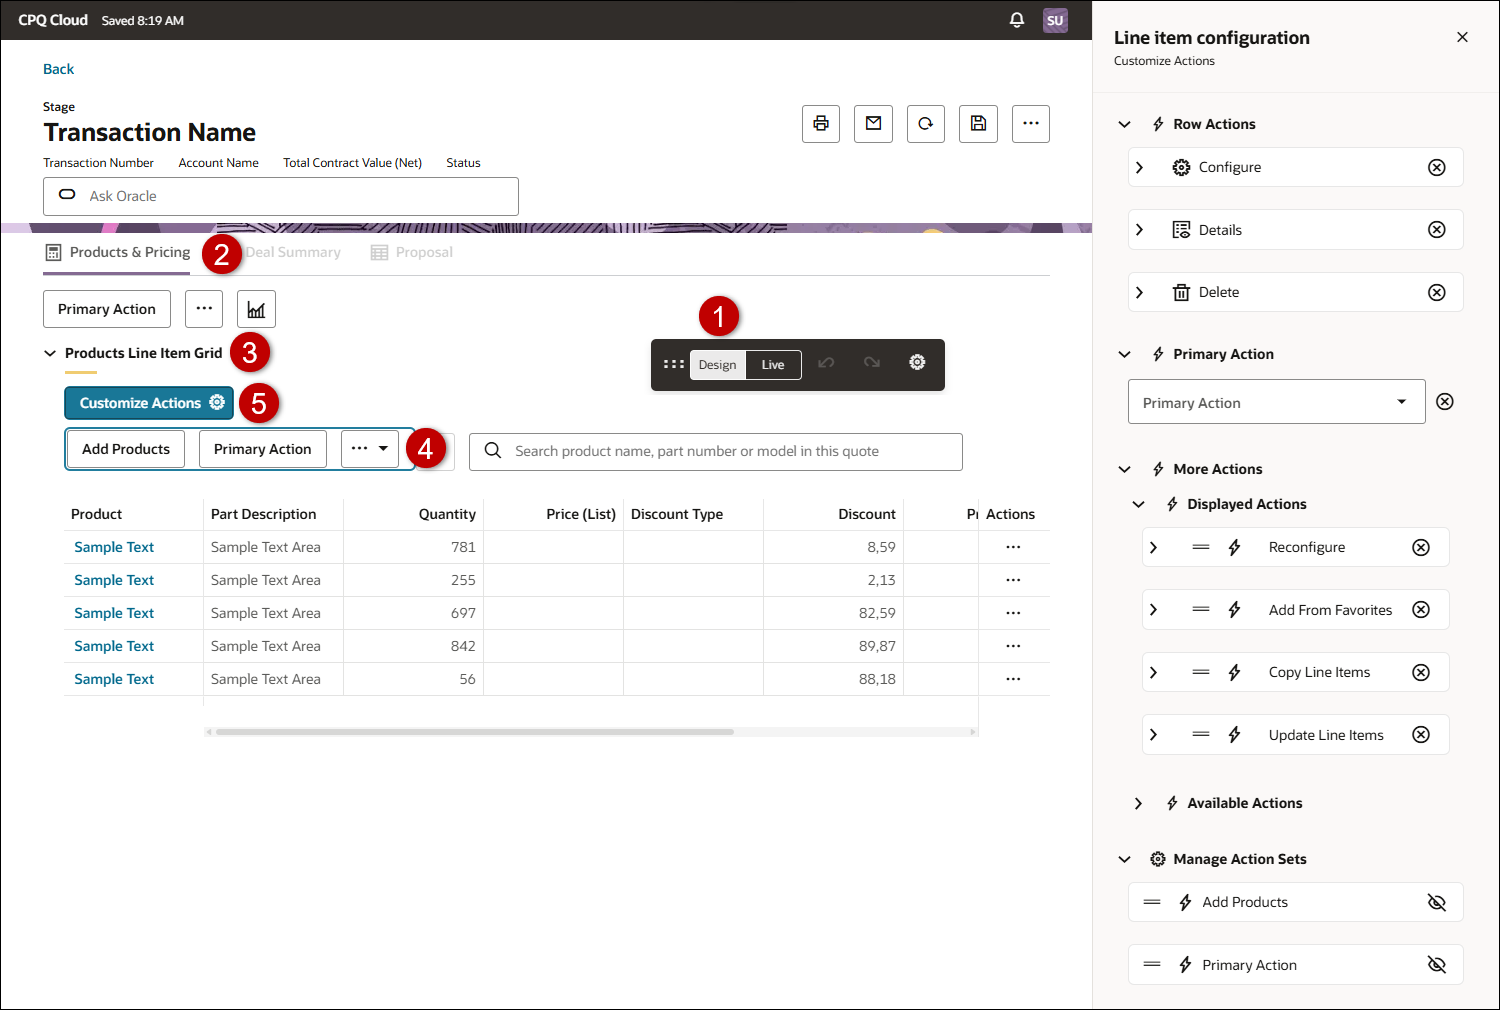
Customize Line Item Grid Actions (Row Actions, Add Products, Primary Action, More Actions)
-
Open or create a Redwood quote, navigate to the Line Item Grid, then click Design.
-
Click next to the Line Item Grid actions.
-
Click Customize Actions
-
Expand Row Actions section.
-
Show
 or Hide
  the Configure action icon.
 -
To change the action icon, expand the action item and click the Pick

![]() Customize AI-Assisted Add Products
Customize AI-Assisted Add Products
AI-Assisted Add Products automatically identifies and extracts product details from customer-provided documents and converts unstructured data into structured product entries.
-
Expand AI-Assisted Add Products.
-
Check the Enable AI-Assisted Add Products option.
-
Select the applicable agent from the Agents drop-down.
![]() Customize the Add Products Drawer
Customize the Add Products Drawer
-
Styles
Set the default product display to Cards or List.
-
Filters
-
Select Supported Types: Parts, Models, and/or BOMs (non-configurable kits)
These options control the product types that are returned in the Add Products drawer. -
If applicable, add Default Filters to limit product results in the Add Products drawer before a sales user navigates to or searches for products.
-
Enter desired text in the Add filter field.
-
Click X to remove a filter.
-
-
-
Catalog
- Enable Browse Catalog: Enable or disable the Browse Catalog.
Disabling the Browse Catalog will remove the ability for sales users to navigate through available product hierarchies. -
If Browse Catalog is enabled set the following options:
-
Enforce Browse Catalog: Enable this option to disable the ability for sales users to close the Browse Catalog.
-
Include Catalog Hierarchy: Control which product families are displayed in the Browse Catalog when sales users define search criteria in the Add Products drawer.
-
When disabled (default), only relevant product families are displayed in the Browse Catalog during a search.
-
When enabled, all available product families are displayed in the Browse Catalog during a search.
-
-
- Enable Browse Catalog: Enable or disable the Browse Catalog.
-
Recommendations
-
Enable or disable recommendations.
You can disable recommendations if they are not applicable or intelligence models are not ready customer use.-
Check Enable Recommendations to suggest Product Recommendations to be added alongside the current items in the quote.
-
Check Enable Top Selling Recommendations to recommend top-selling configurations for configurable products, based on actual sales data from past transactions.
-
-
Notes:
-
Refer to Add Products for more information about adding products,
-
Typically, Add Products is enabled when there are no line items in a quote. But the visibility of the Add Products action can also be controlled by the Document Views and Access Rules for the Transaction Update Line Items action.
-
Refer to Intelligence Portal for the setup and administration of AI-generated Product Recommendations and Top Selling Configurations.
![]() Customize Primary and More Actions
Customize Primary and More Actions
-
Expand Primary Action to customize the primary action
-
Select the applicable action from the Primary Action drop-down.
-
Click the Delete
 icon to remove the primary action.
 -
To update the label for the primary action, click the
icon. -
Click Advanced, to enable, disable, or mark the confirmation dialog critical.
-
-
Expand More Actions to customize the actions displayed in the More Action drop-down for the Line Item Grid.
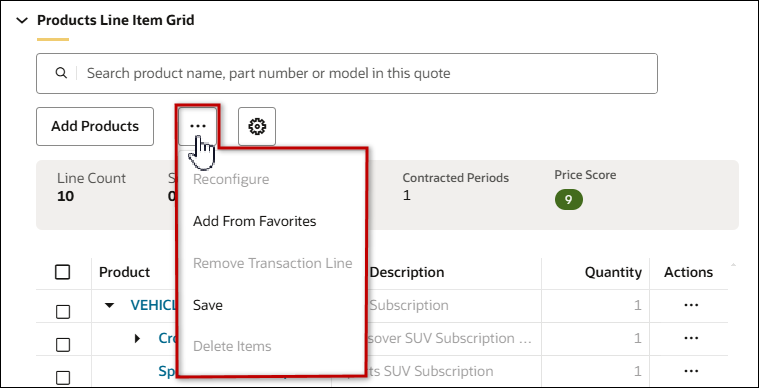
More Actions Live View
-
Expand the Label section to add a label, versus the default ellipsis, for the More Actions drop-down.
-
Enter the text in the Label field.
-
Click the Translation
icon to provide a translation. -
Click the label Delete
icon to remove the label.
-
-
Expand Displayed Actions to view and customize selected actions.
-
To add an action to the More Actions drop-down:
-
Expand Available Actions, find the desired action, then click the Add Action + icon.
-
-
To update the label for an action:
-
Expand the action, click Manage, then update the action label in Commerce administration.
-
-
Click Advanced, to enable, disable, or mark the confirmation dialog critical.
-
Click the action Delete
icon to remove an action from the More Actions drop-down.
-
-
-
Expand Manage Action Sets to customize the Add Products and Primary Action behavior.
-
Click the Hide
icon to hide the Add Products action or the Primary Action from all sales users. -
Click the Show
icon to display to the Add Products action or the Primary Action from all sales users.
-
-
Expand Add Products to customize the label for the Add Product action.
- The applicable commerce process must be deployed before action label changes are available to sales users on the Redwood Quote UI.
- Refer to Document Actions for Commerce action administration.
Notes: Action labels are modified in Commerce administration.
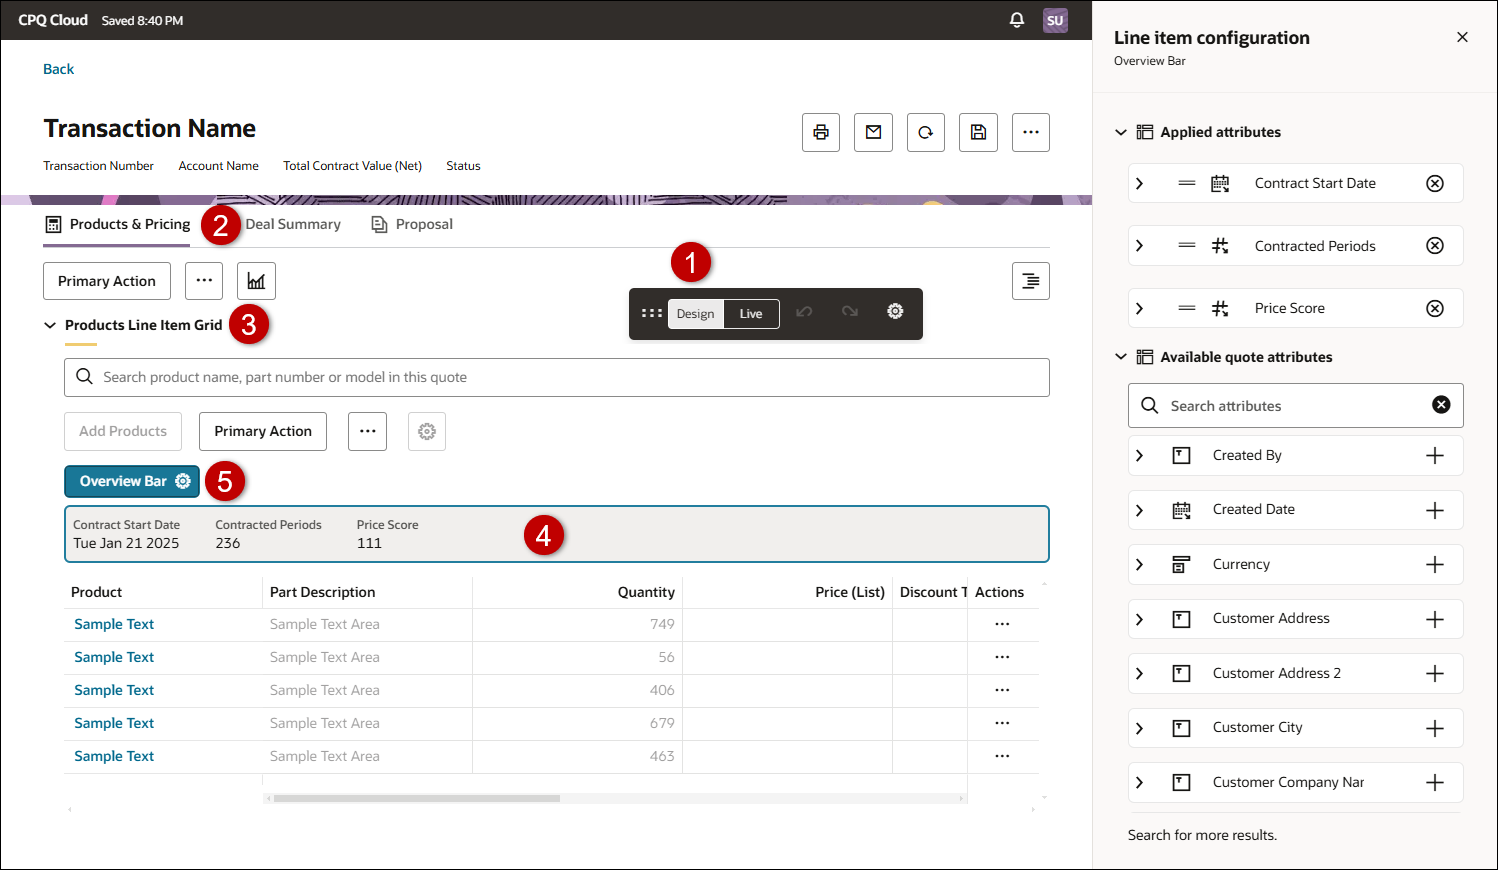
![]() Manage Line Item Grid Overview Bar Attributes
Manage Line Item Grid Overview Bar Attributes
-
Open or create a Redwood quote, navigate to the Line Item Grid, then click Design.
-
Click the Line Item Grid overview.
-
Click Overview Bar
-
Expand Displayed Attributes to view attributes displayed in the Line Item Grid overview bar.
-
To add an attribute to the overview bar:
-
Expand Available quote attributes, find the desired attribute, then click the Add Attribute + icon.
-
-
Click the action Delete
icon to remove an attribute from the overview bar. -
To update the label for an attribute:
-
Expand the attribute, click Manage, then update the action label in Commerce administration.
-
-
Notes: Attribute labels are modified in Commerce administration.
- The applicable commerce process must be deployed before attribute label changes are available to sales users on the Redwood Quote UI.
- Refer to Commerce Attributes for Commerce attribute administration.
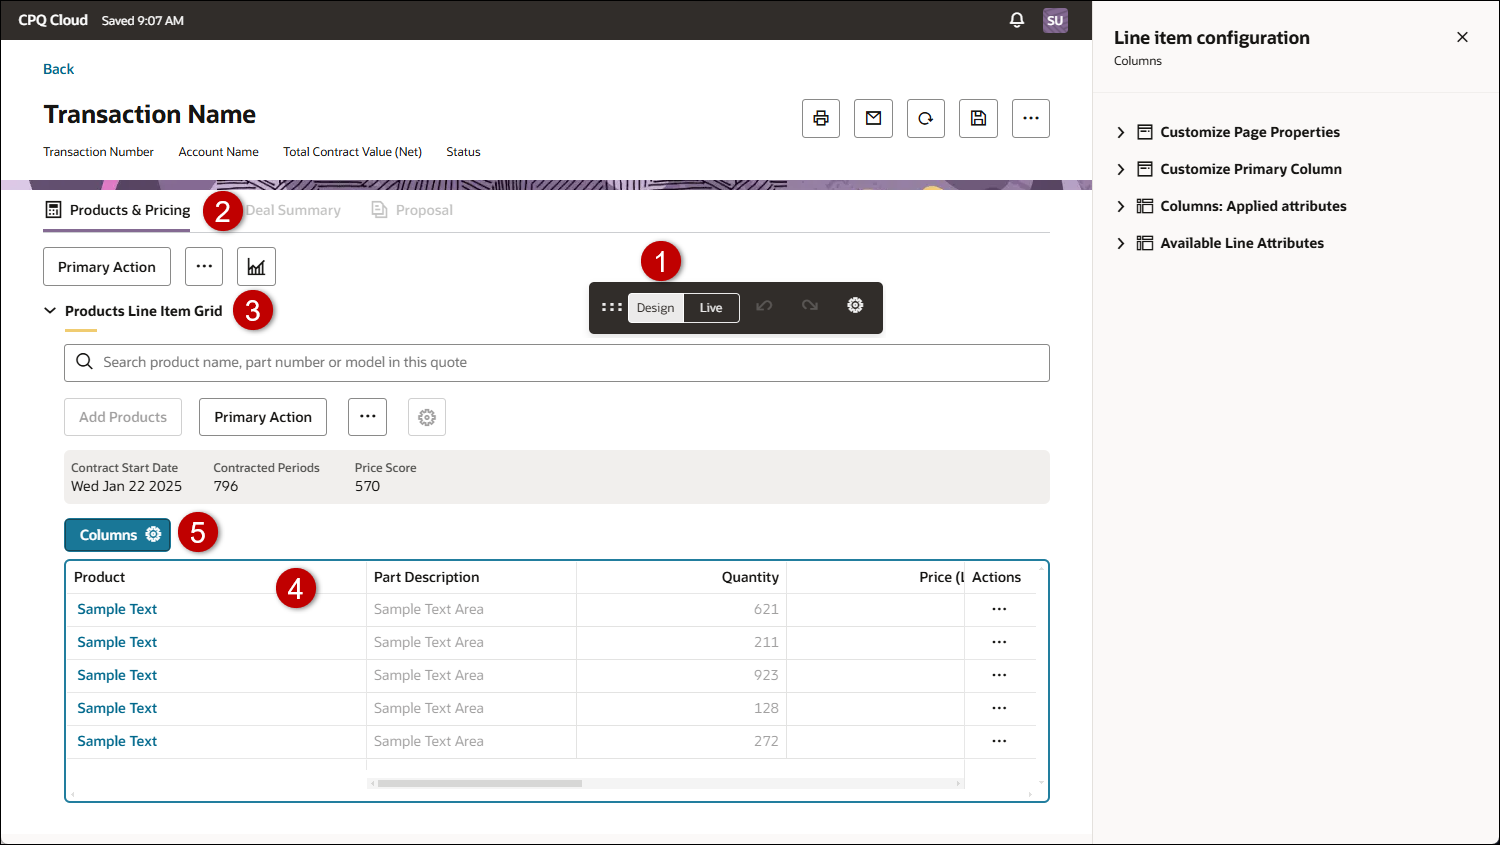
![]() Customize Line Item Grid Columns
Customize Line Item Grid Columns
-
Open or create a Redwood quote, navigate to the Line Item Grid, then click Design.
-
Click inside the Line Item Grid.
-
Click Columns
![]() Customize Line Item Grid Page Properties
Customize Line Item Grid Page Properties
-
Click Customize Page Properties.
-
Select the Enable Price Waterfall option to display the price waterfall displays in the charge drawer.
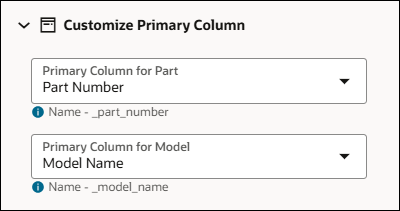
![]() Customize the Line Item Grid Primary Column
Customize the Line Item Grid Primary Column
-
Click Customize Primary Column.
-
Select the Primary Column for Part.
-
Select the Primary Column for Model.
-
To update the label for the primary column attribute, click the
icon.
Notes: Attribute labels are modified in Commerce administration.
- The applicable commerce process must be deployed before attribute label changes are available to sales users on the Redwood Quote UI.
- Refer to Commerce Attributes for Commerce attribute administration.
![]() Customize Line Item Grid Columns
Customize Line Item Grid Columns
-
Click Columns: Applied attributes to view columns for the Line Item Grid.
-
Click the Delete
icon for an attribute to remove a Line Item Grid column.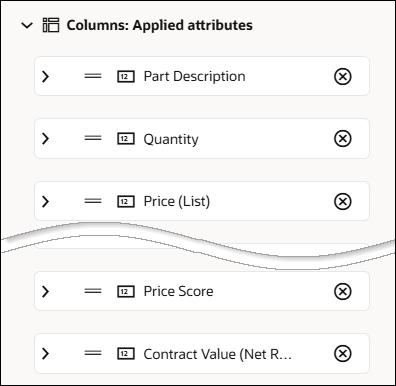
![]() Customize a Line Item Grid Column
Customize a Line Item Grid Column
-
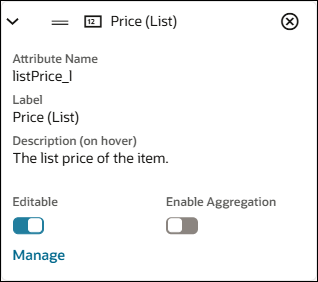
Click on a displayed attribute to customize the Line Item Grid column.
-
Enable the Editable option to allow end users to modify this field.
-
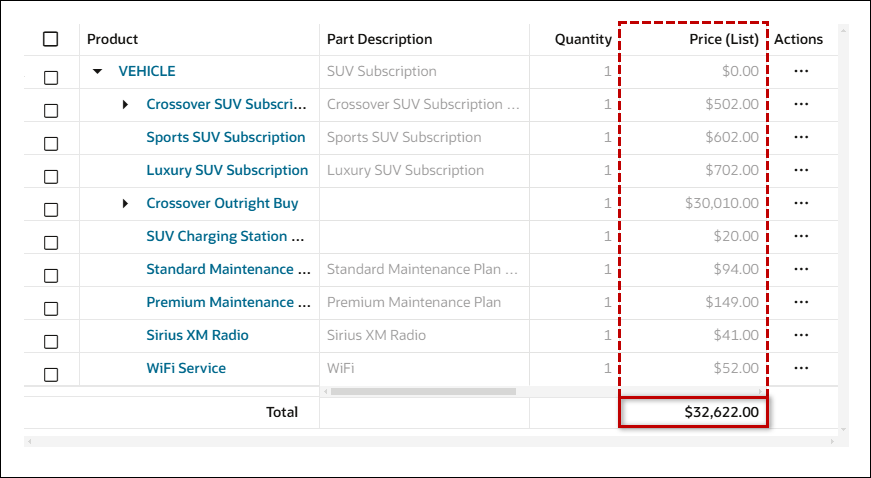
Select Enable Aggregation to show the aggregation of all the values in the column to the user.
Live View
-
Click the Manage link to navigate to the Commerce Attribute Editor.
Notes: Attribute labels are modified in Commerce administration.
- The applicable commerce process must be deployed before attribute label changes are available to sales users on the Redwood Quote UI.
- Refer to Commerce Attributes for Commerce attribute administration.
Price Waterfall Enabled
-
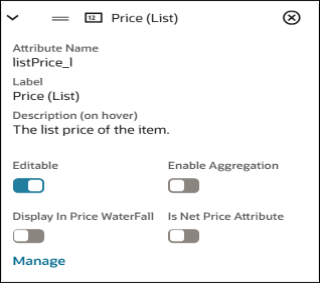
When Price Waterfall is enabled, the following options are displayed for Currency, Float, Integer, Menu, and Text type attributes.
-
Select Display in Price Waterfall to display the selected attribute in the Charge Details View.
-
When Price Waterfall is enabled, select Is Net Price Attribute to designate a Currency type attribute as the Net Price in the Price Waterfall. The value of the selected attribute will be treated as the Net Price in the Price Waterfall. This allows customers using non-standard pricing attributes to still benefit for the price waterfall visualization.
![]() Display Price Waterfall in the Redwood Quote UI
Display Price Waterfall in the Redwood Quote UI
Complete the following steps to display the price waterfall in the Redwood Quote UI.
- Open or create a Redwood quote, navigate to the Line Item Grid, then click Design
-
Click inside a Line Item Grid column.
-
Click Columns
-
Click Customize Page Properties.
-
Select the Enable Price Waterfall option.
-
Display additional attributes in the Charge Details View for price waterfall.
-
Click on the desired attribute in the Columns: Applied attributes section.
-
Select the Display in Price Waterfall option.
-
Repeat this step for all desired attributes.
-
-
Designate the Net Price attribute.
-
Click on the desired attribute in the Columns: Applied attributes section.
-
Select the Is Net Price Attribute option.
-
-
Click Live to save the Designer changes.
Notes
Notes: Action and attribute labels are modified in Commerce administration.
- The applicable commerce process must be deployed before action or attribute label changes are available to sales users on the Redwood Quote UI.
- Refer to Document Actions for Commerce action administration.
- Refer to Commerce Attributes for Commerce attribute administration.


