Last Price Paid
Overview
Sales users need to know what price precedents have been established with a customer in order to intelligently define the appropriate prices for a product. Purchasing agents entering a negotiation typically have access to all of the previous transactions with a vendor and competitors. In contrast, Sales users typically have no information about the prior sales or prices. The Last Price Paid metric provides historical price information

All customers on Oracle CPQ 19C or later should leverage the improved flexibility of the Price Guidance analytic to implement Last Price Paid functionality.
Beginning in Oracle CPQ 20B, customers will no longer be able to create or edit Last Price Paid attributes implemented using the Currency attribute Last Price Paid function.
After upgrading to Oracle CPQ 20B, administrators must set up a Price Guidance analytic to implement Last Price Paid functionality.
For detailed instructions, refer to Setup Last Price Paid Using Price Guidance Analytic
The Last Price Paid attribute values for existing line items using the Currency attribute Last Price Paid function will display until the transaction is re-saved. The Last Price Paid attribute values for new and re-saved line items using the Currency attribute Last Price Paid feature will NOT be populated.
Administration
 Set Up Last Price Paid Using Price Guidance Analytic
Prerequisites
Perform the following tasks prior to creating a Last Price Paid Analytic:
-
Create a Commerce sub-document currency type "Last Price Paid" attribute,
see Commerce Document Attributes for instructions.
-
Add a "Last Price Paid" Data Column,
see Data Columns for instructions.
-
Deploy the applicable Commerce Process,
see Commerce Deployment Center for instuctions.
Create a Last Price Paid Analytic
-
Navigate to the Process Administration page.
Admin > Commerce and Documents > Process Definition
-
Select Analytics from the Navigation drop-down menu, then click List.
-
Click Create Analytic.
The Analytic wizard opens.
-
Scroll through the filmstrip to the Price Guidance option, then click Create.
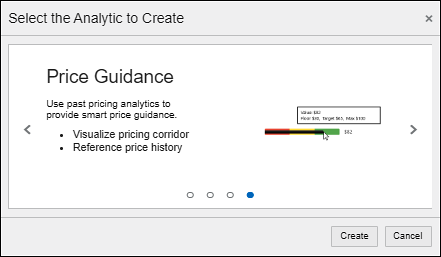
The Price Guidance wizard opens and guides administrators through the analytic creation process.
-
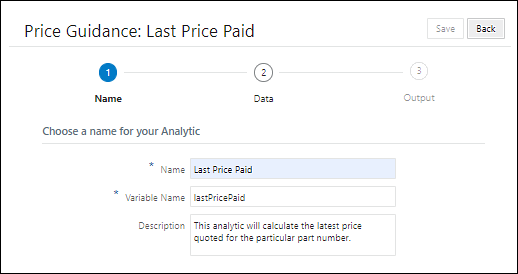
Define the following parameters:
- Name - The name for the analytic.
- Variable Name - The variable name for the analytic.
- Description (optional) - The description for the analytic.
-
Click on the Data icon to proceed to the next page.
-
Select the sub-document (e.g. Transaction Line) from the Commerce Document drop-down menu.
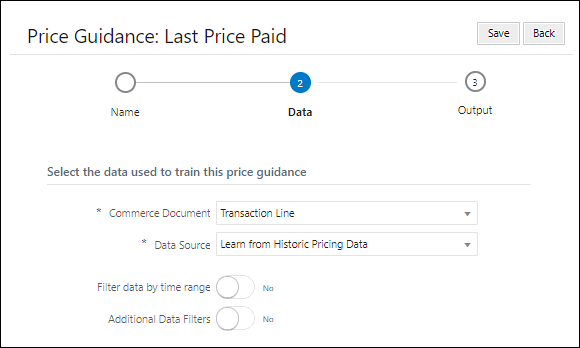
-
Select Learn from Historic Pricing Data from the Data Source drop-down menu.
-
Define time range filters.

- Set Filter data by time range to Yes.
- Select the Date Attribute from the drop-down menu.
- Select the date Range from the drop-down menu.
-
Define additional data filters.
- Set Additional Data Filters to Yes.
-
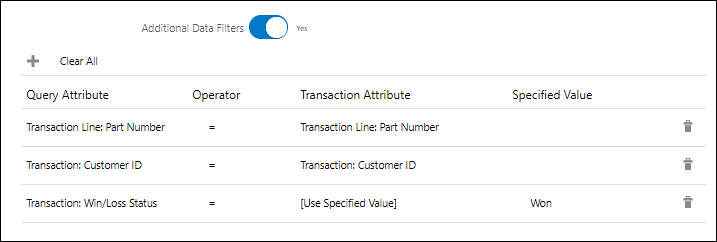
Click the "+" icon to add the following filters:
-
Specify the following criteria:
|
Transaction Win/Loss Status
|
=
|
[Use Specified Value]
|
Won
|
|
Transaction Line: Part Number
|
=
|
Transaction Line: Part Number
|
|
|
Transaction: Customer Id
|
=
|
Transaction: Customer Id
|
|
Note: Commerce attributes used as Query Attributes must be mapped to Data Columns. For instructions about mapping attributes, refer to the Data Columns topic.
-
Click on the Output icon to proceed to the next page.

-
Select one or more modify actions as Trigger Actions.
When a sales user invokes a trigger action on the Commerce UI, the price guidance calculation is executed and the calculation result is stored in the Output Attributes, which are also defined on this page.

Notes:
-
The price guidance calculation is executed after "Formula", but before "Advanced Modify - After Formula" BML.
-
When a Transaction action is selected for a Transaction Line price guidance Trigger Action, the trigger action will invoke the Transaction Line price guidance against all line items of the current quote. If a quote contains a large number of line items, performance must be validated before deploying to sales users.
-
Define the analytic output parameters.
-
Click the "+" icon to add an output attribute:

-
For the Output Attribute, select the appropriate sub-document Currency attribute (e.g. Transaction Line: Last Price) or create a new sub-document Currency attribute.
- Select Latest from the Aggregate Type drop-down menu.
- Select the appropriate attribute from the Source Column drop-down menu. (e.g. Transaction Line: Price (Net) ).
The Source Column drop-down attributes are line-level currency attributes that have been setup as a Data Column.
- Click Save.
Notes:
- The "Last Price Paid" Output Attribute must be added to the transaction layout to display the Last Price Paid metric to end users.
- The Commerce process must be deployed to make changes visible to the end user.
Define Line Last Price Paid for a Currency Attribute
This method is deprecated beginning is 20B, use the Price Guidance analytic to implement Last Price Paid.
Perform the following steps to define the Last Price Paid attribute.
-
Navigate the Attribute List page for the appropriate Commerce sub-document (e.g. Transaction Line).
Admin > Commerce and Documents > Process Definition > Documents > Attributes
-
Select the appropriate Currency attribute or create a new Currency attribute.
-
Select Last Price Paid from the Enable Deal Negotiation drop-down menu.
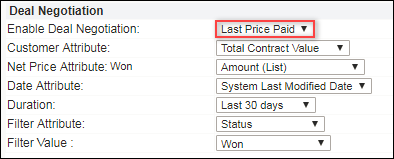
- Select the following options:
- Customer Attribute
- Net Price Attribute
Date Attribute
- Duration
- Filter Attribute: After the Filter Attribute is selected the Filter Value option will display.
- Filter Value: Administrators can use this filter to exclude test, lost, or "in progress" Transactions by filtering the results to consider only Transactions with a "WON" status.
- Click Apply to save the attribute settings.
Related Topics
See Also


