Approval Notifications
Overview
Approval Notifications help shorten the quote lifecycle by minimizing the lag between when an approval is requested and when an approver takes action. Emails notify users that an approval action has been triggered and allows approvers to approve or reject without logging into CPQ.
When an approval request is submitted, an email notification is sent to the designated approvers. There are three different types of email notifications: Default Approval Notifications, Custom Approval Notifications, and Advanced Notifications.
When the quote is approved, a notification is sent to the submitter. If a quote is rejected, a notification is sent to the submitter and pending approvers. Additionally if an approval request is canceled or revised, the pending approvers are automatically sent notifications.
Oracle CPQ can generate the following email notifications:
 Default Approval Notification
Oracle CPQ provides default approval notifications which administrators can use with approval processes. These default approval notifications can save administrators time in not having to create custom email notification templates.
The Default Notification is sent to each approver with details about the transaction and submitter. Approvers can respond to these emails to approve or reject. When HTML emails are enabled, the notification also include Approve or Reject links. Refer to Email Approval Response.
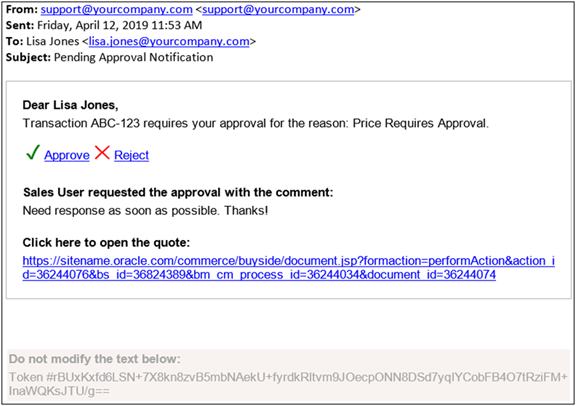
Sample HTML Default Approval Email Notification
The Default Notification email is presented to recipients in their preferred languages. However, the token and action are not translatable objects.
Custom Approval Notification
Oracle CPQ provides custom approval notifications which administrators can use with approval processes. These custom approval notifications allow administrators to create company-branded email notifications that are designed to meet your company's business requirements including any custom quote information your approvers may require.
The Custom Notification is sent to each approver based on the email template that is selected. Approvers can respond to these emails to approve or reject. Refer to Email Approval Response.
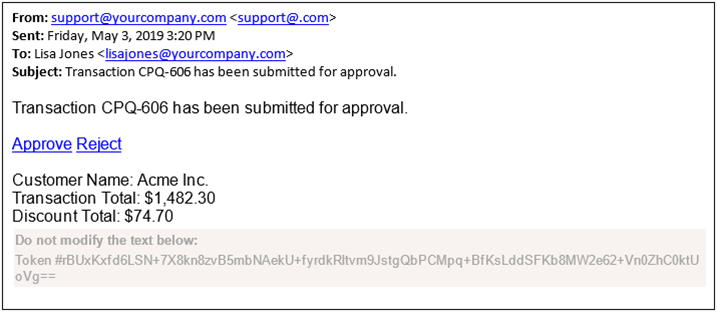
Sample HTML Custom Approval Email Notification
Advanced Approval Notification
Oracle CPQ allows advanced approval notifications which administrators can use with approval processes. These advanced approval notifications allow administrators to create company-branded email notifications that are designed to meet your company's business requirements including any custom quote information your approvers may require.
The Advanced Notification is sent to each approver based on the output of a BML function that is defined. Approvers can respond to these emails to approve or reject. Refer to Email Approval Response.
Email Approval Response
When an approver receives a email notification that they have a pending approval request, they can approve or reject the request via email without having to log in to Oracle CPQ directly. Oracle CPQ supports two methods for responding to email notifications: replying to the message with a keyword or clicking a mailto link.
If your email notification includes mailto links for your Approve and Reject actions, the mailto links automatically generate your email response. This includes the Approve or Reject labels and their associated action variable name, moves the token to the message body, and provides space for approver comments.
Oracle CPQ 20C and later supports HTML-formatted email approval replies to include unlimited comment lines with a maximum of 4000 characters. Numbers, multi-byte characters, special characters, and extra spaces display properly in the comment lines. Prior to Oracle CPQ 20C, only the first line of an email approval comment was copied in the email approval reply.
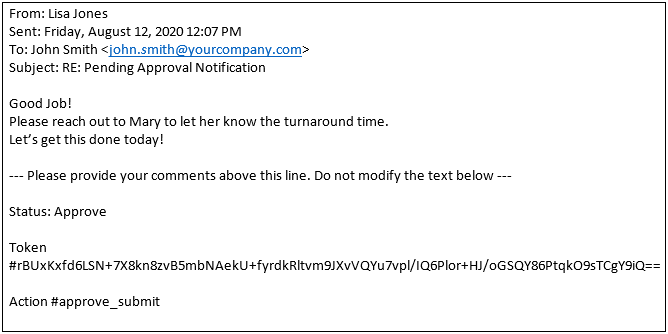
Sample Mailto Email Approval Response
An email response generated by a mailto link is presented to recipients in their preferred languages. However, the token and action are not translatable objects.
The submit history attribute displays all comment lines in one line.
Administration
Setting Email Notification Preference Watch Video 
Administrators decide whether they receive notification emails. To set your email notification preference, complete the following steps:
- Navigate to My Profile > Preferences.
- Locate Notification Preferences.
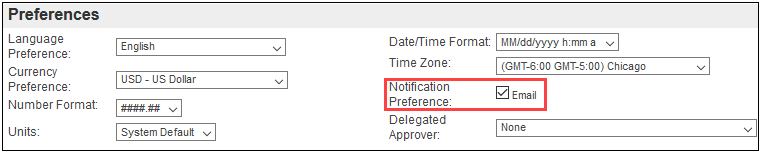
- Select the Email checkbox to receive email notifications. Unselect the Email checkbox to avoid receiving email notifications.
Enabling HTML Approval Notifications Watch Video
In Oracle CPQ 19B when HTML Approval Email is enabled, the default email notifications are generated in an HTML format which includes improved layout, format, and style. The default email notifications also include Approve and Reject mailto links. For all notification types, the system-generated token is relocated from the email subject line to the end of the message body. Refer to Email Approval Response.
To enable HTML approval email notifications, complete the following steps:
- Navigate to the Commerce Options page.
Admin Home > Commerce and Documents > Commerce Settings

- Select Yes to set the Enable HTML Approval Email option.
- Click Update.
Once the HTML Approval Email is enabled, all new approval email notifications will be sent using the new HTML format. All in-progress approvals that were sent using the old format can be approved or rejected using the legacy response format.
Adding Default Approval Notification Watch Video
If you have not defined your approval process and want to create a process that uses the default notification, complete the following steps:
- Navigate to the Processes page.
Admin Home > Commerce and Documents > Process Definitions
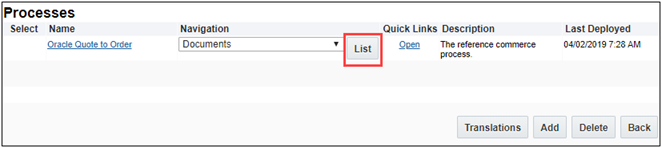
- For a process, select Documents from the Navigation drop-down and then click List. The Documents List page displays.

- For a Document, select Actions from the Navigation drop-down and then click List. The Action List page displays.
- Click on the Submit action link. The Admin Action page displays.
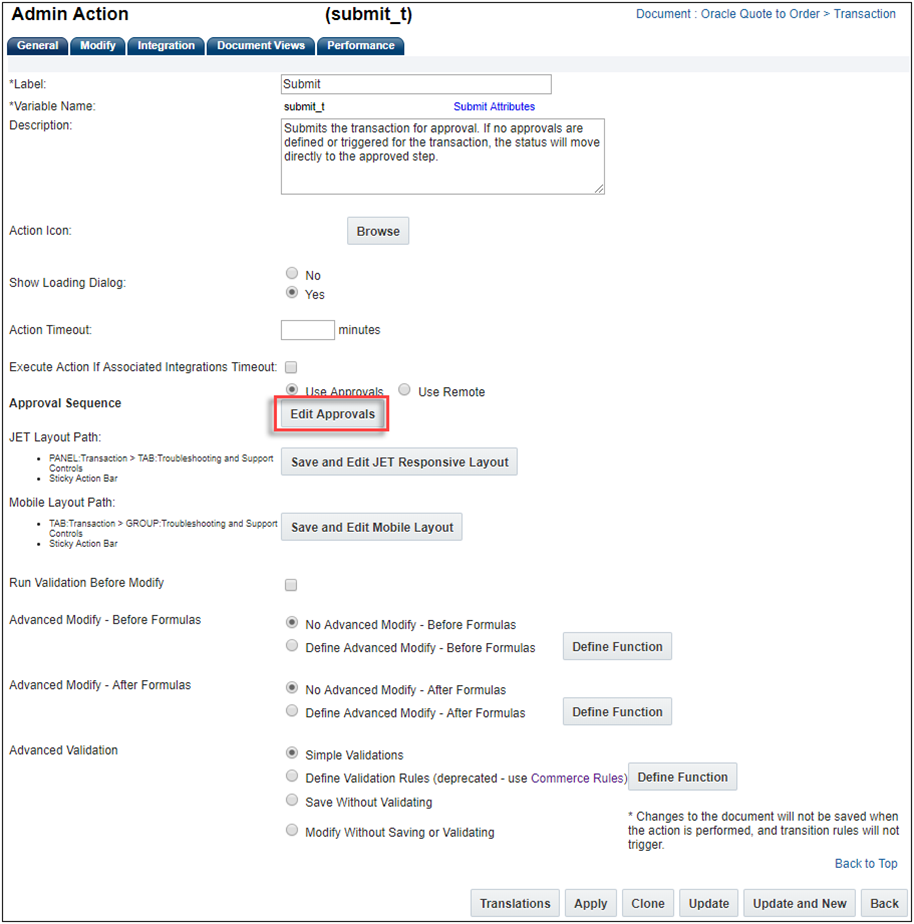
- Click Edit Approvals under Approval Sequence. The Process Definition: Approval Sequence Reasons page displays.
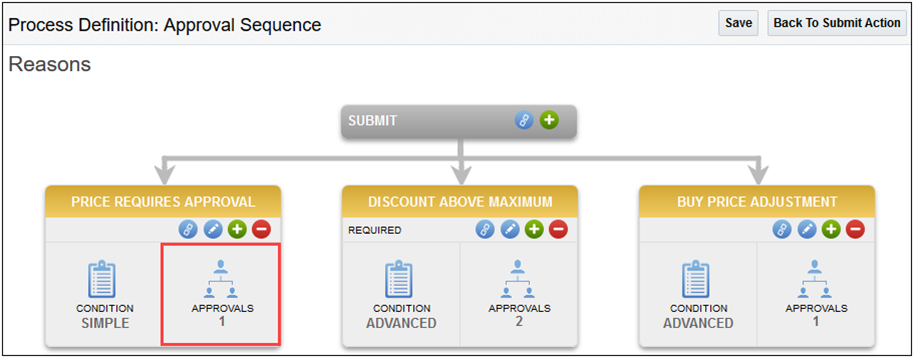
- For each approval reason, click into Approvals box.
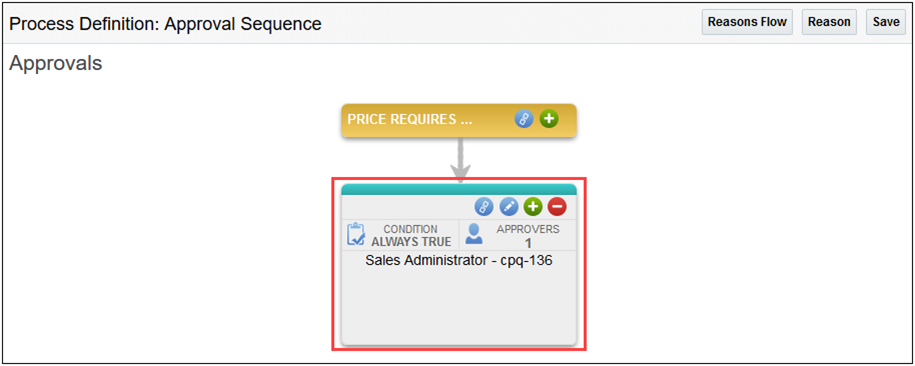
- Click into the Approvals box. The Approval Details screen displays.
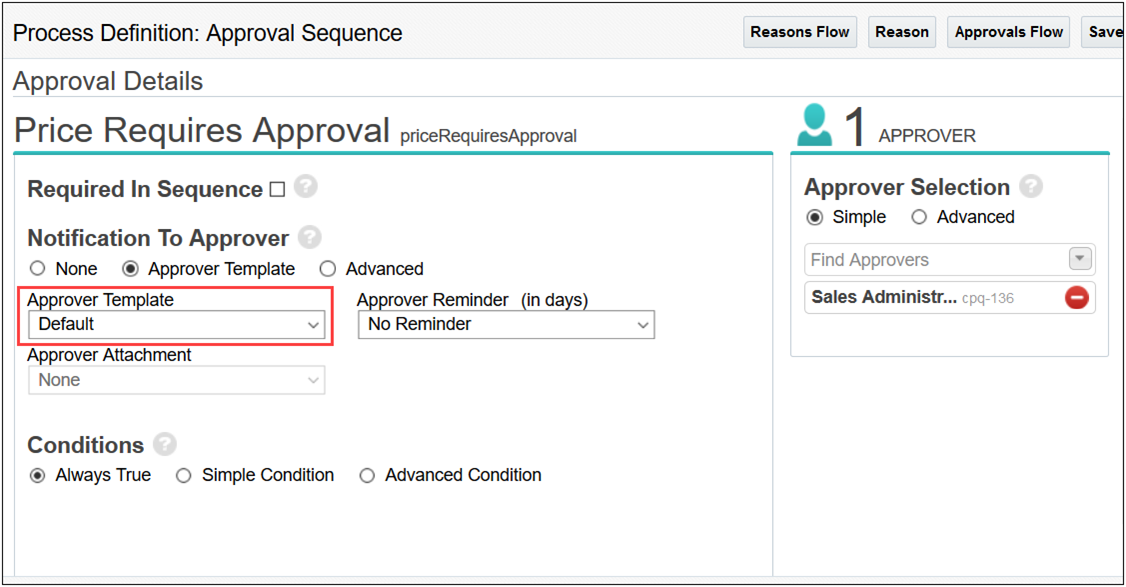
- Select Approver Template under Notification To Approver.
- Select Default in the Approver Template drop-down.
- Click Save.
Adding Custom Approval Notification Watch Video
If you have not defined your approval process and want to create a process that uses a custom notification, complete the following steps:
- Navigate to the Processes page.
Admin Home > Commerce and Documents > Process Definitions
- For a process, select Documents from the Navigation drop-down and then click List. The Documents List page displays.
- For a Document, select Actions from the Navigation drop-down and then click List. The Action List page displays.
- Click on the Submit action link. The Admin Action page displays.
- Click Edit Approvals under Approval Sequence. The Process Definition: Approval Sequence Reasons page displays.
- For each approval reason, click into Approvals box.
- Click into the Approvals box. The Approval Details screen displays.
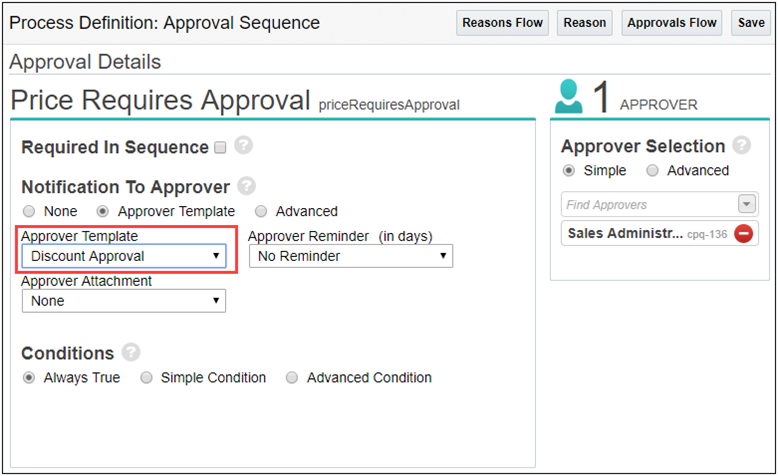
- Select Approver Template under Notification To Approver.
- Select your Custom Email Template in the Approver Template drop-down.
- Click Save.
Adding Dynamic Approve and Reject Mailto Links Watch Video
To add the dynamic Approve and Reject mailto links to your existing Email Template, complete the following steps:
- Navigate to the Email Designer Templates page.
Admin Home > Commerce and Documents > Email Designer
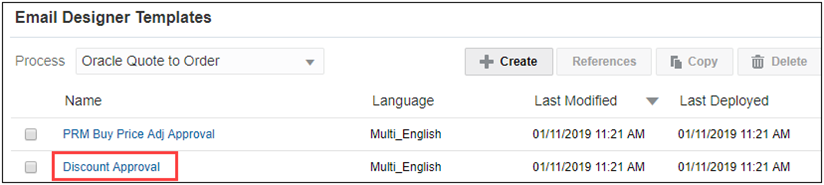
- Select the Template you want to add the Accept and Reject mailto links to. The Email Designer: Template page displays.
If you need to create a new Text Element section, complete steps 3 - 4.
If you have an existing Text Element, skip to step 5.
- Click Elements in the Properties panel to expand the Elements pane.
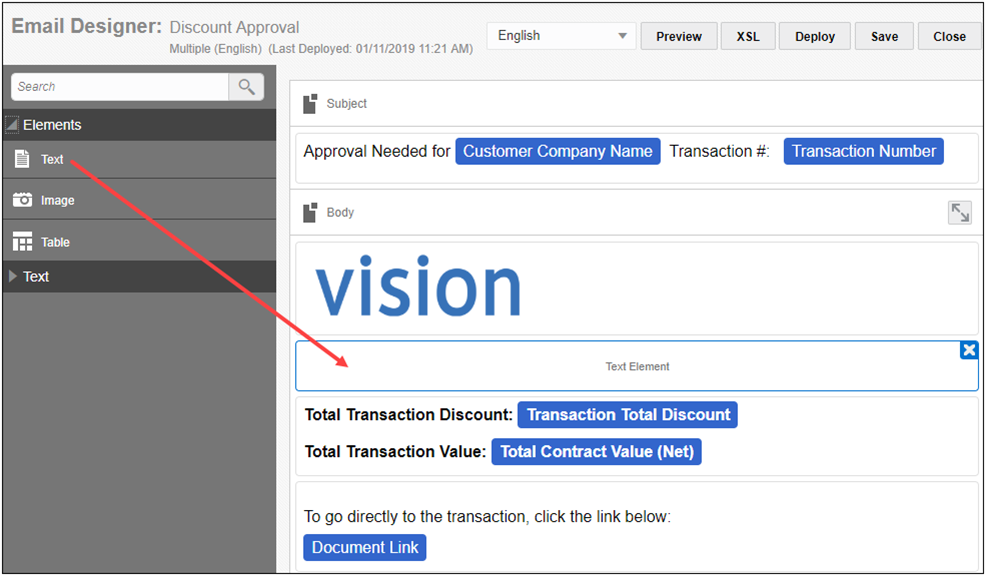
- Click and drag the Element you wish to add to the template into the Body in the Template Flow.
- Double-click on the Element to open the Text Element page.
- Enter any content you wish to include and select the Approve Link and Reject Link attributes from the Attribute drop-down.
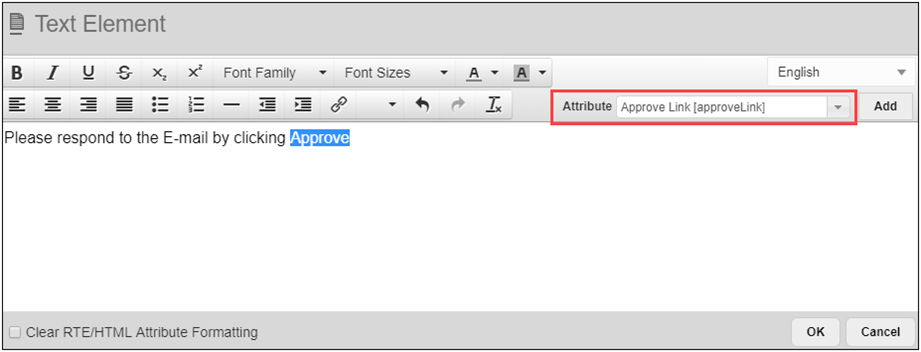
- Click Add to add the link to the text element.
- Click Ok to save the Text Element and return to the Email Designer page.
- Click Preview if you wish to see the change to the template.
- Click Save.
Adding Advanced Approval Email Notification Watch Video
To add an Advanced Notification Template, complete the following steps:
- Navigate to the Processes page.
Admin Home > Commerce and Documents > Process Definitions
- For a process, select Documents from the Navigation drop-down and then click List. The Documents List page displays.
- For a Document, select Actions from the Navigation drop-down and then click List. The Action List page displays.
- Click on the Submit action link. The Admin Action page displays.
- Click Edit Approvals under Approval Sequence. The Process Definition: Approval Sequence Reasons page displays.
- For each approval reason, click into Approvals box.
- Click into the Approvals box. The Approval Details screen displays.
- Click Edit Approvals under Approval Sequence. The Process Definition: Approval Sequence page displays.
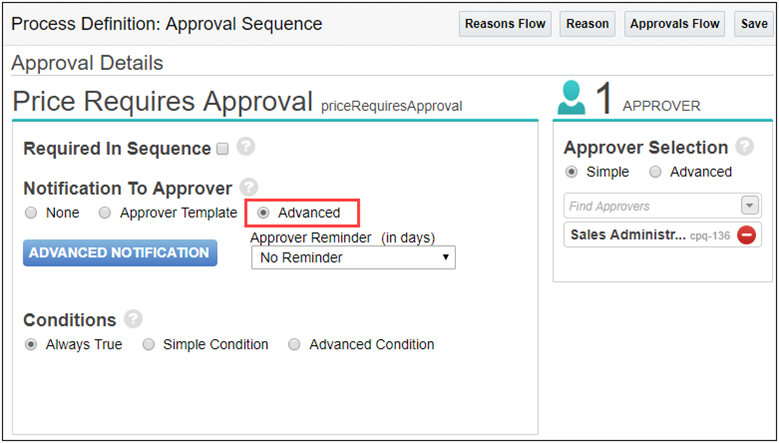
- Select Advanced under Notification To Approver. If associated BML has not been defined for the Advanced Notification, complete all steps in Add Rule Input Variables for Mailto Links.
- Click Save.
Adding Rule Input Variables for Mailto Links Watch Video
To add the rule input variables for the mailto links to your Advanced Notifications, complete the following steps:
- Navigate to the Process Definition: Approval Details page. Complete all steps in Add an Advanced Notification Template.
- Click Advanced Notification. The Select Attribute page displays.
-
Go to the appropriate Variable Name tab. For our example you would need to go to the Variable Name for (Transaction) tab.
-
Select the _transaction_next_approver, bs_id, _transaction_approve_link, and _transaction_reject_link.
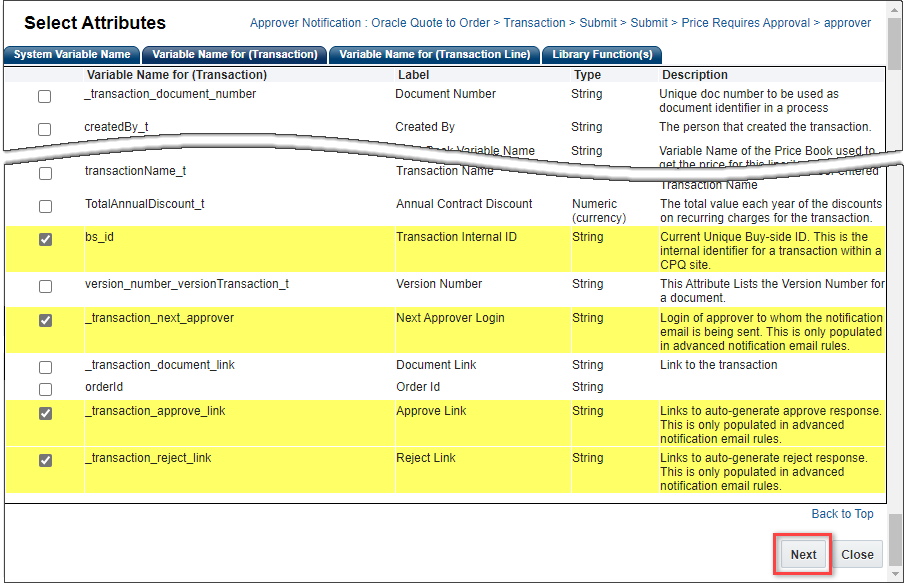
- Click Next. The BML Editor page displays.
- Create the HTML for the email notifications using the BML editor. The BML function must return a string. The following sample HTML body text provided for reference.
str = "";
str = str + "<html><body><table>";
str = str + "<tr></td>Hi " + _transaction_next_approver + ",</br></td> </tr>";
str = str + "<tr></td>Could you please approve the transaction " + bs_id +"</br></td> </tr>";
str = str + "<tr></td>You could use the below links to auto-generate the response</br> </td></tr>";
str = str + "<tr></td>" + _transaction_approve_link + "|"+ _transaction_reject_link + "</br></td></tr>";
str = str + " </table></body></html>";
return str;
Sample Advanced Notification BML
- Place the cursor in the BML editor where you want the Approve Link to be inserted.
- Click on the _transaction_approve_link to add it to the BML function.
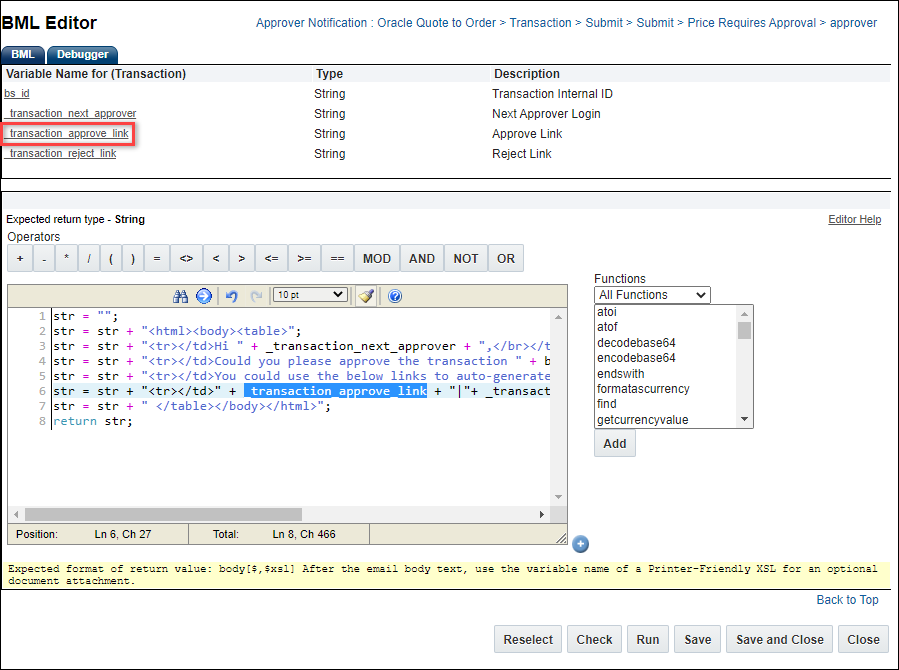
- Place the cursor in the BML editor where you want the Reject Link to be inserted.
- Click on the t_ransaction_reject_link to add it to the BML function.
- Click Save.
Selecting an Email Template for the Approve, Reject, and Cancel Approval Sub-Action Notification Emails Watch Video
An Email Template drop-down is available on the General tab of the Revise, Reject, and Approve sub-action’s admin page to allow admins to associate an Email Designer template with the sub-action.
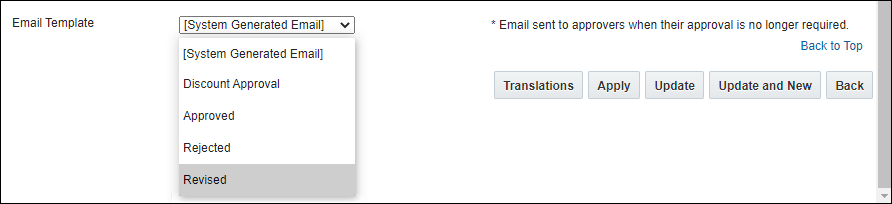
[System Generated Email] will always be the first option in the Email Template menu. If [System Generated Email] is selected, Oracle CPQ will continue to send the default, system generated email to the appropriate recipient whenever the sub-action is invoked.
Deployed Email Designer templates in the Commerce Process will appear below [System Generated Email] in the Email Template drop-down. If an Email Designer template is selected, Oracle CPQ will use the template to build the email that is sent to the appropriate recipient whenever the sub-action is invoked.
Setting up Mobile Approvals
To enable Mobile Approval, please log a Service Request on
My Oracle Support. The Email Notification keyword and Email Template fields for an action only appear when the feature is enabled.
- Navigate to a Modify action, such as Approve.
-
Define the Email Notification keyword for the action.
Keywords are case-sensitive.
- Multiple keywords can be associated with an action. All possible values can be separated with a tilde in the Email Notification Keyword field on the Action Editor.
- A keyword has to be unique.
- A keyword can have alphabets, numbers and underscore.
- A keyword cannot have multi-byte characters
- A keyword can be associated with only one action within a process
- Specify a text area or history type attribute in the Approval Comment Mapping field in the Action Editor.
- The comment specified by a user in the email will be mapped to the specified attribute.
- On a Transition Rule, set up the Mobile Devices Notification. Select the option Allow response to Trigger an Action.
- When this option is selected, Oracle CPQ will automatically generate the unique key of the outgoing email.
Notes
When approving a quote by replying to an approval email, the reply must be sent from the same email address to which the approval email was initially sent. If an approval email is forwarded to a different email, replying from that email address will not trigger the approval.
The user specified comment can contain multi-byte characters.
If a user is having difficulty opening approval notifications in Microsoft Outlook, they should verify their Default Program or Default App setting for the MAILTO file type is set to open in Microsoft Outlook.
Oracle CPQ validates that the user email is registered with the system before sending the unique key. Therefore, only a user with a valid Oracle CPQ account can receive the unique key and can perform the Modify action via email. Inactivated users will not be sent a key.
The user responding to the email is used for permissions on actions and any CRM integrations.
Related Topics
See Also


