Overview
Layouts make up the structure of a Document Designer template. All Layouts must be added directly to the Template Flow. There are three Layout types that can be added to a template:
Administration
Sections can hold all Element types and are used to hold and organize the main content of a Document Designer template.
While it would be possible to put all of a document’s content into one Section, breaking out parts of the document into multiple Sections promotes organization and simpler administration, as well as giving admins additional options that can be defined per Section.
When a Section Layout is selected in the Template Flow, the following properties can be modified in the Properties pane:
| Property | Description |
|---|---|
|
Name |
The name of the Section that will appear in the Template Flow. |
|
Description |
An optional description of the Section for reference (this description is not visible anywhere else in the system). |
|
Orientation |
Determines the orientation of all pages within the Section. If Portrait is selected, all pages will be oriented vertically. If Landscape is selected, all pages will be oriented horizontally. |
|
Columns |
The number of columns that will be used to organize content within the Section. |
|
Date Format |
The format that determines how all date attributes in the Section appear in the output. |
|
Currency Format |
The format that determines how all currency attributes in the Section appear in the output. |
|
Margins |
The space between Elements (when defined for Top and Bottom) and the space between Elements and the edge of the page (when defined for Left or Right), throughout the Section. |
|
Background Image |
A background image that will be applied to all pages within the Section. For more information on Background Images, see the topic Document Designer and Background Images. |
|
Alternate Background Image |
An alternate background image that will be applied to all pages within the template when the Background Image Condition button is set to False. For more information on Background Images, see the topic Document Designer and Background Images. |
|
Read Only |
Select the Read Only check box in the Section Properties panel of Document Designer to prevent users from editing protected sections of a .DOCX output file |
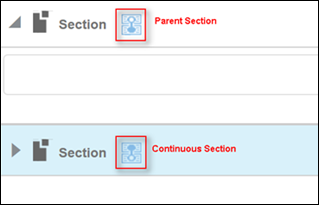
Use a Continuous Section to split a single Document Designer section into two or more continuous sections without a page break between each section. A continuous section functions as a child of the parent section and inherits the margins, page orientation, and background image of the parent section. When dragged, a continuous section moves with its parent section. Parent and continuous sections are identified by icons that display in the section’s header.
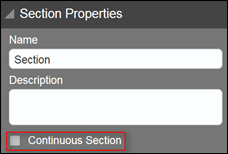
A Continuous Section property is available in the Section Properties panel. The Section Properties panel is accessed by clicking a specific section of a Document Designer template. Selecting the Continuous Section checkbox makes the selected section a child of the preceding section.
Tips and Consideration for Continuous Sections
Consider the following tips when using the new Continuous Section feature:
- The Continuous checkbox is disabled for the section at the beginning of a layout and the sections after the Header, Footer, and Table of Contents elements.
-
Administrators can apply conditions and loops to both sections and continuous sections. When the Apply to Continuous Sections checkbox is selected from the Loop dialog or the Conditional dialog for the parent section, the loop or condition applies to all of the continuous sections.

-
Administrators can control if looped section elements include page breaks between each loop iteration. The setting affects both simple and advanced loops. When this setting is enabled, page breaks will occur for each loop iteration (same behavior as Oracle CPQ 22A and earlier). Upon Oracle CPQ 22B upgrade, the Page break each loop iteration is enabled for existing section-level loops. All new section-level loops, defined after the Oracle CPQ 22B upgrade, default to the Page break each loop iteration as disabled. This setting allows administrators more flexibility in the pagination of documents. For example, if a document designer template is set up with continuous sections with loops, each transaction line was on a separate page within the document. The user can enable or disable the page break on each loop iteration as they desire within the document. If enabled, the page breaks remain between each transaction line. If disabled, the transaction lines are presented continuously.

- Page-related properties are disabled when working with continuous sections. Only non-page-related properties are editable in continuous sections.
- When a section and a continuous section are both selected, the Section Properties panel does not display any properties.
- Administrators cannot delete a section with continuous sections unless the Continuous Section checkbox is unchecked for the sections.
The Table of Contents Layout is typically one of the first Layouts in the Template Flow. Each line in the Table of Contents is determined by the template’s Heading Styles and the Heading Elements throughout the template.
In a PDF or DOCX output, the reader can click each line in the Table of Contents to be taken to where the Header is in the document. For an RTF output, depending on what program the file is opened in, the Table of Contents may or may not function in this manner.
The Table of Contents will only reference Heading Elements whose Heading Styles are in the selected Heading Style Set and have Add to Table of Contents? set to Yes.
For more information on Heading Style Sets and Heading Styles, see the topic Heading Styles and Style Sets in Document Designer. For more information on Heading Elements, see the topic Document Designer Elements.
There are two parts to the Table of Contents Layout: the Title, which is a Text element, and the Content.
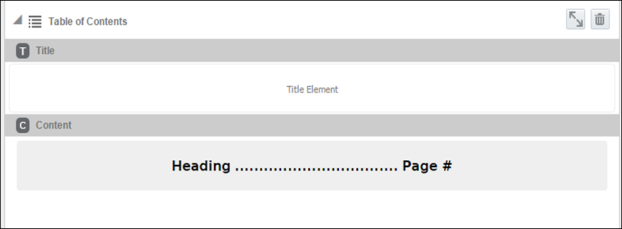
The Title Text Element can be modified like any other Text Element. For more information on modifying Text Elements, see the topic Document Designer Elements.
The content of the Table of Contents is automatically generated, but the format of the content is set in the Table of Contents properties pane, which is revealed in the Properties panel when the Table of Contents is selected.
When a Table of Contents Layout is selected in the Template Flow, the following properties can be modified in the Properties pane:
| Property | Description |
|---|---|
|
Heading Style Set |
The Heading Style Set whose Heading Elements will be used to populate the Table of Contents. |
|
Content Style |
Are-set formatting options that will affect the style of all lines in the Table of Contents. |
|
Contents Font |
The font of all lines in the Table of Contents. |
|
Contents Size |
The font size of all lines in the Table of Contents. |
|
Contents Options |
Formatting options that affect all lines in the Table of Contents. Options include Font Color, Bold, Italics, and Clear Formatting. |
|
Margins |
The space between the Table of Contents as a single element (when defined for Top and Bottom) and the margins of the page (when defined for Left or Right). |
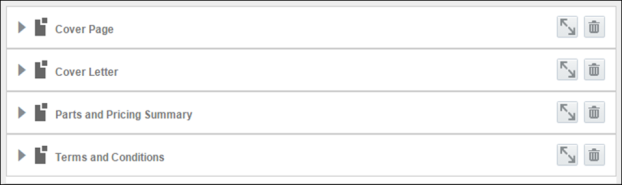
The Header & Footer Layout applies a header and or footer to all Layouts below it in the Template Flow. Text, Image, Table, Spacer, and XSL Snippet Elements can be added to a Header & Footer Layout to create the header and/or footer content.
All Layouts that do not have a Header & Footer Element above them in the Template Flow will not have a header or footer applied to them. A Header & Footer will apply to all Layouts below it in the Template Flow until another Header & Footer Element is defined.
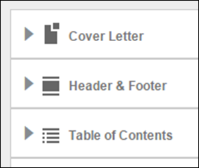
In this Template Flow, the Header & Footer will appear in
the Table of Contents, but not in the Cover Letter.
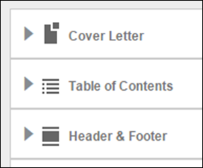
In this Template Flow, the Header & Footer will not appear in
the Table of Contents or the Cover Letter.
If there are Layouts that should not have Header and Footer content, the admin should create one or more empty Header & Footer Layouts to apply to these Layouts.
When a Header & Footer Layout is selected in the Template Flow, the following properties can be modified in the Properties pane:
| Property | Description |
|---|---|
|
Name |
The name of the Header & Footer that will appear in the Template Flow. |
|
Header Height |
The height of the Header. The vertical space of the body content of all pages affected by the Header & Footer will inversely be affected by changes to the Header Height. |
|
Footer Height |
The height of the Footer. The vertical space of the body content of all pages affected by the Header & Footer will inversely be affected by changes to the Footer Height. |
|
Margins |
The space between Elements (when defined for Top and Bottom) and the space between Elements and the margins of the page (when defined for Left or Right), throughout the Header & Footer. |
Header and Footer Margins
Separate header and footer margin fields are now available and can be applied to sub-sections individually. The top and bottom margins of a section are applied after the Header and Footer margins are applied.
To access the Margin fields, click on a header or footer to open the Properties panel for the header and footer.


