Attribute Help Icons
Overview
In order to better inform sales reps about the product they are configuring, each Configuration attribute on the layout can have its own “Help” icon. Upon hovering the cursor over a Help icon, HTML defined by the admin will display to the sales user.
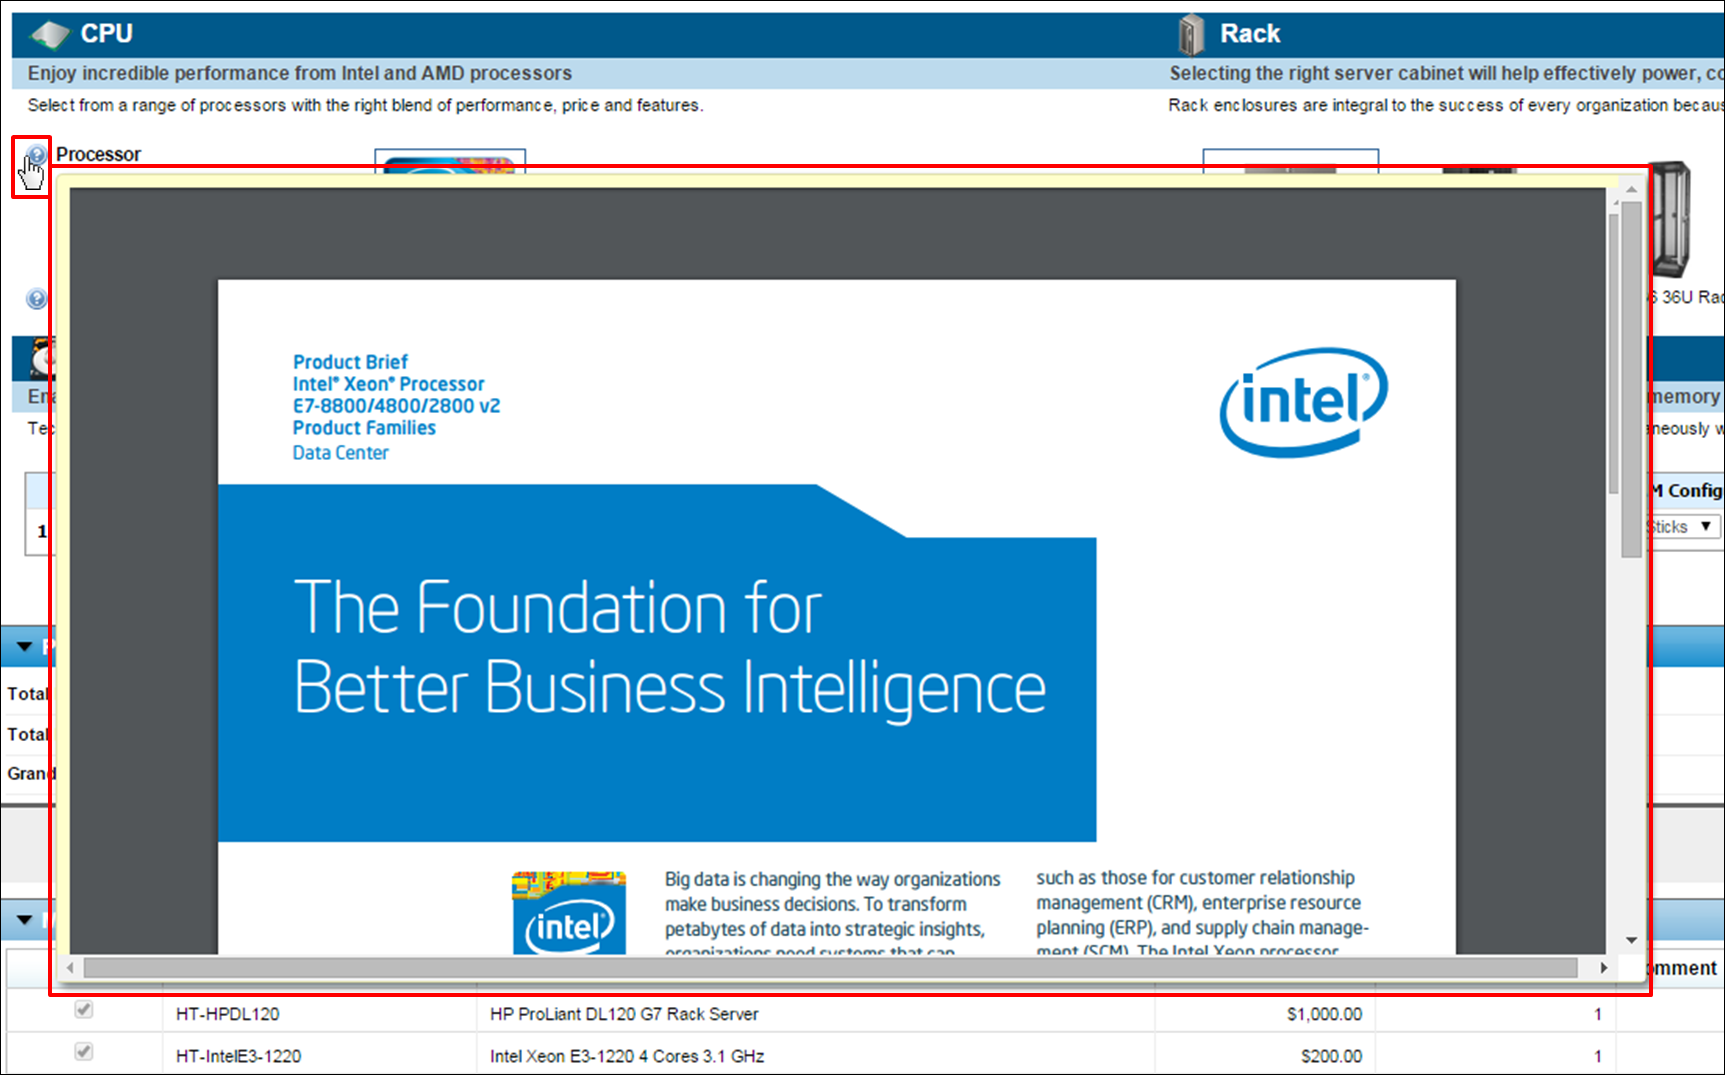
Help icons can be used to display PDFs, images, videos, simple text or anything that can be shown using HTML in order to empower the sales rep through better guided selling.
The admin can choose whether or not a Help icon is shown on the user side for each attribute that is on the Layout. If the Help icon will be shown on the user side, the admin can specify if the Help icon should be to the left of the attribute’s label, or to the right of the attribute’s value.
The JET layout does not support the "Right of Value" option for attribute help icons. If the "Right of Value" option is selected, the help icon will appear to the left of the attribute for JET Configuration layouts.

Help Icon Left of the Attribute Label

Help Icon Right of the Attribute Value
Additionally, the admin can manipulate the site’s CSS in order to change the size of the content box that is shown to users when hovering over the Help icon.
If an attribute’s Help icon is enabled, but the attribute does not have an HTML Description defined, the Help icon will show on the user side, but nothing will show when the user hovers over the icon. It is a best practice to turn off the Help icon for all attributes that do not have a Description defined.

User Side Behavior when Help Icon is Enabled but no Description Defined
Administration
 Adding Configuration Attribute Help Content
Configuration attribute Help content is managed within each individual attribute. To add Help content to an attribute:
- Open the Configuration attribute you want to add Help content to. See the topic Configuration Attributes Overview for more information on navigating to a Configuration attribute.
-
On the General tab, click Edit HTML next to the Description field.

The Content HTML Editor window opens. The Content HTML Editor is a WYSIWYG HTML editor. Clicking Edit HTML Source in the Content HTML Editor opens the source HTML behind what is shown in the WYSIWYG editor, allowing the admin to do work within HTML.
- Add Help content to the Content HTML Editor window. The content shown in the editor will appear when a sales user hovers over the Help icon
- Click Save to save the attribute description.
- Click Update to save the changes to the attribute.
 Enabling the Help Icon on the Configuration Flow Layout
In order for a Help icon to appear on the user side, it must be enabled on the Configuration Flow Layout Editor. To enable an attribute’s Help icon:
- Open the Configuration Flow Layout that the attribute with the Help content is on. See the topic Configuration Flows for the navigation steps to open the Configuration Flow Layout Editor.
-
Locate the attribute in the Layout editor and click the Properties icon (a gear icon) on the attribute.
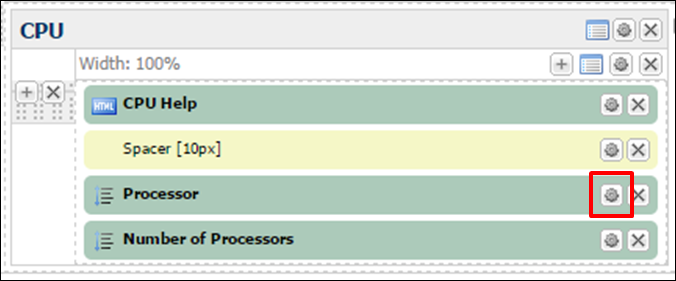
The Attribute Properties dialog box appears.
-
Select the Help Icon checkbox to enable the Help icon on the user side.

An Alignment drop-down appears below the Help Icon checkbox.
-
Optionally change where the Help icon will appear in relation to the attribute label/value on the user side by selecting either Left of the Label or Right of the Value from the Alignment drop-down.
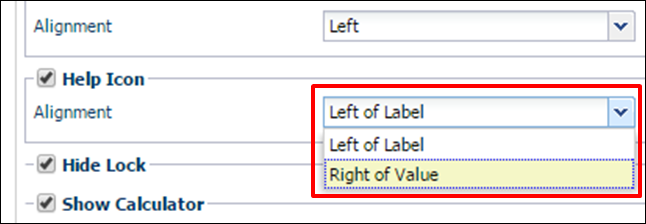
The JET layout does not support the "Right of Value" option for attribute help icons. If the "Right of Value" option is selected, the help icon will appear to the left of the attribute for JET Configuration layouts.
- Click Ok to save the attribute properties.
- Click Save to save the Layout.
 Modifying the Help Pop-Up Box via CSS
The length and width of a Help icon’s pop-up box is set within the site’s CSS. To change the size of the Help pop-up, use your browser’s Web Developer Tool to investigate the CSS that is acting on the Help pop-up. In Chrome you can find this in the menu under “More Tools > Developer Tool”. In Firefox this is in the menu under “Web Developer > Inspector”.
In order to modify the CSS that determines the size of the Help pop-up, you must find out which CSS class responsible for the size, and which stylesheet it is defined within. To find the CSS class and stylesheet:
- Open the Oracle CPQ Configurator that contains the Help pop-up.
- Open the Inspector from your browser’s Web Developer tool.
-
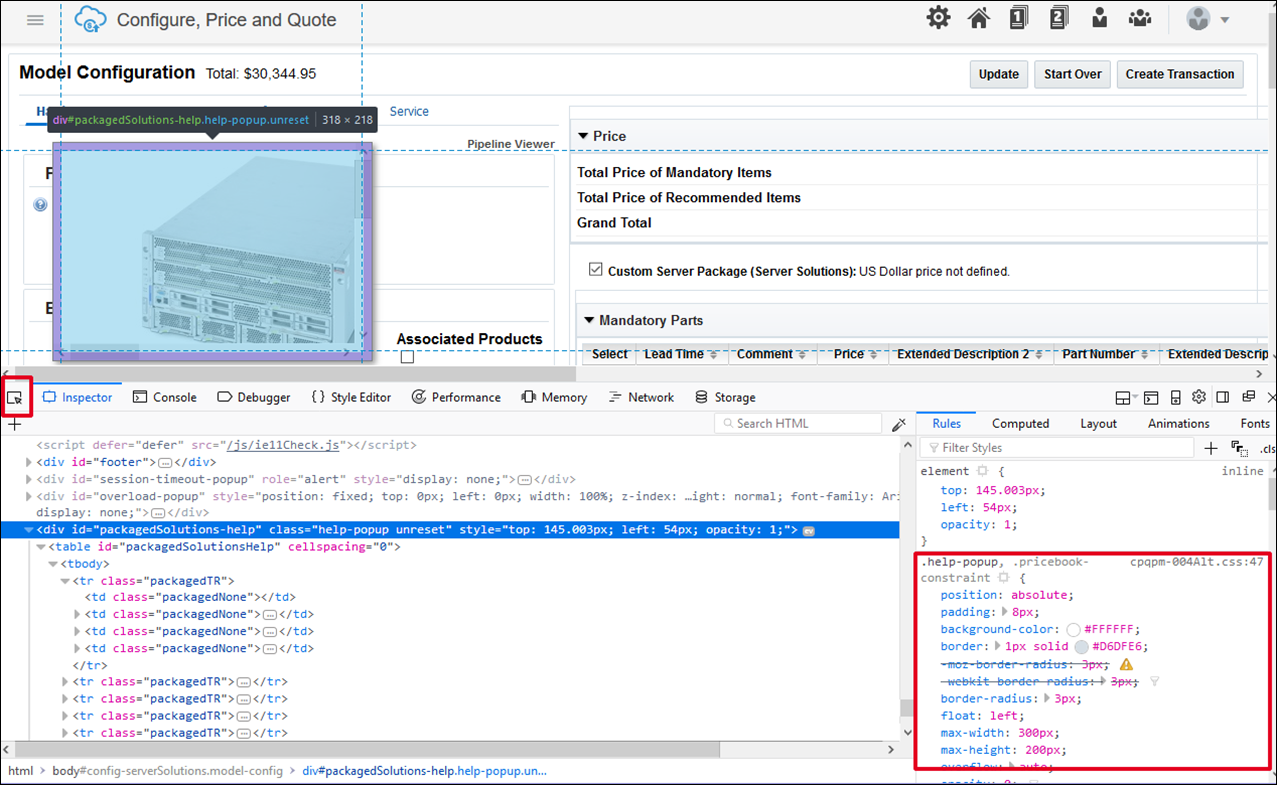
Use the inspector tool to inspect the Help icon.
-
Hover over the Help icon to reveal the pop-up, then hover over the edge of the pop-up so that it is outlined in blue.
In the Inspector tab of the Developer console, the <div id> tag that applies to the Help pop-up is highlighted in blue. Note the name of the class within the <div id> tag. The class is the CSS class that gives the Help pop-up its height and width. If styling has been defined for the CSS style, the CSS class (in this example help-popup) is shown in the Rules tab of the left-most panel in the developer console, along with what stylesheet it is being pulled from, what line of the stylesheet it is on, and any styling that has been set within the class (in the example max-height and max-width). Make note of this class name and the stylesheet it is within.
If the CSS class that defines the Help pop-up styling was not shown in the Rules tab of the Developer console, and therefore is not applying any styling, you will need to add the class and max-height and max-width values to the Configuration Flow’s alternate stylesheet.
If the CSS class that defines the Help pop-up styling was shown in the Rules tab of the Developer console, you will need to modify the stylesheet that the CSS class is within (the stylesheet name was within the Rules tab of the Developer console).
To download and modify an Oracle CPQ CSS file:
- Locate the CSS file within CPQ. For more information on where Configuration Stylesheets are defined within the system, see the topic Stylesheet Precedence.
- Right-click the Download or Download Stylesheet link (varies depending on where the stylesheet is defined) for the stylesheet and then click Save Link As… (menu option name may vary depending on which browser you are using) in the right-click menu to download the CSS file.
- Choose a location to save the file and then click Save.
- Locate the file you just downloaded and open it within a text editor.
-
If the class did not have any styling defined for it:
Add the CSS class and values for the Help pop-up’s height and width to the bottom of the stylesheet.

If the class was already defined in the stylesheet:
Locate the class name in the stylesheet and modify its max-height and max-width values, or add them if values were not previously defined.
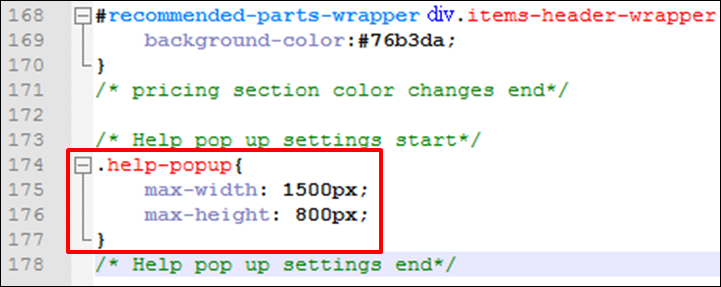
- Save the CSS file in the text editor.
- Return to the browser window where the CSS file is defined, or navigate back to the location.
- If the stylesheet is defined within the site-wide Stylesheet Manager :
- Click Browse… for the stylesheet.
- Select the CSS file you modified.
- Click Open.
- Click Accept in the Stylesheet Manager to save the changes.
If the stylesheet is defined within the Configuration Regular Stylesheets List:
- Click the stylesheet name. The Configuration Stylesheet Editor window appears.
- Click Browse….
- Select the CSS file you modified.
- Click Open.
- Click Update in the Configuration Stylesheet Editor window to apply the updated stylesheet.
Related Topics
 See Also


![]() Adding Configuration Attribute Help Content
Adding Configuration Attribute Help Content
![]() Enabling the Help Icon on the Configuration Flow Layout
Enabling the Help Icon on the Configuration Flow Layout
![]() Modifying the Help Pop-Up Box via CSS
Modifying the Help Pop-Up Box via CSS


