Overview
This topic describes how to customize the Redwood Quote Line Item Grid.
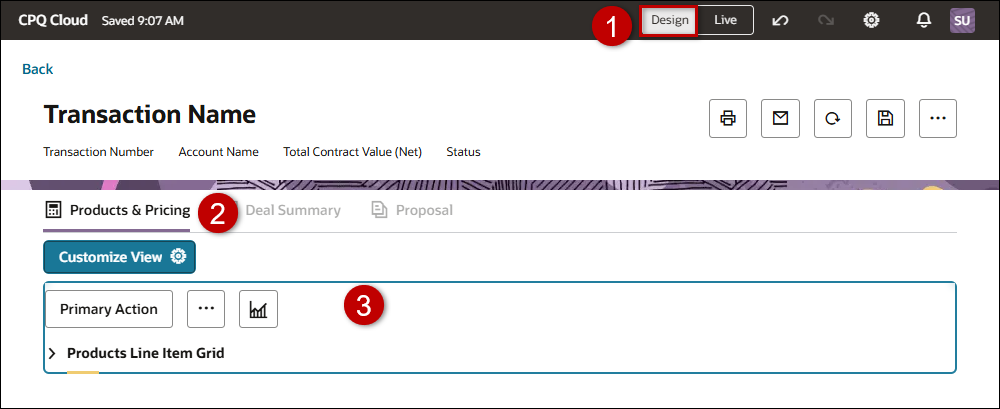
Administration
Customize View
-
Open or create a Redwood quote, then click Design.
-
Click the applicable view (Products & Pricing is the default view for the Line Item Grid).
-
Click inside the view area.
-
Click the Customize View

Refer to Redwood Quote Views > Customize View for more information.
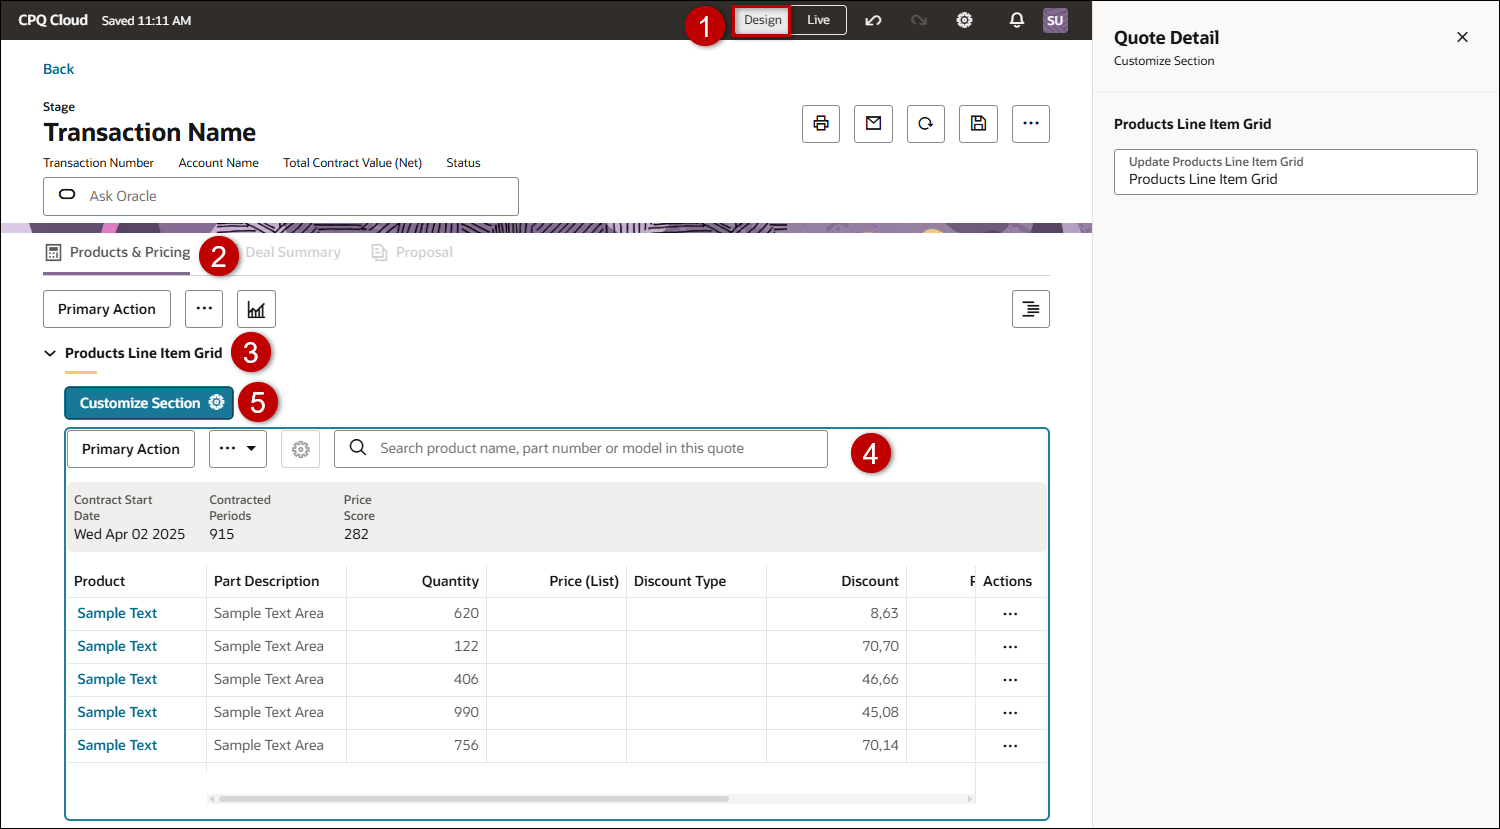
Customize Section
![]() Customize Line Item Grid Section
Customize Line Item Grid Section
-
Open or create a Redwood quote, then click Design.
-
Click the applicable view. (Products & Pricing is the default view for the Line Item Grid).
-
Click the applicable section. (Products Line Item Grid is the default section for the Line Item Grid).
-
Click the Customize Section
-
Click in the Update <Section Name> to customize the section name.
Line Item Grid Section Styles
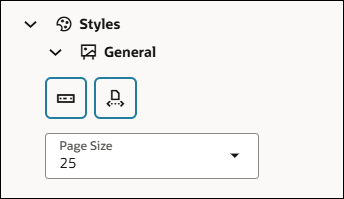
Show / Hide Overview Bar
-
Click Styles
-
Click General
-
Click the Show/Hide Overview Bar icon
 to display or hide the Line Item Grid Overview bar.
Paginate
-
Click Styles
-
Click General
-
Click the Pagination icon
 to enable or disable Line Item Grid pagination.
 -
If enabled, select the pagination Page Size.
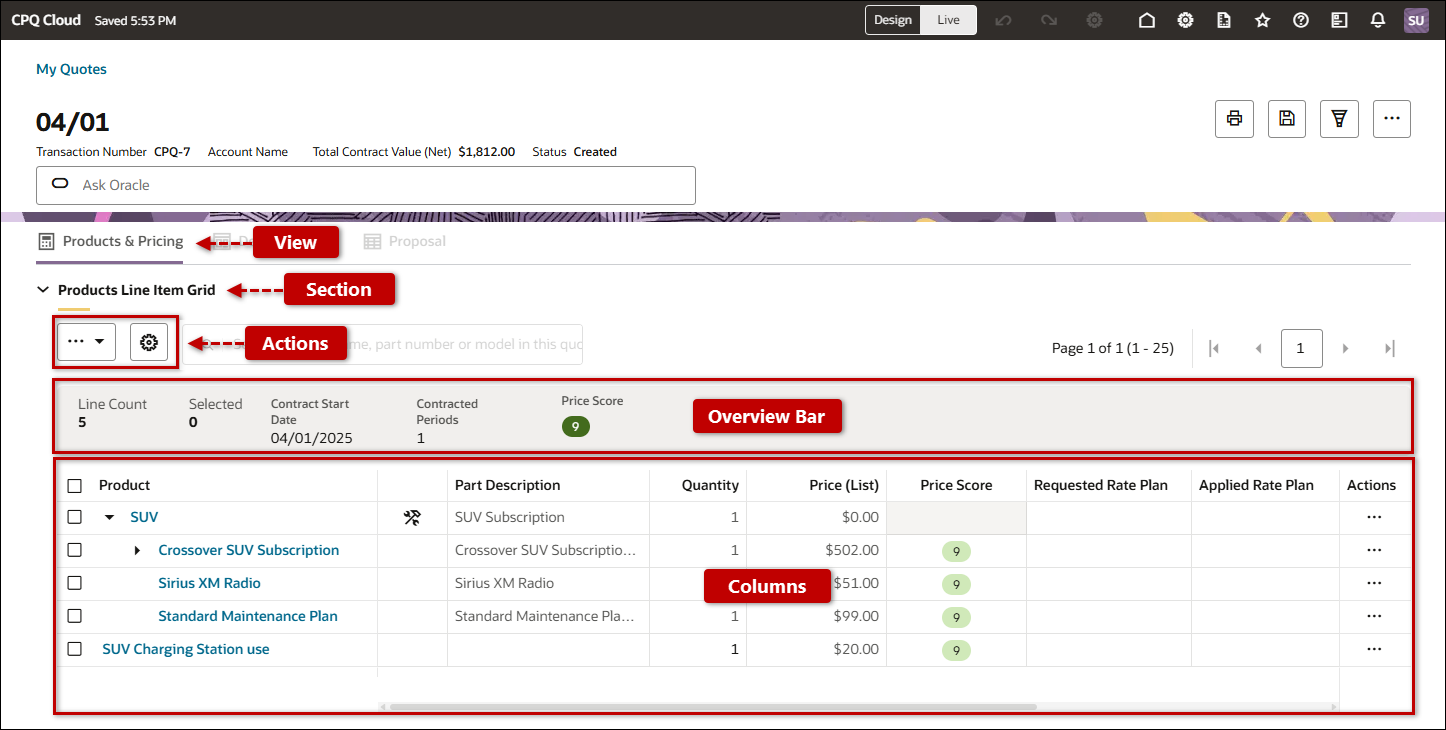
Actions
![]() Customize, Add, or Delete Line Item Grid Actions
Customize, Add, or Delete Line Item Grid Actions
-
Open or create a Redwood quote, then click Design.
-
Click the applicable view. (Products & Pricing is the default view for the Line Item Grid)
-
If the Products Line Item Grid section is collapsed, click the Products Line Item Grid.
-
Click next to the Line Item Grid actions.
-
Click Customize Actions
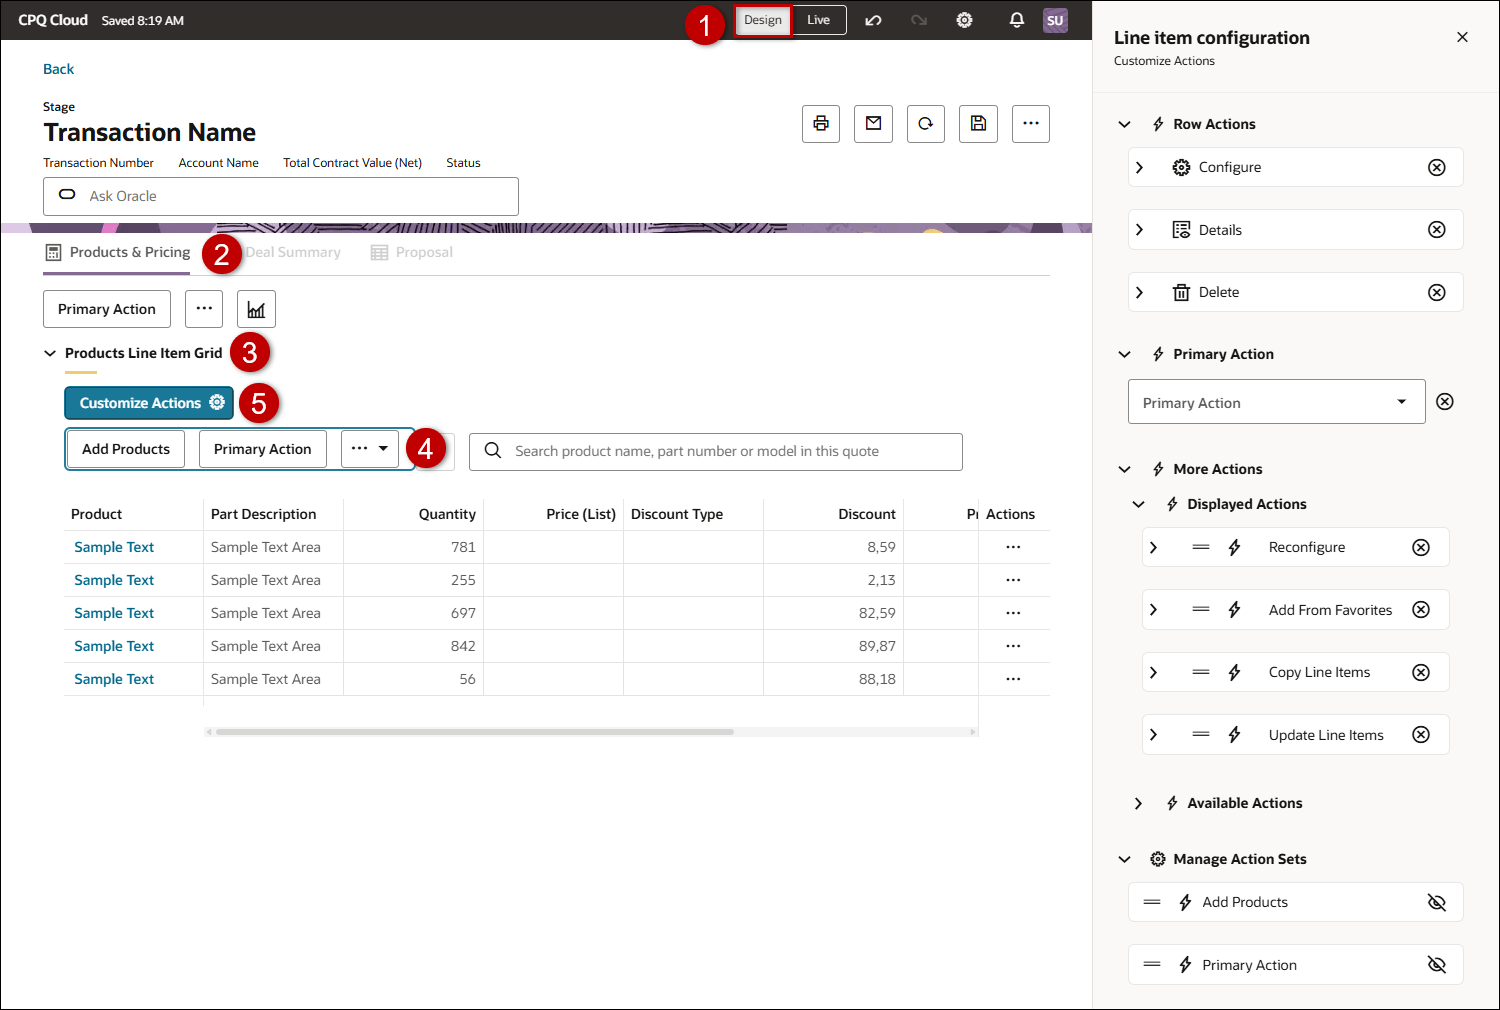
Row Actions
This section lists actions for a line item Actions.
Primary Action
-
Click Primary Action.
-
Select the applicable action from the Primary Action drop-down.
-
Click the Delete icon
 to remove the primary action.
More Actions
-
Click More Actions.
-
Click Displayed Actions to view actions displayed in the More Action drop-down for the Line Item Grid.
-
Click the action Delete icon
to remove an action from the More Actions drop-down. -
Click Available Actions to view actions that can be added to the More Actions drop-down.
-
Click the action Add icon + to add an available action to the More Actions drop-down.
Live View
Manage Action Sets
-
Click Manage Action Sets.
-
Click the Hide icon
 to hide the Add Products action or the Primary Action from all sales users.
 -
Click the Show icon
 to display hidden actions.
Add Products Action
The Add Products action allows users to search and then add parts, models, BOMs, and Favorites to a quote from a single consolidated page. Typically, Add Products is enabled when there are no line items in a quote. But the visibility of the Add Products action can also be controlled by the following items:
-
The Line Item Grid > Customize Actions > Manage Action Sets setting in the Redwood Quote Designer
-
Document Views for the transaction Update Line Items action
-
Access Rules for the transaction Update Line Items action
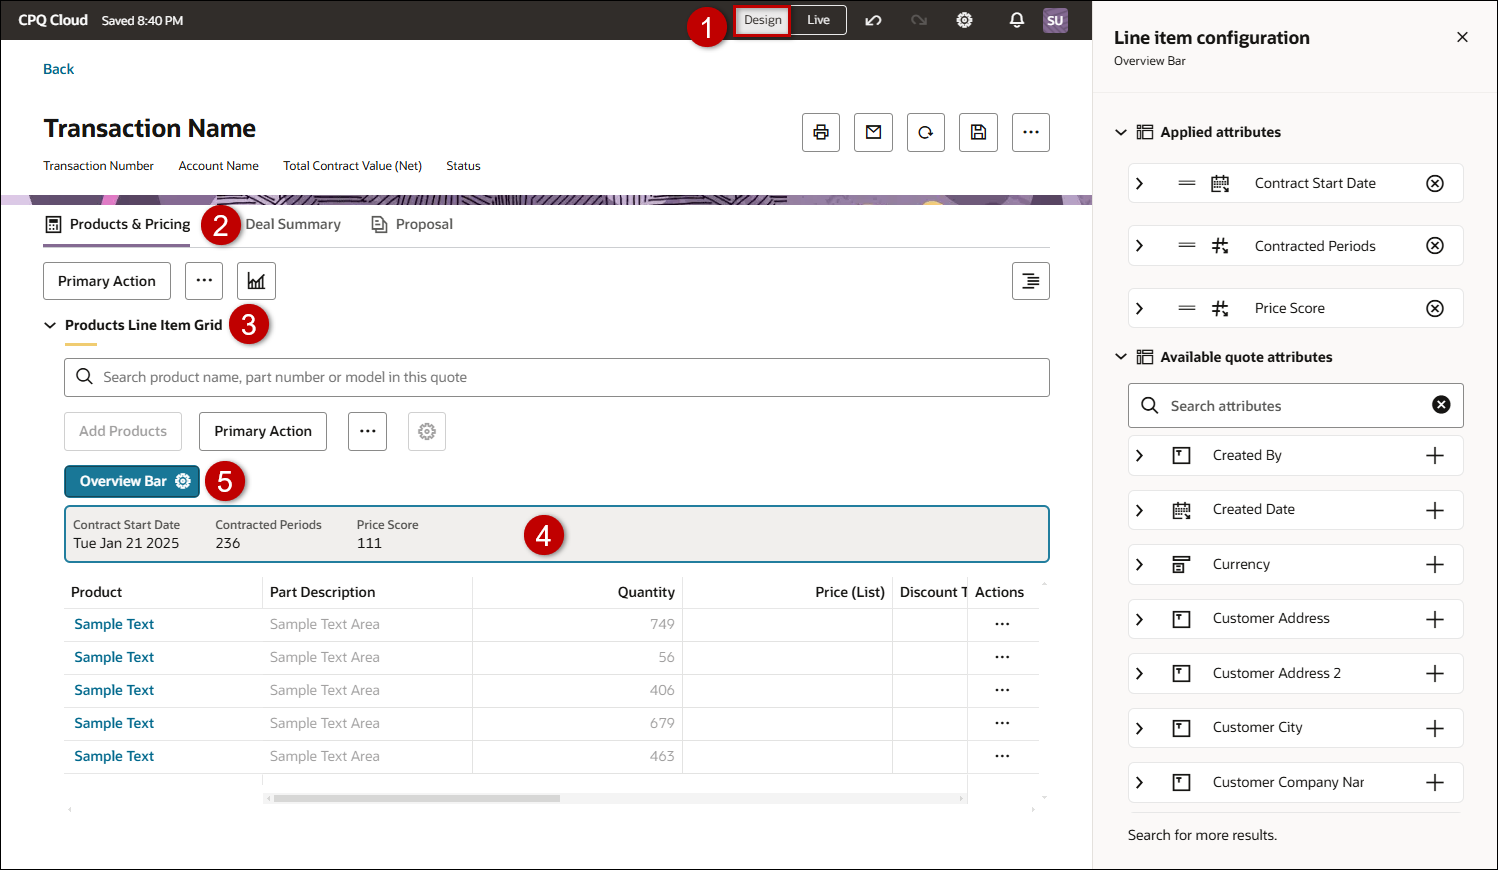
Overview Bar
![]() Add or Delete Attributes in the Line Item Grid Overview Bar
Add or Delete Attributes in the Line Item Grid Overview Bar
-
Open or create a Redwood quote, then click Design.
-
Click the applicable view. (Products & Pricing is the default view for the Line Item Grid)
-
If the Products Line Item Grid section is collapsed, click the Products Line Item Grid.
-
Click the Line Item Grid overview.
-
Click Overview Bar
-
Click Displayed Attributes to view attributes displayed in the Line Item Grid overview bar.
-
Click the action Delete icon
to remove an attribute from the Line Item Grid overview bar.
-
Click Available Quote Attributes to view attributes that can be added to the Line Item Grid overview bar.
-
Click the attribute Add icon + to add an available attribute to the Line Item Grid overview bar.
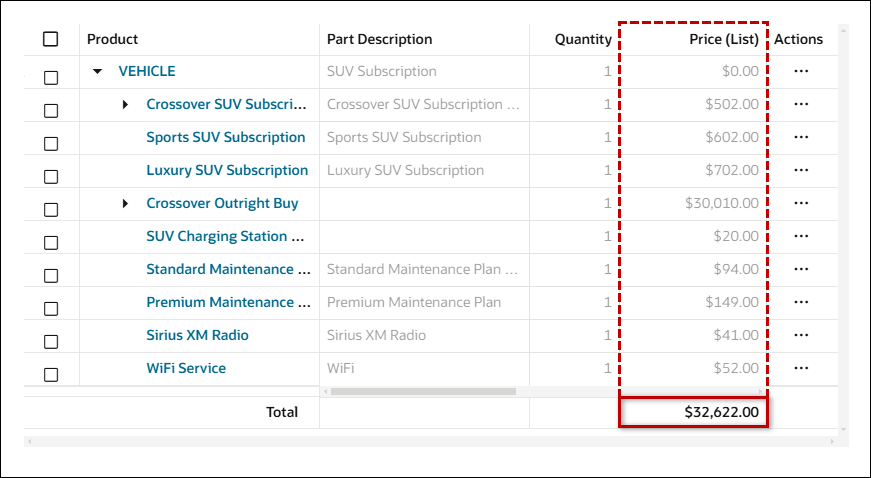
Columns
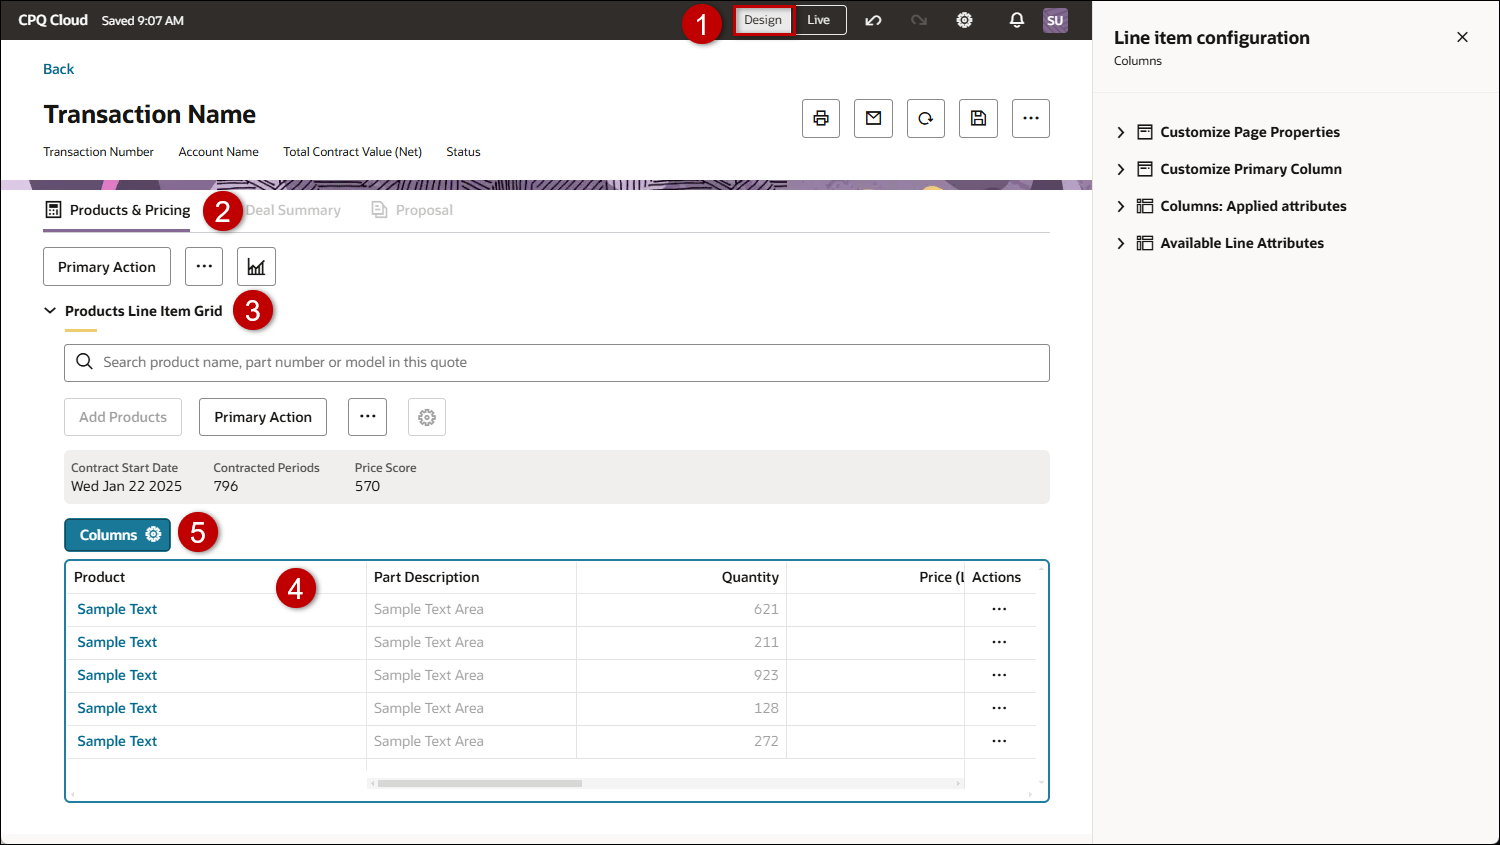
![]() Access Line Item Grid Column Settings
Access Line Item Grid Column Settings
-
Open or create a Redwood quote, then click Design.
-
Click the applicable view. (Products & Pricing is the default view for the Line Item Grid)
-
If the Products Line Item Grid section is collapsed, click the Products Line Item Grid.
-
Click next to the Line Item Grid.
-
Click Columns
![]() Customize Line Item Grid Page Properties
Customize Line Item Grid Page Properties
-
Click Customize Page Properties.
-
Select the Enable Price Waterfall option to display the price waterfall displays in the charge drawer.
![]() Customize the Line Item Grid Primary Column
Customize the Line Item Grid Primary Column
-
Click Customize Primary Column.
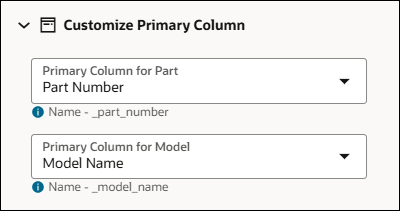
-
Select the Primary Column for Part.
-
Select the Primary Column for Model.
![]() View or Delete Line Item Grid Columns
View or Delete Line Item Grid Columns
-
Click Columns: Applied attributes to view columns for the Line Item Grid.
-
Click the Delete icon
for an attribute to remove a Line Item Grid column.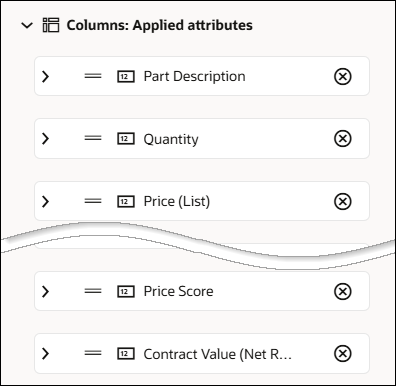
![]() Customize a Line Item Grid Column
Customize a Line Item Grid Column
-
Click on a displayed attribute to customize the Line Item Grid column.
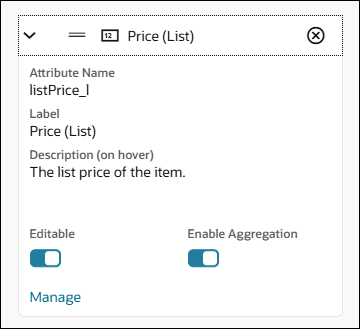
-
Enable the Editable option to allow end users to modify this field.
-
Select Enable Aggregation to show the aggregation of all the values in the column to the user.
-
When Price Waterfall is enabled, select Display in Price Waterfall to display the selected attribute in the Charge Details View.
Only Currency, Float, Integer, Menu, and Text type attributes can be displayed in the Price Waterfall. -
When Price Waterfall is enabled, select Is Net Price Attribute to designate a Currency type attribute as the Net Price in the Price Waterfall. The value of the selected attribute will be treated as the Net Price in the Price Waterfall. This allows customers using non-standard pricing attributes to still benefit for the price waterfall visualization.
-
Click the Manage link to navigate to the Commerce Attribute Editor. Refer to Commerce Attributes for more information about attribute properties.
![]() Display Price Waterfall in the Redwood Quote UI
Display Price Waterfall in the Redwood Quote UI
Complete the following steps to display the price waterfall in the Redwood Quote UI.
-
Open or create a Redwood quote, then click Design.
-
Click the view that contains the Line Item Grid. (Products & Pricing is the default view for the Line Item Grid)
-
If the Products Line Item Grid section is collapsed, click the Products Line Item Grid.
-
Click inside a Line Item Grid column.
-
Click Columns
-
Click Customize Page Properties.
-
Select the Enable Price Waterfall option.
-
Display additional attributes in the Charge Details View for price waterfall.
-
Click on the desired attribute in the Columns: Applied attributes section.
-
Select the Display in Price Waterfall option.
-
Repeat this step for all desired attributes.
-
-
Designate the Net Price attribute.
-
Click on the desired attribute in the Columns: Applied attributes section.
-
Select the Is Net Price Attribute option.
-
-
Click Live to save the Designer changes.
-
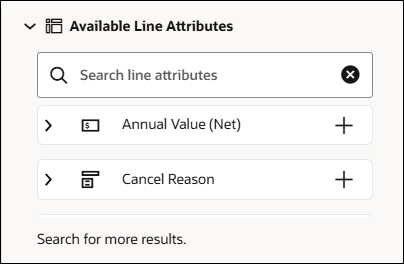
Click Available Line Attributes to view and search for attributes for Line Item Grid columns.
-
Click the Add icon + to add the associated attribute.