Administration
Customize Views
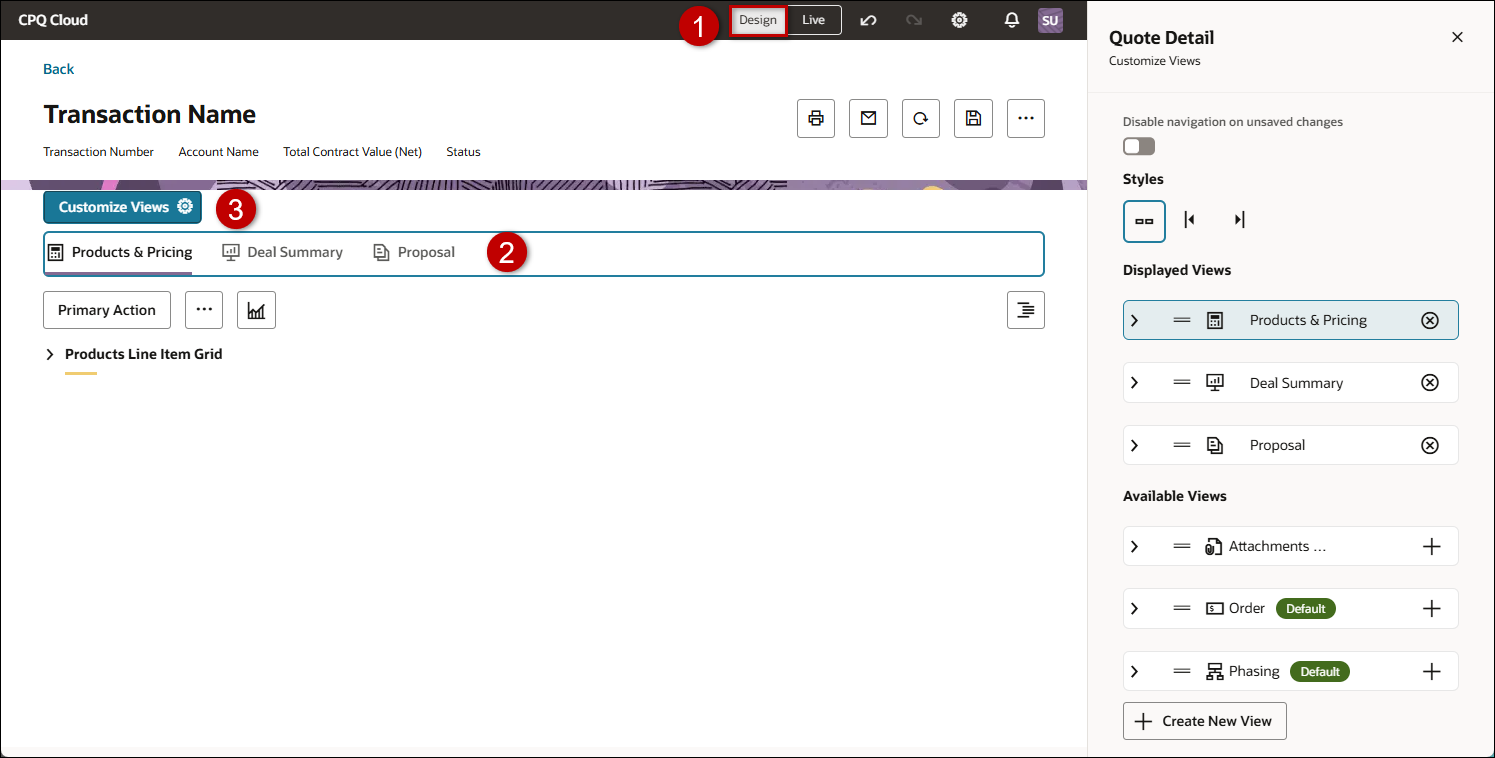
Information inside a quote is displayed in views. There can be one or multiple views in a quote.
To access Customize Views settings:
-
Open or create a Redwood quote, then click Design.
-
Click the views section.
-
Click Customize Views

![]() Disable Navigation on Unsaved Changes
Disable Navigation on Unsaved Changes
-
Enable the Disable navigation on unsaved changes option to prompt the user to save prior to navigating away from a view.
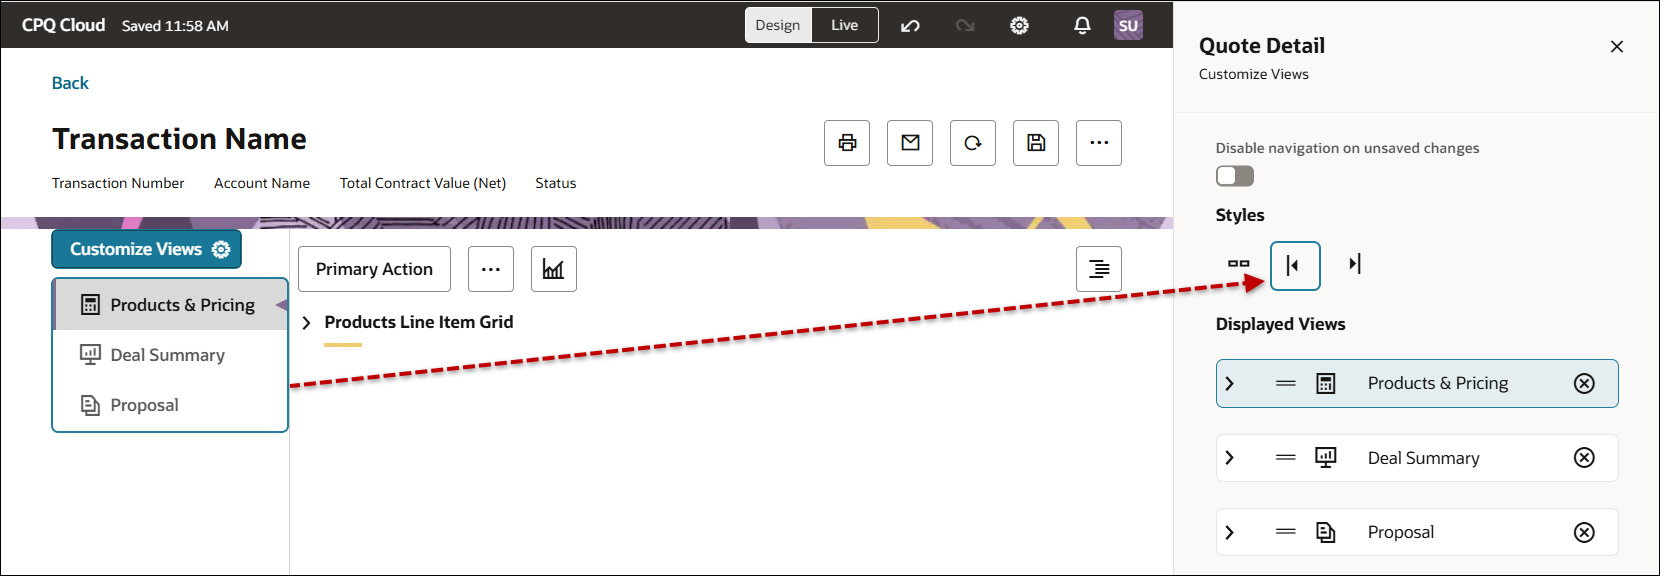
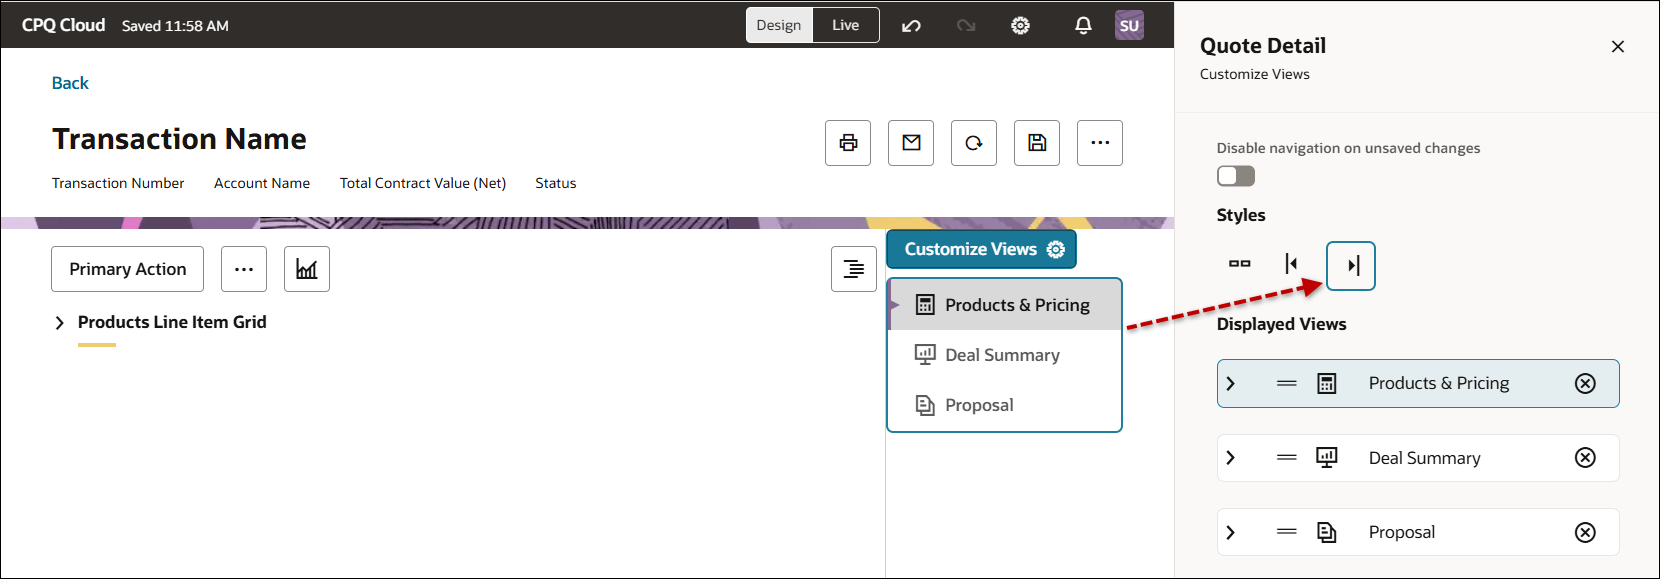
Select the applicable Style option to set how views are displayed on the Redwood quote.
-
Horizontal


-
Vertical Left

-
Vertical Right

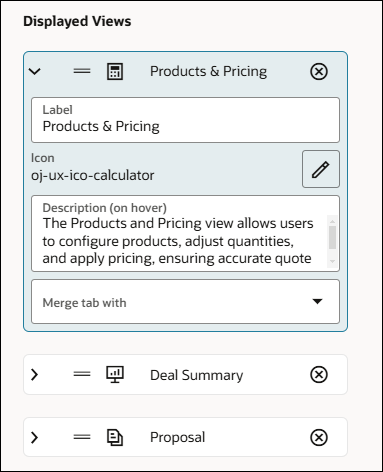
![]() Customize Displayed View Label, Description, or Icon
Customize Displayed View Label, Description, or Icon
-
Click on a Displayed Views item.
-
Click inside the Label field to change the displayed text for the view.
-
Click the Edit icon
 to change the icon for the view.
 -
Click inside the Description field to change the text displayed on hover.
![]() Remove or Demote a Displayed View
Remove or Demote a Displayed View
-
Click on a Displayed Views item.
-
Click the Delete icon
 to remove a displayed view.
 -
To demote a view to a section, select a view from the Merge tab with drop-down.
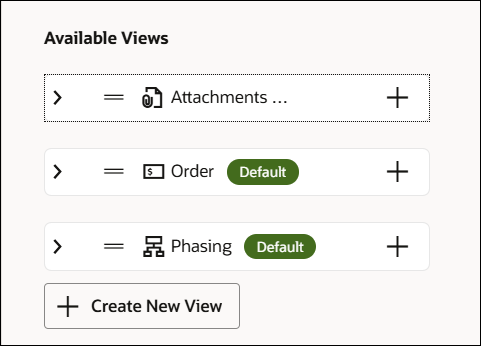
Available Views lists additional pre-defined views that can be added to the quote layout.
-
Click the Add icon + to add the associated view.
-
Click the Create New View to add a blank view.
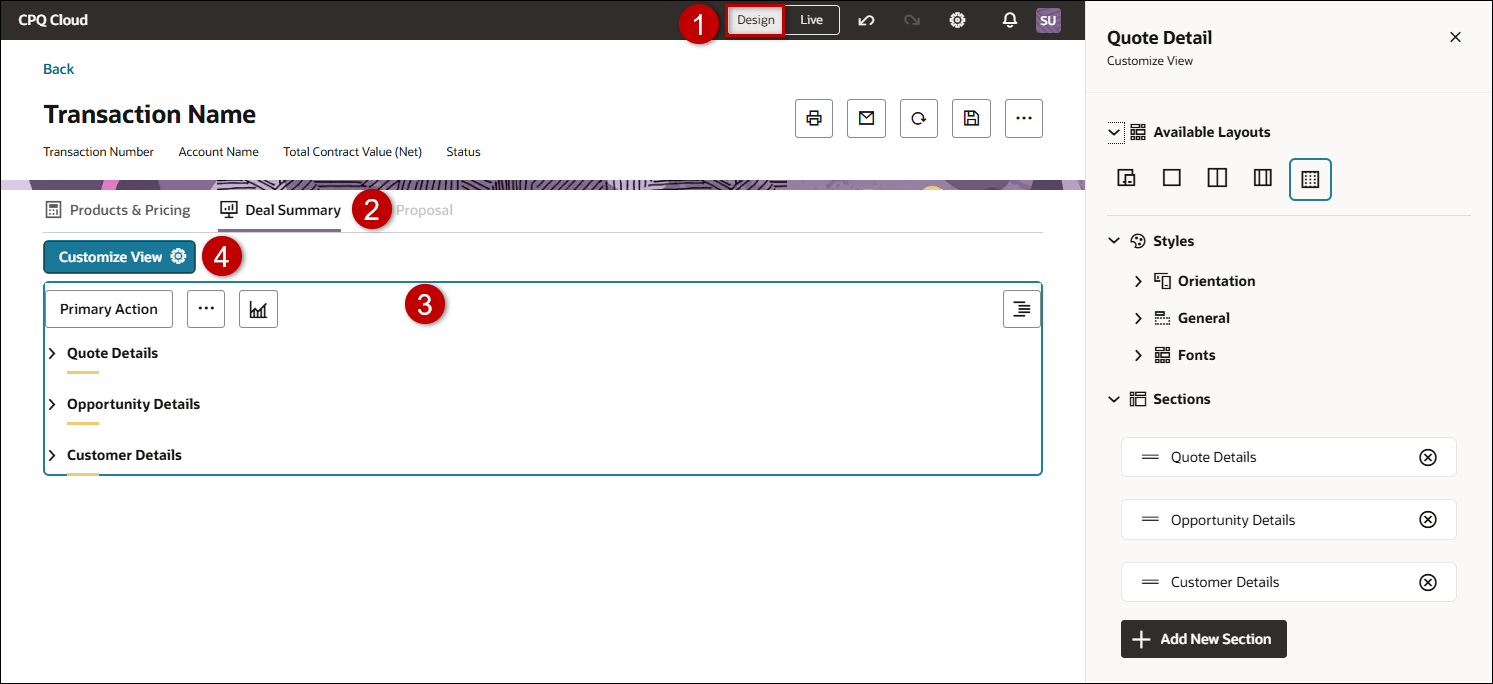
Customize View
Information inside a view is displayed in sections. There can be one or multiple sections in a view. Views can also contain actions and visualizations.
To access Customize View settings:
-
Open or create a Redwood quote, then click Design.
-
Click the applicable view.
-
Click inside the view area.
-
Click Customize View
-
Click Available Layouts.
-
Set the column layout for all sections within the current view.
Note: Individual section layouts will override the view layout.
 Responsive Layout (automatically adjusts the number of columns based on the browser width)
 One Column Layout
 Two Column Layout
 Three Column Layout
 Four Column Layout
-
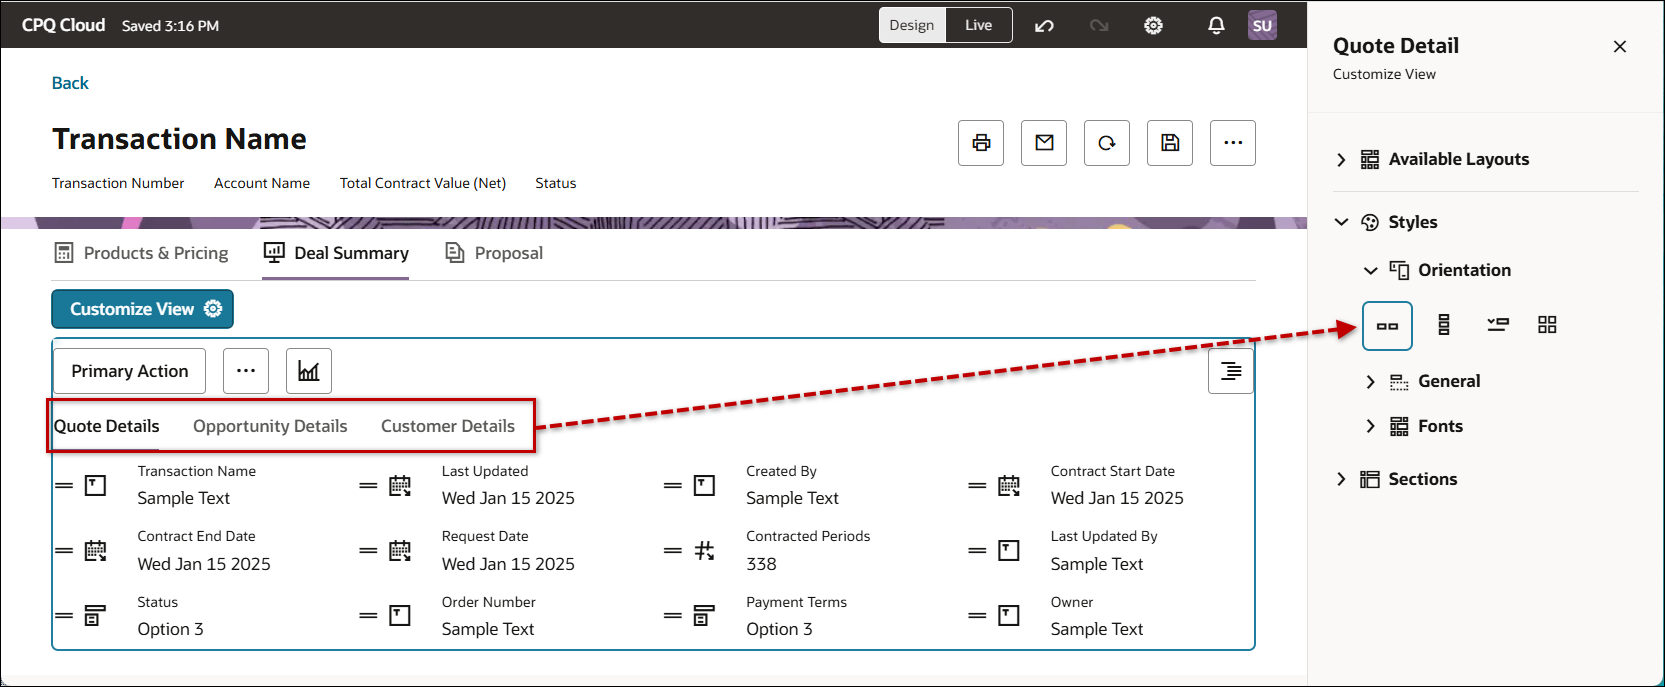
Click Styles, then click Orientation.
-
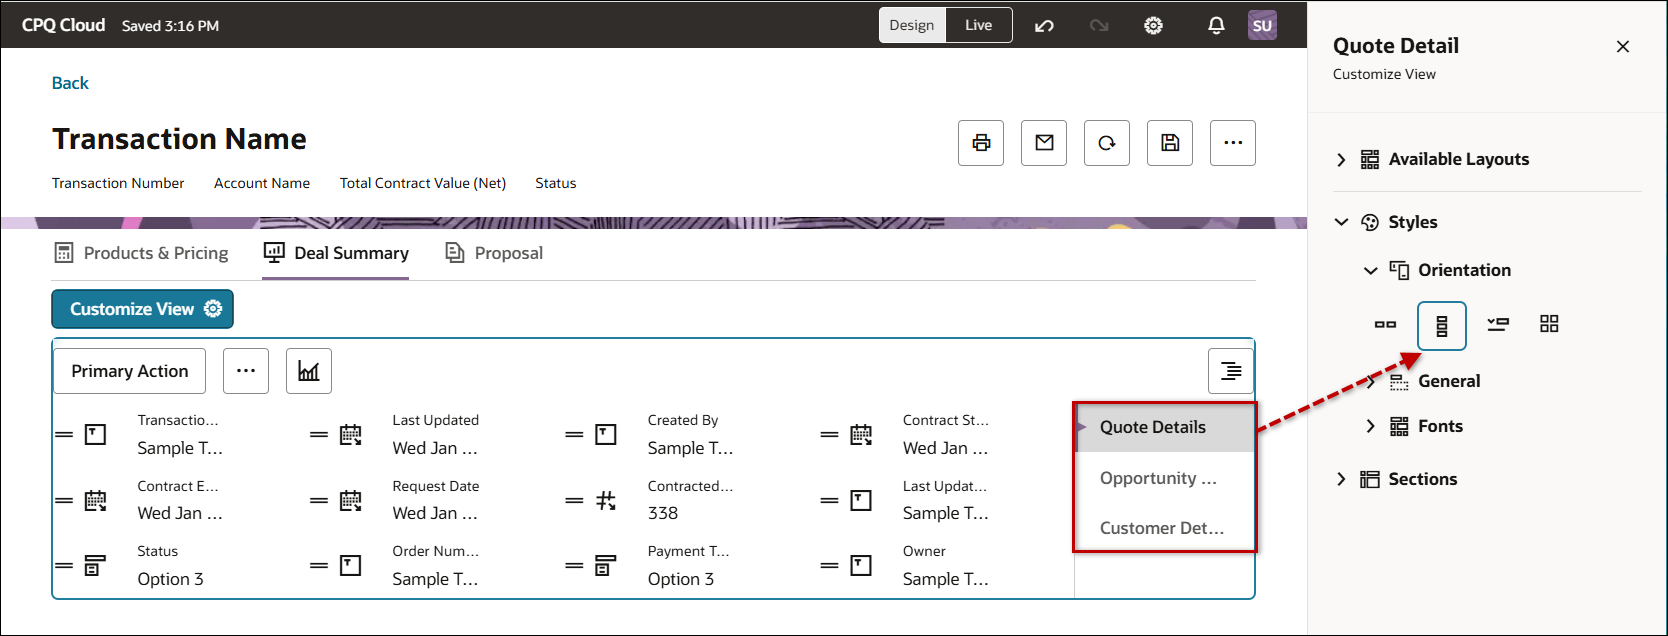
Select the applicable Orientation option to set how sections are displayed in the current view.
-
Horizontal

Sections within the current view are displayed as horizontal tabs.
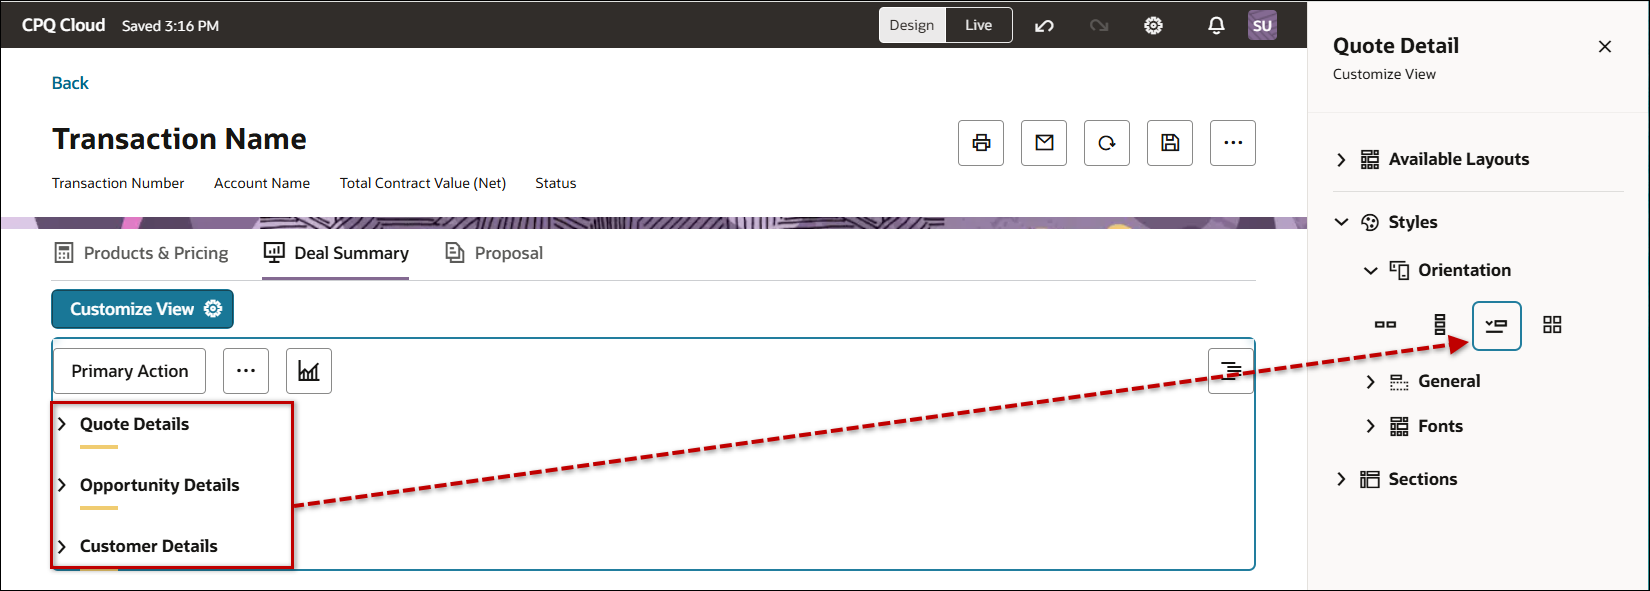
-
Vertical

Sections within the current view are displayed as vertical tabs.
-
Collapsible

Sections within the current view are displayed as expandable / collapsible items.
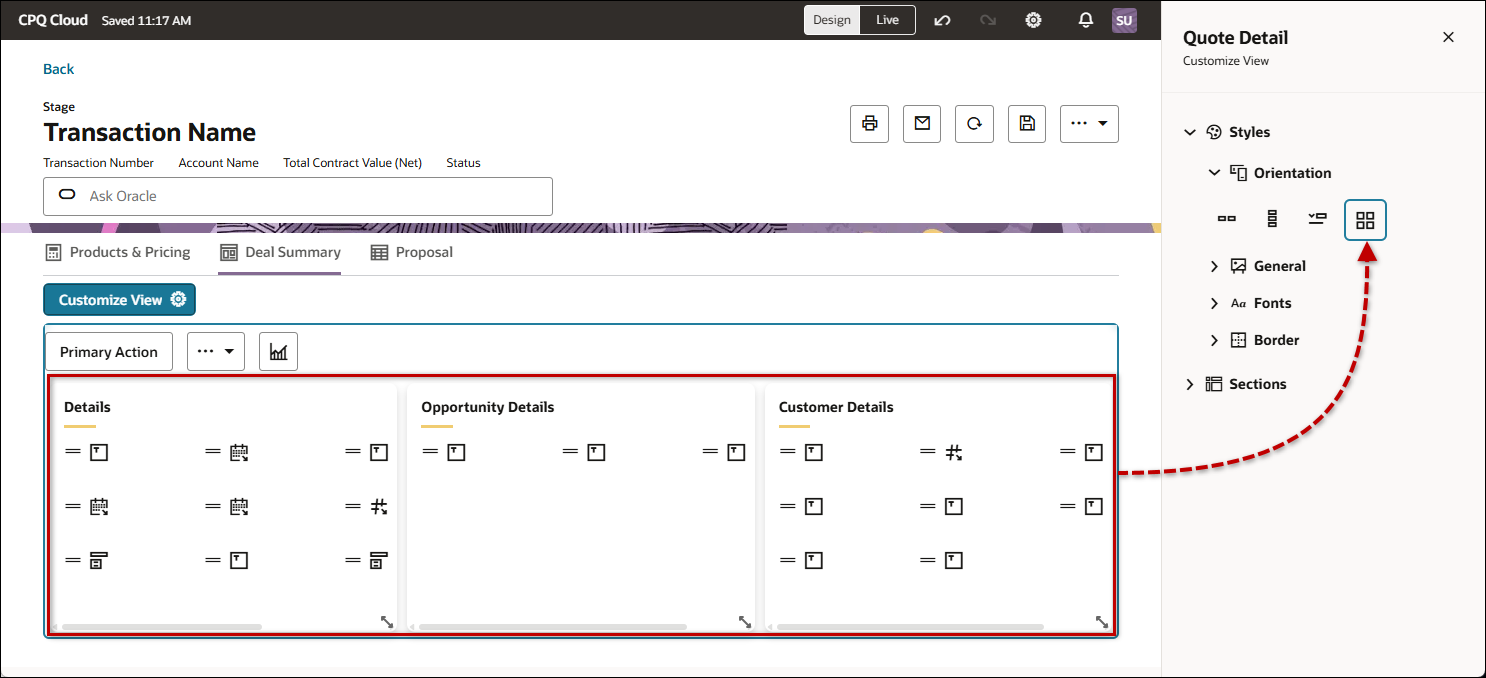
-
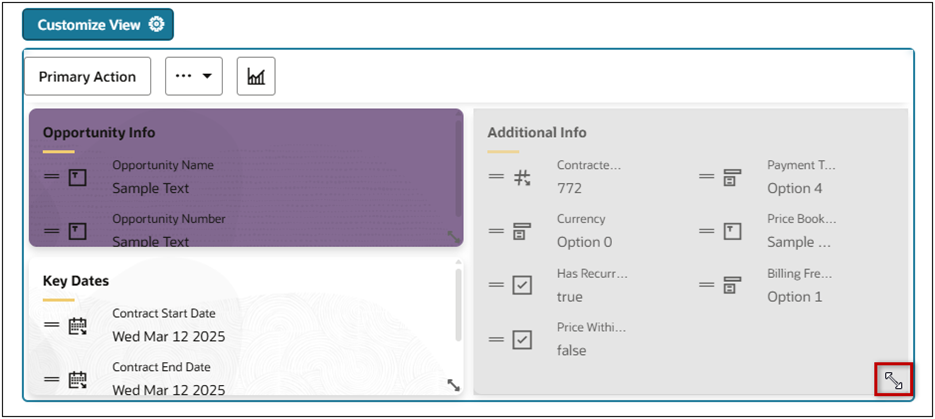
Custom Grid Layout

The Custom Grid Layout orientation allows administrators to dynamically rearrange and resize sections within a Redwood view. Administrators can also customize the Custom Grid view backgrounds and borders to further customize the style of Redwood views.
-
-
When a view Orientation is set to Custom Grid Layout in Design mode, administrators can now drag-and-drop sections with a view.
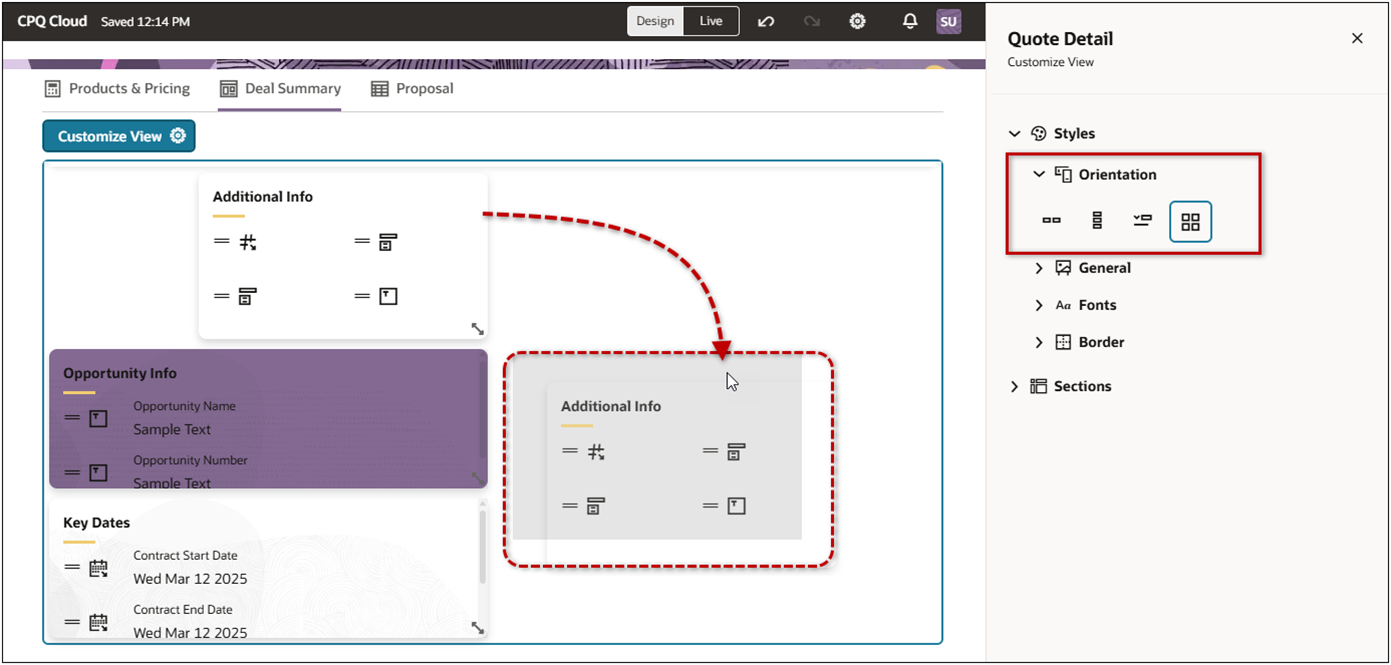
-
Administrators can also use the resize function to change the width and/or length of a section.
![]() Customize View General Settings (Read Only, Quick Navigation, Hide if Empty, Expand / Collapse All, Customize Section Height)
Customize View General Settings (Read Only, Quick Navigation, Hide if Empty, Expand / Collapse All, Customize Section Height)
- Click Styles, then click General.
-
If desired, enable the following options:
Option Description  Read Only
Displays all sections in a view in Read Only mode.
-
To make a single section read only, refer to Redwood Quote Sections.
When Read Only is enabled, users can click the Edit icon
to edit fields.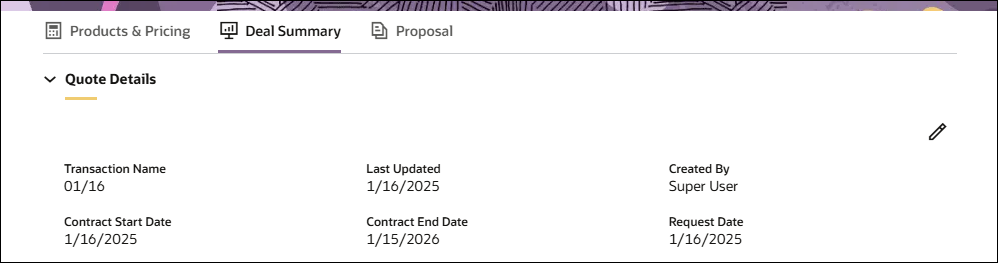
Then users can click inside a field to edit an attribute, or they can click the Close icon X to return to Read Only mode.

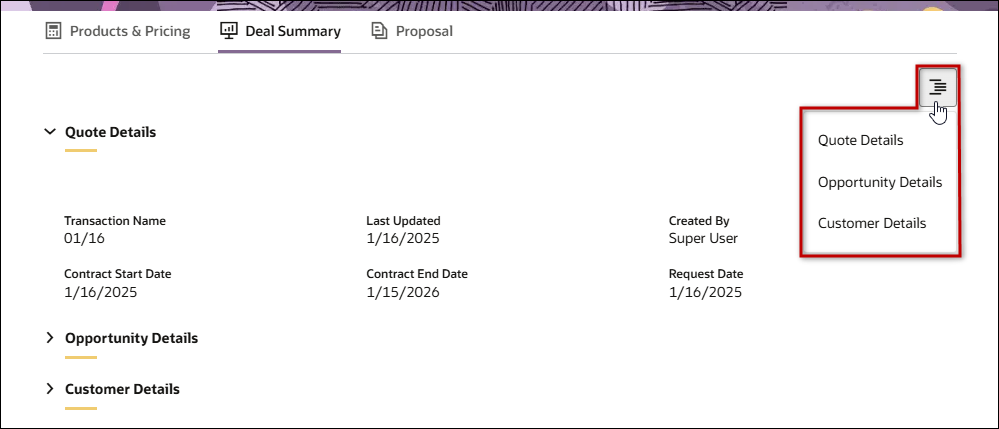
 Quick Navigation
Displays a quick navigation menu.
When Quick Navigation is enabled, users can click menu icon to quickly navigate between sections.
 Hide If Empty
The Hide If Empty option allows you to hide an entire view from the user if all attributes within that view are hidden for the user.
This helps maintain a clean and relevant UI by preventing the display of empty or non-applicable sections.
When to Use: Enable this option when a view contains dynamic or role-based attributes that may be conditionally hidden. If no attributes are visible to the user, the entire view will not be shown.
Example Use Case: If a section displays region-specific pricing fields and all those fields are hidden based on the user’s role or region, enabling Hide If Empty will ensure that the entire pricing section is not rendered in the UI.
 Expand All Sections
 Expands all sections by default. (Collapsible Orientation only)
Users can click on the section header to collapse a section.
 Collapse All Sections
Collapses all sections by default. (Collapsible Orientation only)
Users can click on the section header to expand a section.
 Compact Section Height
Displays grid sections in compact height (Custom Grid Orientation only)
Scrollbars are added to the larger sections to facilitate viewing of content.
-
-
Click Styles, then click Fonts.
-
Select the desired Font for the current view.
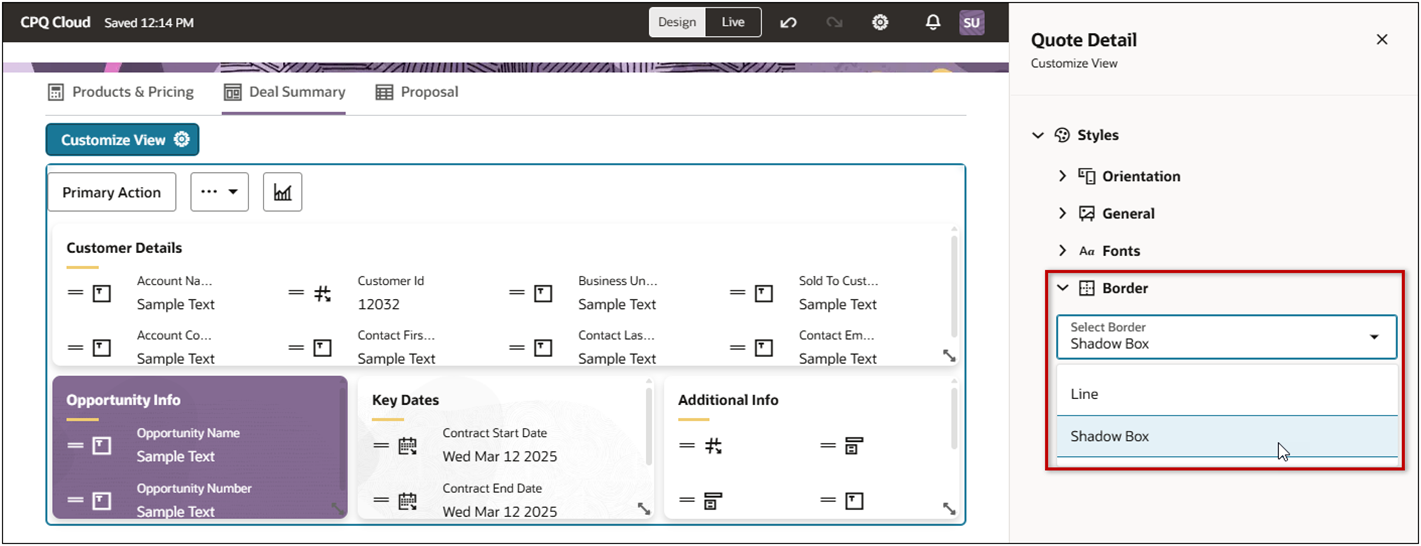
![]() Customize View Borders for Custom Grid Layout
Customize View Borders for Custom Grid Layout
The new Border style allows administrators to apply simple Line or Box Shadow borders for sections within the applicable view.
-
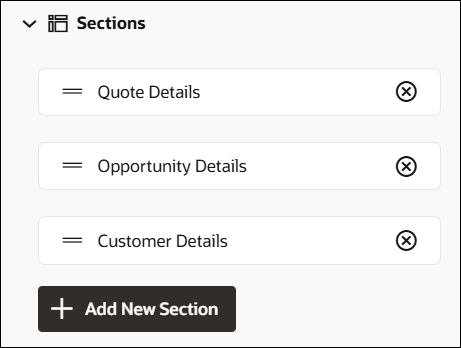
Click Sections to view the sections for the current view.
-
Click the section Delete icon
to remove a section from the current view. -
Click the Add New Section to add a blank section.