Manage Transaction
Overview
This topic covers administration of the main document (Transaction) using the Redwood interface pages. Refer to Commerce Documents for administration using the classic interface pages.
Each Commerce process contains one document set. There are two types of Commerce documents: main document (e.g. Transaction) and sub-document (e.g. Transaction Line).
A document set is comprised of a main document with an attached sub-document.
Using these document types, you can create flexible Commerce processes.
- For every process, Commerce documents are created in a one-to-one relationship.
- Every main document can be mapped to only one sub-document.
- A summary of sub-document data also appears on main documents, in the Line Item Grid.
Example: A process named RFQ can contain a main document and a corresponding sub-document (RFQ sub). Main documents are used for general information pertaining to the Transaction, like customer name or billing and shipping information, while sub-documents are used as product detail pages.
Manage Transaction Page
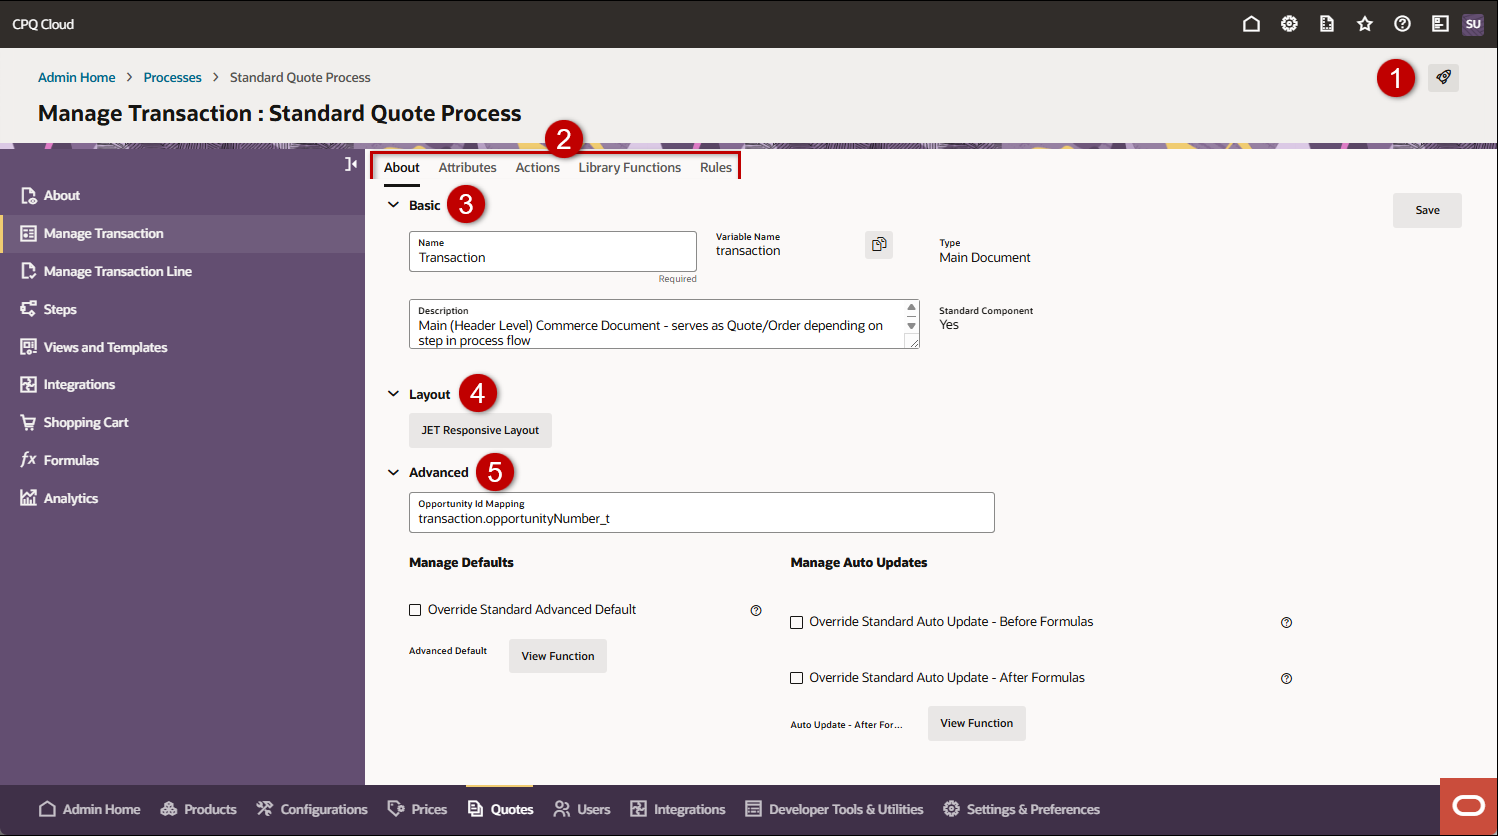
The Manage Transaction page provides access to transaction settings, attributes, actions, library functions, and rules.
|
1
|
Access the Deployment Center
|
|
2
|
Transaction tabs:
|
|
3
|
Basic: Manage / view the transaction Name, Variable Name, and Description
|
|
4
|
Layout: If enabled, this section provides access to the JET, Legacy, and Mobile layouts.
For Redwood user side quote interface pages, refer to the Redwood Quote Designer to manage the quote layout.
|
|
5
|
Advanced: Manage the following transaction settings.
-
Opportunity Id Mapping: This field is used to map a CRM opportunity id to a Commerce document.
-
Manage Defaults: View / manage the transaction document Advanced Default.
-
Manage Auto Updates: View / manage transaction document Auto Update Before and After Formulas.
|
Administration
 Manage a Transaction
Complete the following steps to manage a transaction.
- Navigate to Admin Home > Quotes.
- Select the applicable Process.
- Select Manage Transaction in the left navigation section.
- Manage Basic settings.
- If applicable, open the Basic section.
- Edit the Name, if necessary.
- To copy the transaction variable name, click the
 icon.
icon. - Edit the Description, if necessary.
-
If enabled, open the Layout section to access to the JET, Legacy, and Mobile layouts.
Refer Commerce Layout Editor and Commerce Mobile Layouts for layout information.
Note: For Redwood user side quote interface pages, refer to the Redwood Quote Designer to manage the quote layout.
-
Manage Advanced settings.
-
Open the Advanced section.
-
Enter Opportunity Id Mapping, if necessary.
This field is used to map a CRM opportunity id to a Commerce document.
-
Edit the Advanced Default, if necessary.
-
Disable Advanced Default
Unselect Enable Advanced Default to disable the Advanced Default.
-or-
-
Select Enable Advanced Default then click Define Function.
The BML Editor opens.
-
Select the applicable System Variable Name, Variable Name for (Main Document), Variable Name for (Sub-Document), and/or Library Function(s) for the selected document.
If required, click Reselect to select attributes.
- Click Next Screen to go the Function Editor page.
- Enter the BML function, then click Save and Close.
-
Define Advanced Default Function
-
Edit the Auto Update - Before Formulas, if necessary.
This allows functions to run before Formulas when the Commerce page performs an auto update.
-
Standard Process Auto Update Before Formulas - There are no standard Auto Update - Before Formulas in the default Standard Process.
-
To override a default value, check Override Standard Auto Update - Before Formulas, and then click Save.
-
To quickly return to the standard function, uncheck Override Standard Auto Update - Before Formulas then click Save.
-
Disable Auto Update - Before Formulas
Unselect Enable Auto Update - Before Formulas to disable the Auto Update - Before Formulas.
-or-
-
Define Auto Update - Before Formulas
Select Enable Auto Update - Before Formulas then click Define Function.
The BML Editor opens.
-
Select the applicable System Variable Name, Variable Name for (Main Document), Variable Name for (Sub-Document), and/or Library Function(s) for the selected document.
If required, click Reselect to select attributes.
- Click Next Screen to go the Function Editor page.
- Enter the BML function, then click Save and Close.
-
Edit the Auto Update - After Formulas, if necessary.
This allows functions to run before Formulas when the Commerce page performs an auto update.
-
Standard Process Auto Update After Formulas - Standard Process documents are pre-populated with default functions.
-
To override a default value, check Override Standard Auto Update - After Formulas, and then click Save.
-
To quickly return to the standard function, uncheck Override Standard Auto Update - After Formulas then click Save.
-
Disable Auto Update - After Formulas
Unselect Enable Auto Update - After Formulas to disable the Auto Update - After Formulas.
-or-
-
Define Auto Update - After Formulas
Select Enable Auto Update - After Formulas then click Define Function.
The BML Editor opens.
-
Select the applicable System Variable Name, Variable Name for (Main Document), Variable Name for (Sub-Document), and/or Library Function(s) for the selected document.
If required, click Reselect to select attributes.
- Click Next Screen to go the Function Editor page.
- Enter the BML function, then click Save and Close.
-
Click Save to apply your changes.
Disable Quantity Explosion
Oracle CPQ 26A implements quantity explosion for the standard quote process to ensure child quantities adjust proportionally when the parent quantity changes. Quantity explosion is only applied to configured products; kits remain unchanged as they are treated as a single unit.
Complete the following steps to disable quantity explosion.
-
Navigate to Admin Home > Quotes > Process > Manage Transaction.
-
Open the Advanced section.
-
Check Override Standard Auto Update – After Formulas, then click Save.
-
Click Define Function.
-
Update the Exploded BOM Quantity option to false.
put(extraParms, "explodedBOMQuantity", false);
Note: To re-enable quantity explosion, uncheck Override Standard Auto Update - After Formulas to return to the standard function.
-
Click Save and Close in the function editor.
-
Click Save.
Notes
Warning: Users cannot create or add quotes from Configuration to Commerce if mandatory items are missing.
Notes:
- Sub-documents and main documents have a one-to-one relationship, meaning only one sub-document can be associated with a main document.
- Main document Advanced Default will run when the transaction is first created. Its purpose is to set main document attribute default values. The purpose is to have one script that sets all of these attribute values at once, instead of pulling each of them separately. This also simplifies maintenance because all the defaults are set in a single script.
- Sub-document (line item) Advanced Default will run whenever a line item is added to a quote. The purpose of writing this script is to set all of the line item attribute values at once.
Tips and Considerations:
- Edits are not visible until the process is deployed (or redeployed).
- Create main documents as the primary documents in a set. Create sub-documents as detail pages that link up with main documents, that is, Line Item page for an RFQ.
Related Topics
See Also


