Integration Users for Oracle CPQ Running in Fusion
Overview
This feature strictly is used for sending inbound communication from an integrated user client application to Oracle CPQ running on Fusion.
Oracle CPQ 26B introduced support for the set up of an integrated user application for inbound communication to Oracle CPQ running in Fusion. For example, a customer may want to send data to Oracle CPQ from their own internal company-driven application.
When CPQ is running in Fusion to ensure secure communication, the integrated user application must be set up as a connected application using Oracle Cloud Infrastructure Identity and Access Management (IAM) as identity provider (IdP) and CPQ as a service provider. IAM was previously known as Oracle Identity Cloud Service (IDCS).
Once the secure inbound communication for the integrated user application is established via IAM, CPQ administrators can easily manage the integrated user from the new Redwood Integrated Users page. Administrators can view, create, and update the integrated user details as well as activate and inactivate the integration user.
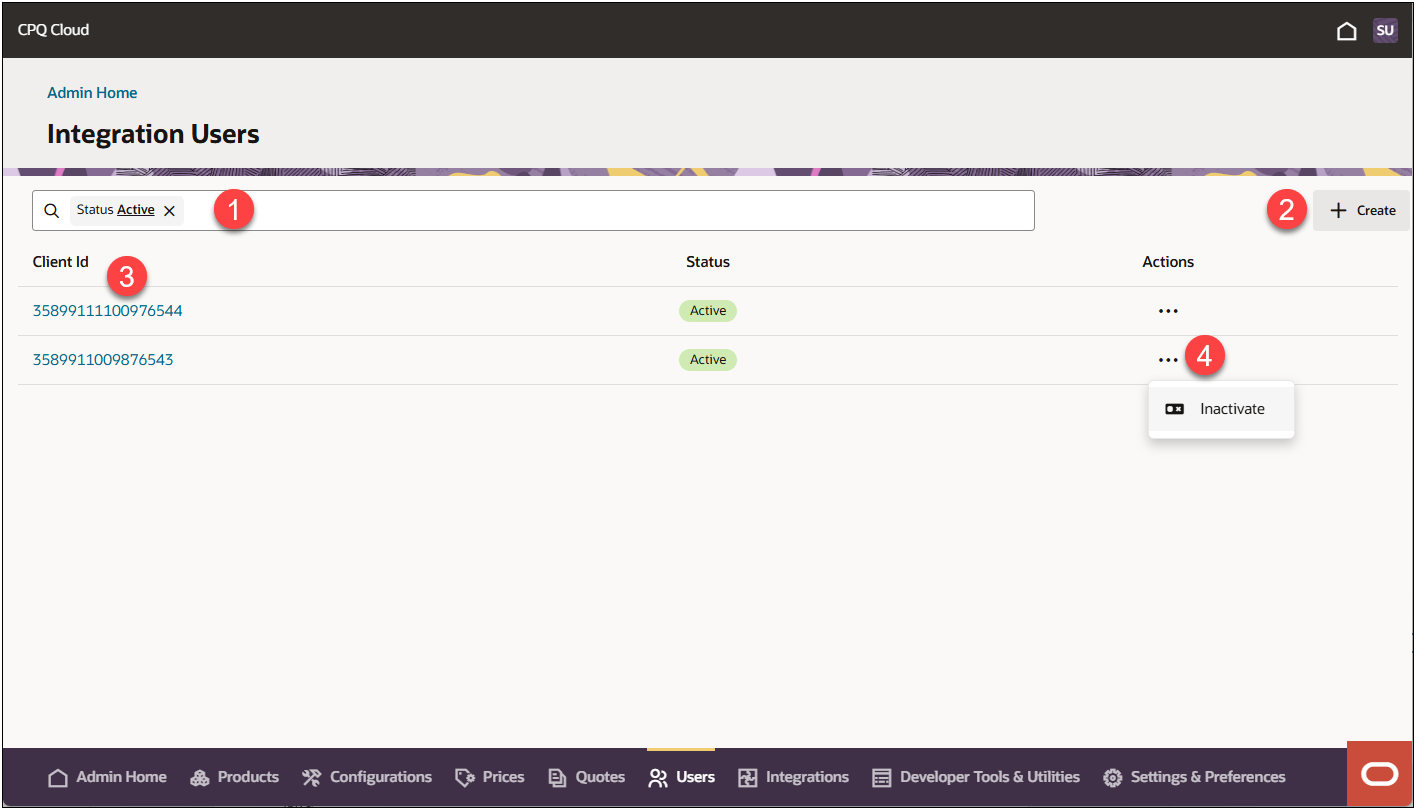
To access Integration Users, naviagte to: Admin Home > Users > Integration Users
|
1
|
Search and Filter
-
To search for an integrated user, click inside the search field and type the integrated user name.
-
To filter items, click on the pre-defined filters below the search field and enter specific filter criteria for that integrated user.
|
|
2
|
Click on + Create to add a new integration user. You will need use the Client ID created in IAM/IDCS to create the integration user. |
|
3
|
Click on Client Id link to view and/or edit the integration user details. |
|
4
|
Click on the integration user’s action ellipsis to Activate or Inactivate that integration user. |
Administration
 Prerequsite: Register an External Application Client in IAM
In order to set up an integration user in Oracle CPQ you must create or already have a secure communication in IAM. IAM was previously known as Oracle Identity Cloud Service (IDCS).
Refer to Register an External Application Client in IAM for Oracle CPQ Running in Fusion for step-by-step instructions for registering an external application client in IAM. You must have the secure connection information from this integration to create an integration user.
Create an Integration User
Complete the following steps to create an integration user.
-
From Fusion, navigate to the CPQ Home Page.
-
In Oracle CPQ, navigate to: Admin Home > Users > Integration User.
-
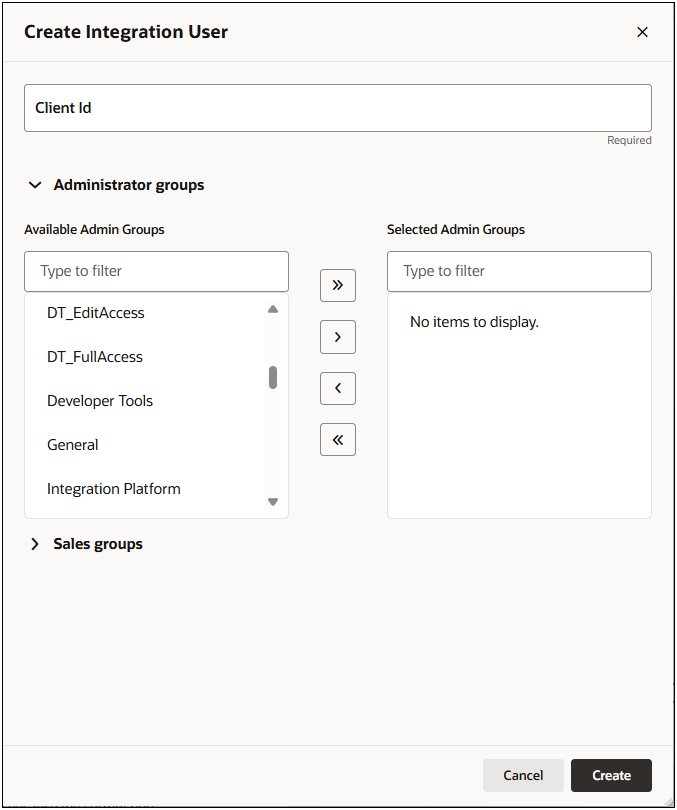
Click + Createto add a new integration user. The Create Integration User panel displays.
-
Enter the Client Id that was created for the integration user in IAM. Refer to Setup an Integration User in IAM.
-
(Optional) Open Administrator groups section to associate an administrator group to the integration user.
-
Select an admin group from the Available Admin Group list. Navigate through the scrolling list to find the desired admin group or start typing the admin group name. The Available Admin Groups list will filter for you.
-
Click the arrow buttons to move the selected available admin group to the Selected Admin Group for the integration user.
-
(Optional) Open Sales groups to associate a sales group to the integration user.
-
Select a sales group from the Available Sales Groups list. Navigate through the scrolling list to find the desired sales group or start typing the sales group name. The Available Sales Groups list will filter for you.
-
Click the arrow buttons to move the selected sales group to the Selected Sales Groups for the integration user.
-
Click Create.
The integration user is created and is listed as active status on the Integration Users page.
Edit an Integration User
Complete the following steps to edit an integration user.
-
Navigate to: Admin Home > Users > Integration User.
-
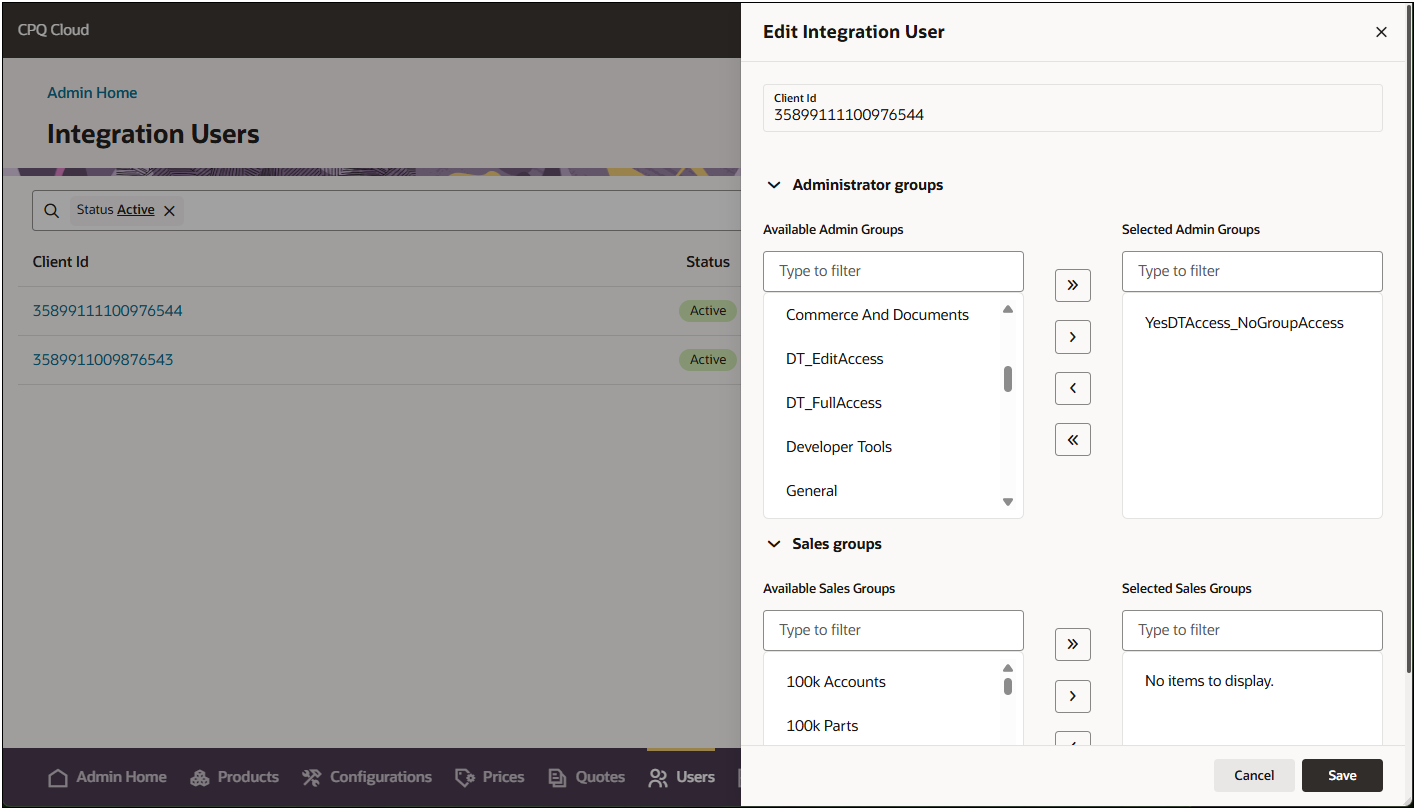
Click the integration user link under Client Id to edit that integration user. The Edit Integration User panel displays.
-
Open Administrator groups section to modify the administrator groups associated to the integration user.
-
Select an admin group from the Available Admin Groups or Selected Admin Groups lists. Navigate through the scrolling list to find the desired admin group or start typing the admin group name. The lists will filter for you.
-
Click the arrow buttons to move the selected admin group to the desired (available or selected) admin group list.
-
Open Sales groups to modify the sales groups associated to the integration user.
-
Select a sales group from the Available Sales Group or Selected Sales Groups lists. Navigate through the scrolling list to find the desired sales group or start typing the sales group name. The lists will filter for you.
-
Click the arrow buttons to move the selected sales group to the desired (available or selected) sales group list.
-
Click Save to update the integration user.
Activate or Inactivate an Integration User
Complete the following steps to activate or inactivate an integration user.
-
Navigate to: Admin Home > Users > Integration User.
-
Click on the integration user’s action ellipsis.
-
Select Activate or Inactivate.
The Status column for the integration user is updated to reflect the selected status.
NOTES:
This feature is only supported for Oracle CPQ sites running in Fusion.
The Client ID and Client secret are extremely sensitive information. They MUST be stored securely.


