Overview
Customers can leverage Oracle Identity and Access Management (IAM)'s Identity Domains and Oracle Identity Cloud Service (IDCS), as an integrated identity management solution. The integration simplifies the identity services requirements common to Enterprise customers. With the integration, administrators delegate user management activities such as user creation, activation, revocation, and password management for host company users to IDCS.
The following functionality is available in Oracle CPQ:
-
Use IDCS to perform user management activities
Use IDCS as the single location for performing the following user management activities for all Oracle and non-Oracle applications integrated with IDCS.
- Provision Oracle CPQ users from IDCS
- Revoke Oracle CPQ user access from IDCS
- User activation and deactivation
- Password management from IDCS
-
Provide a Single Sign-On (SSO) solution for all applications integrated with IDCS
Use the IDCS integration to provide an SSO solution for all Oracle and non-Oracle applications integrated with IDCS.
-
Edit user attributes using modified Oracle CPQ administration pages
After provisioning Oracle CPQ users from IDCS, view the newly created users and update their user attributes using modified Oracle CPQ administration pages.
Administration
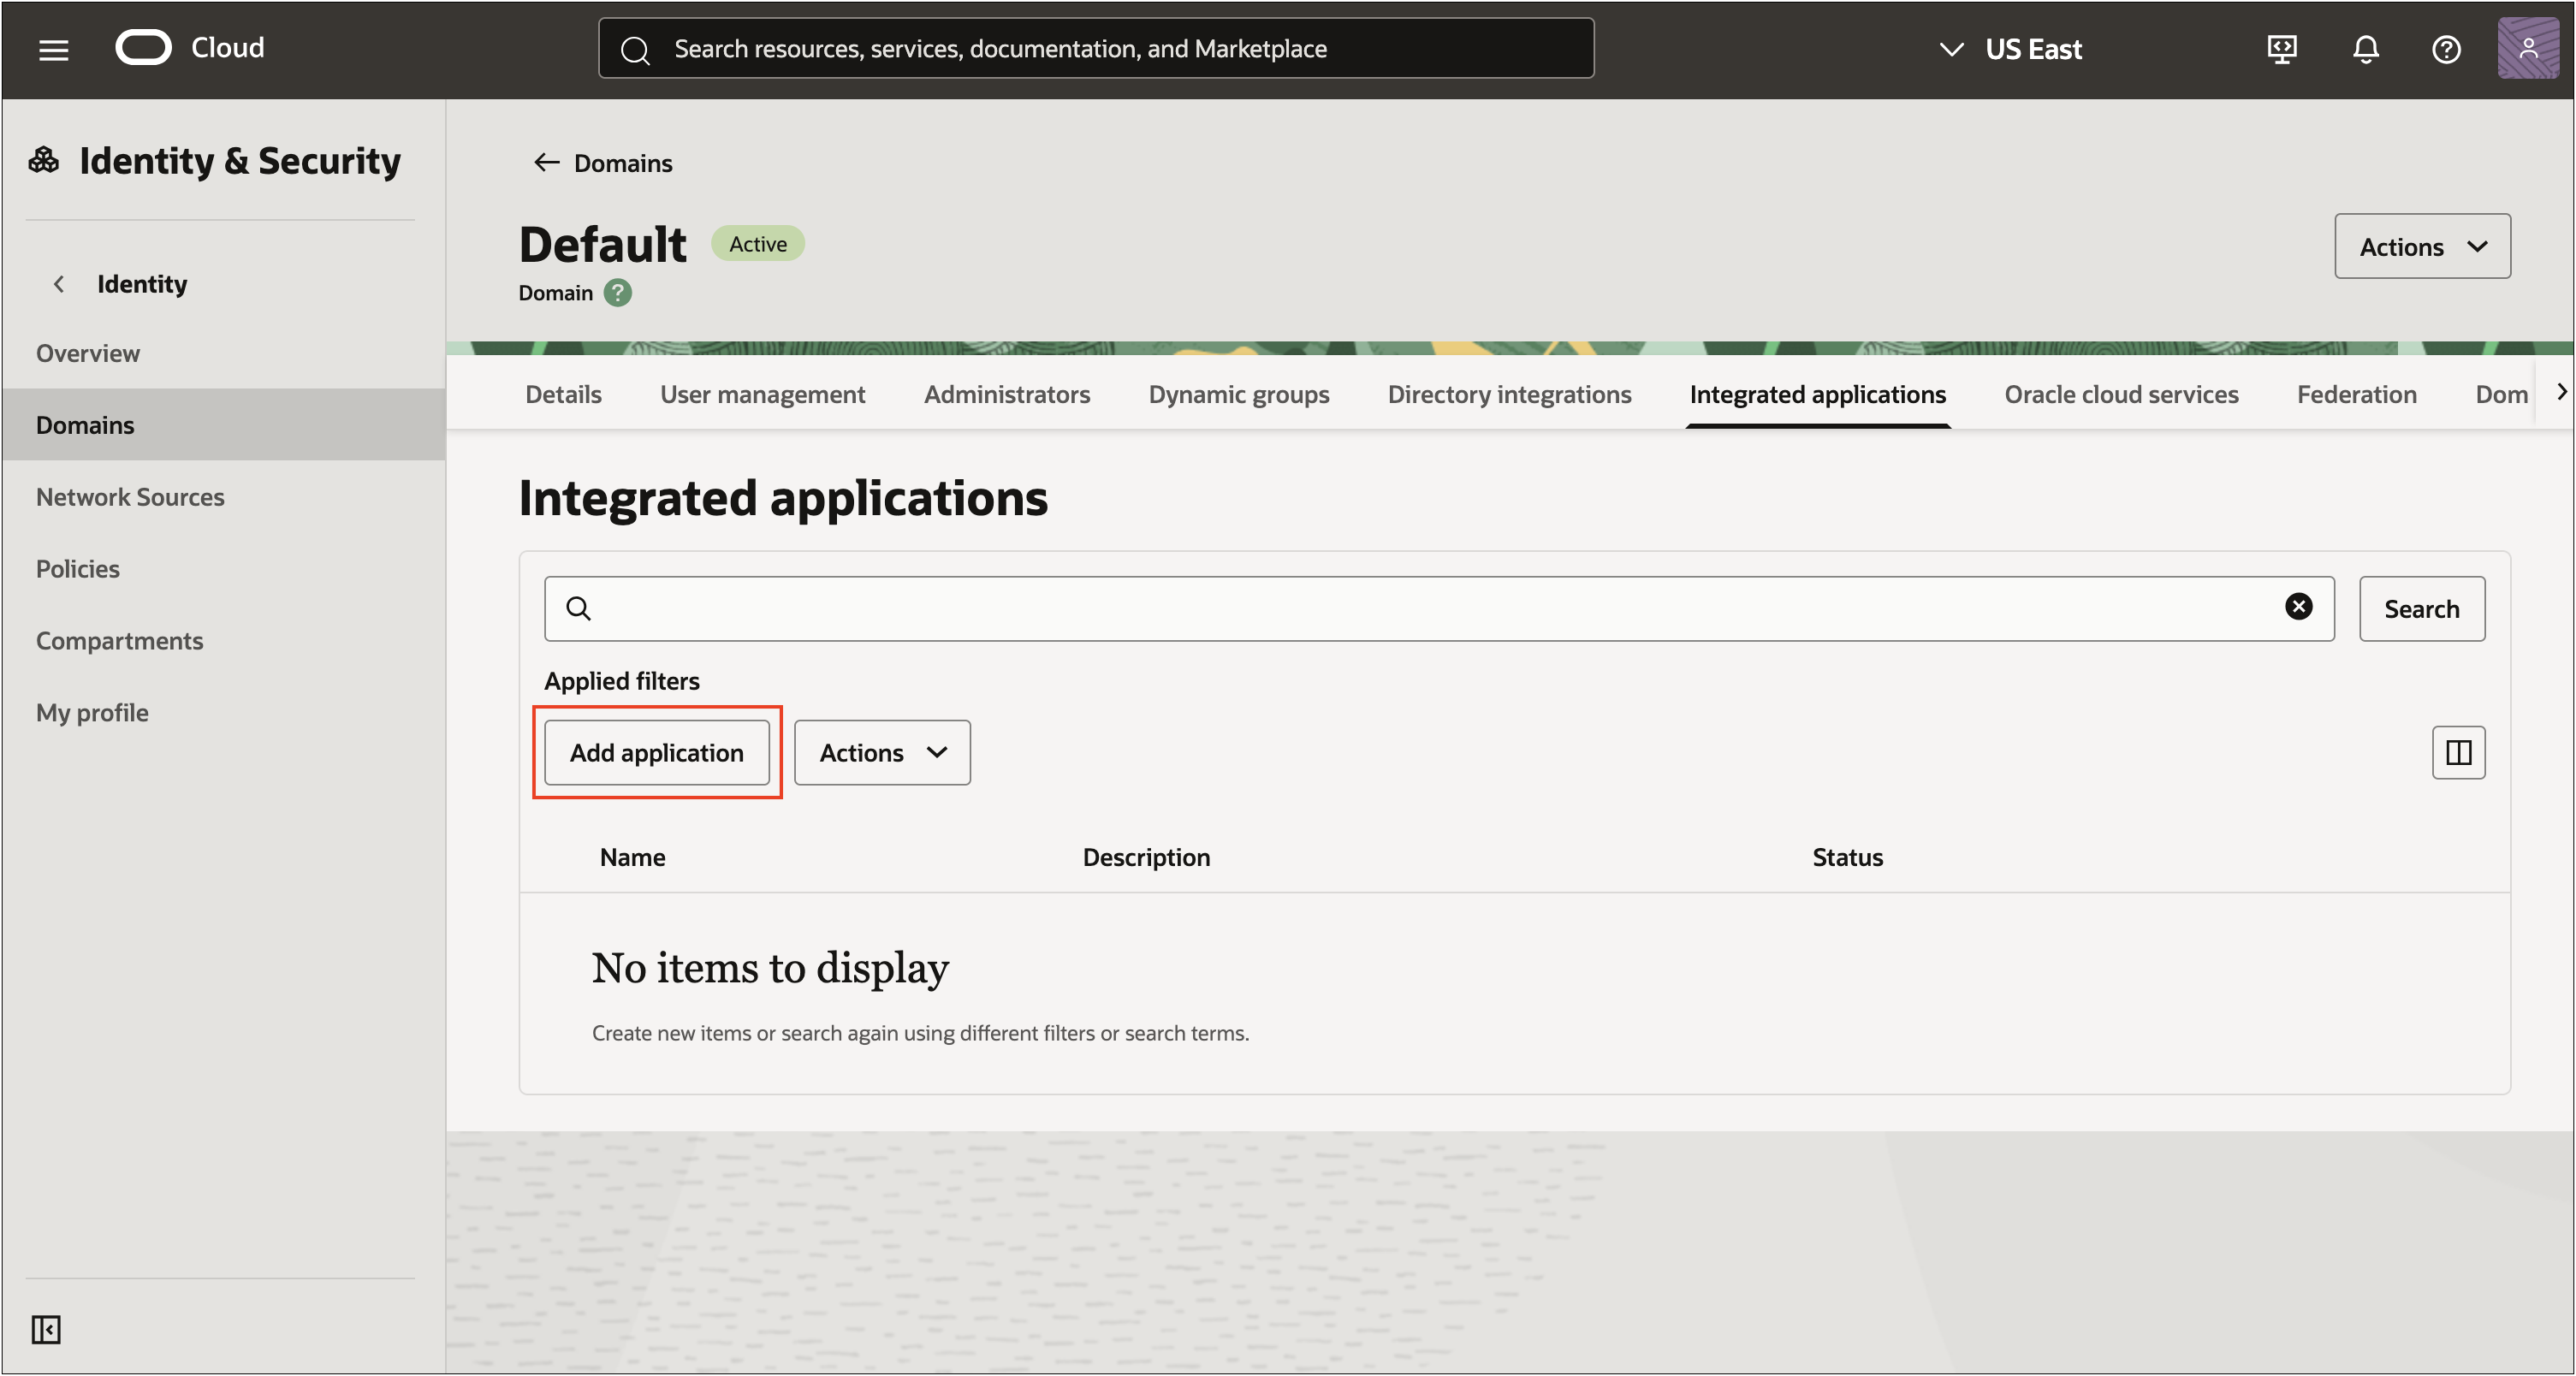
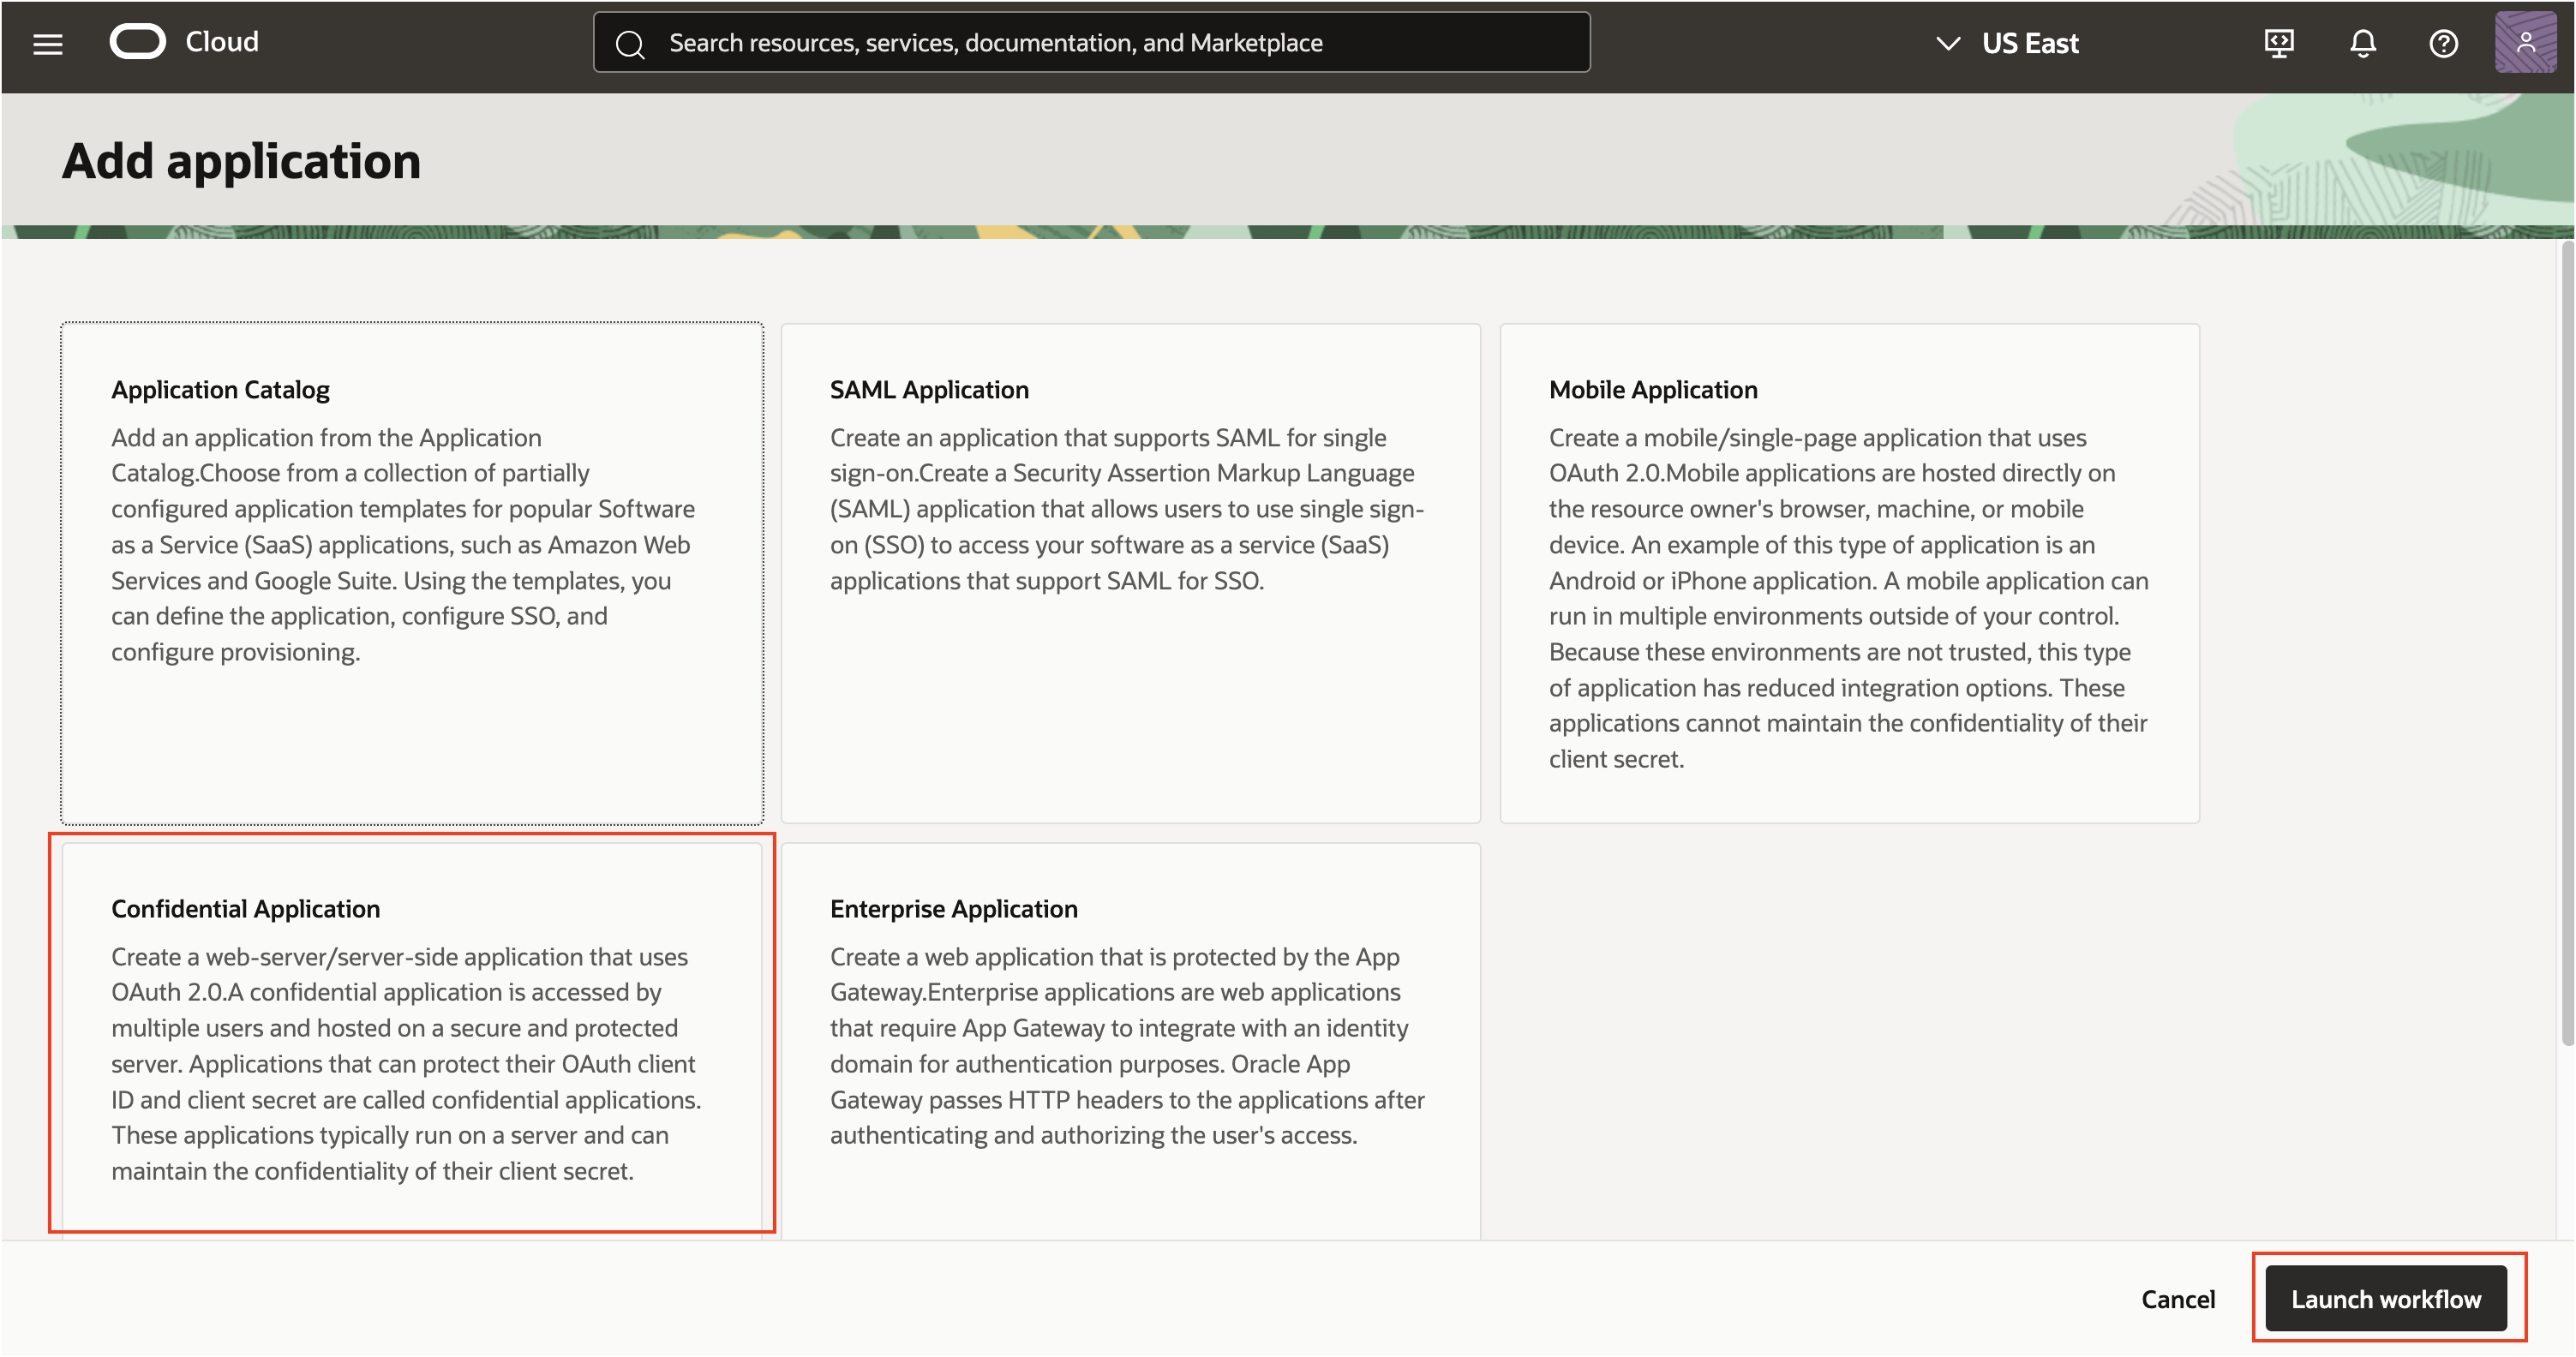
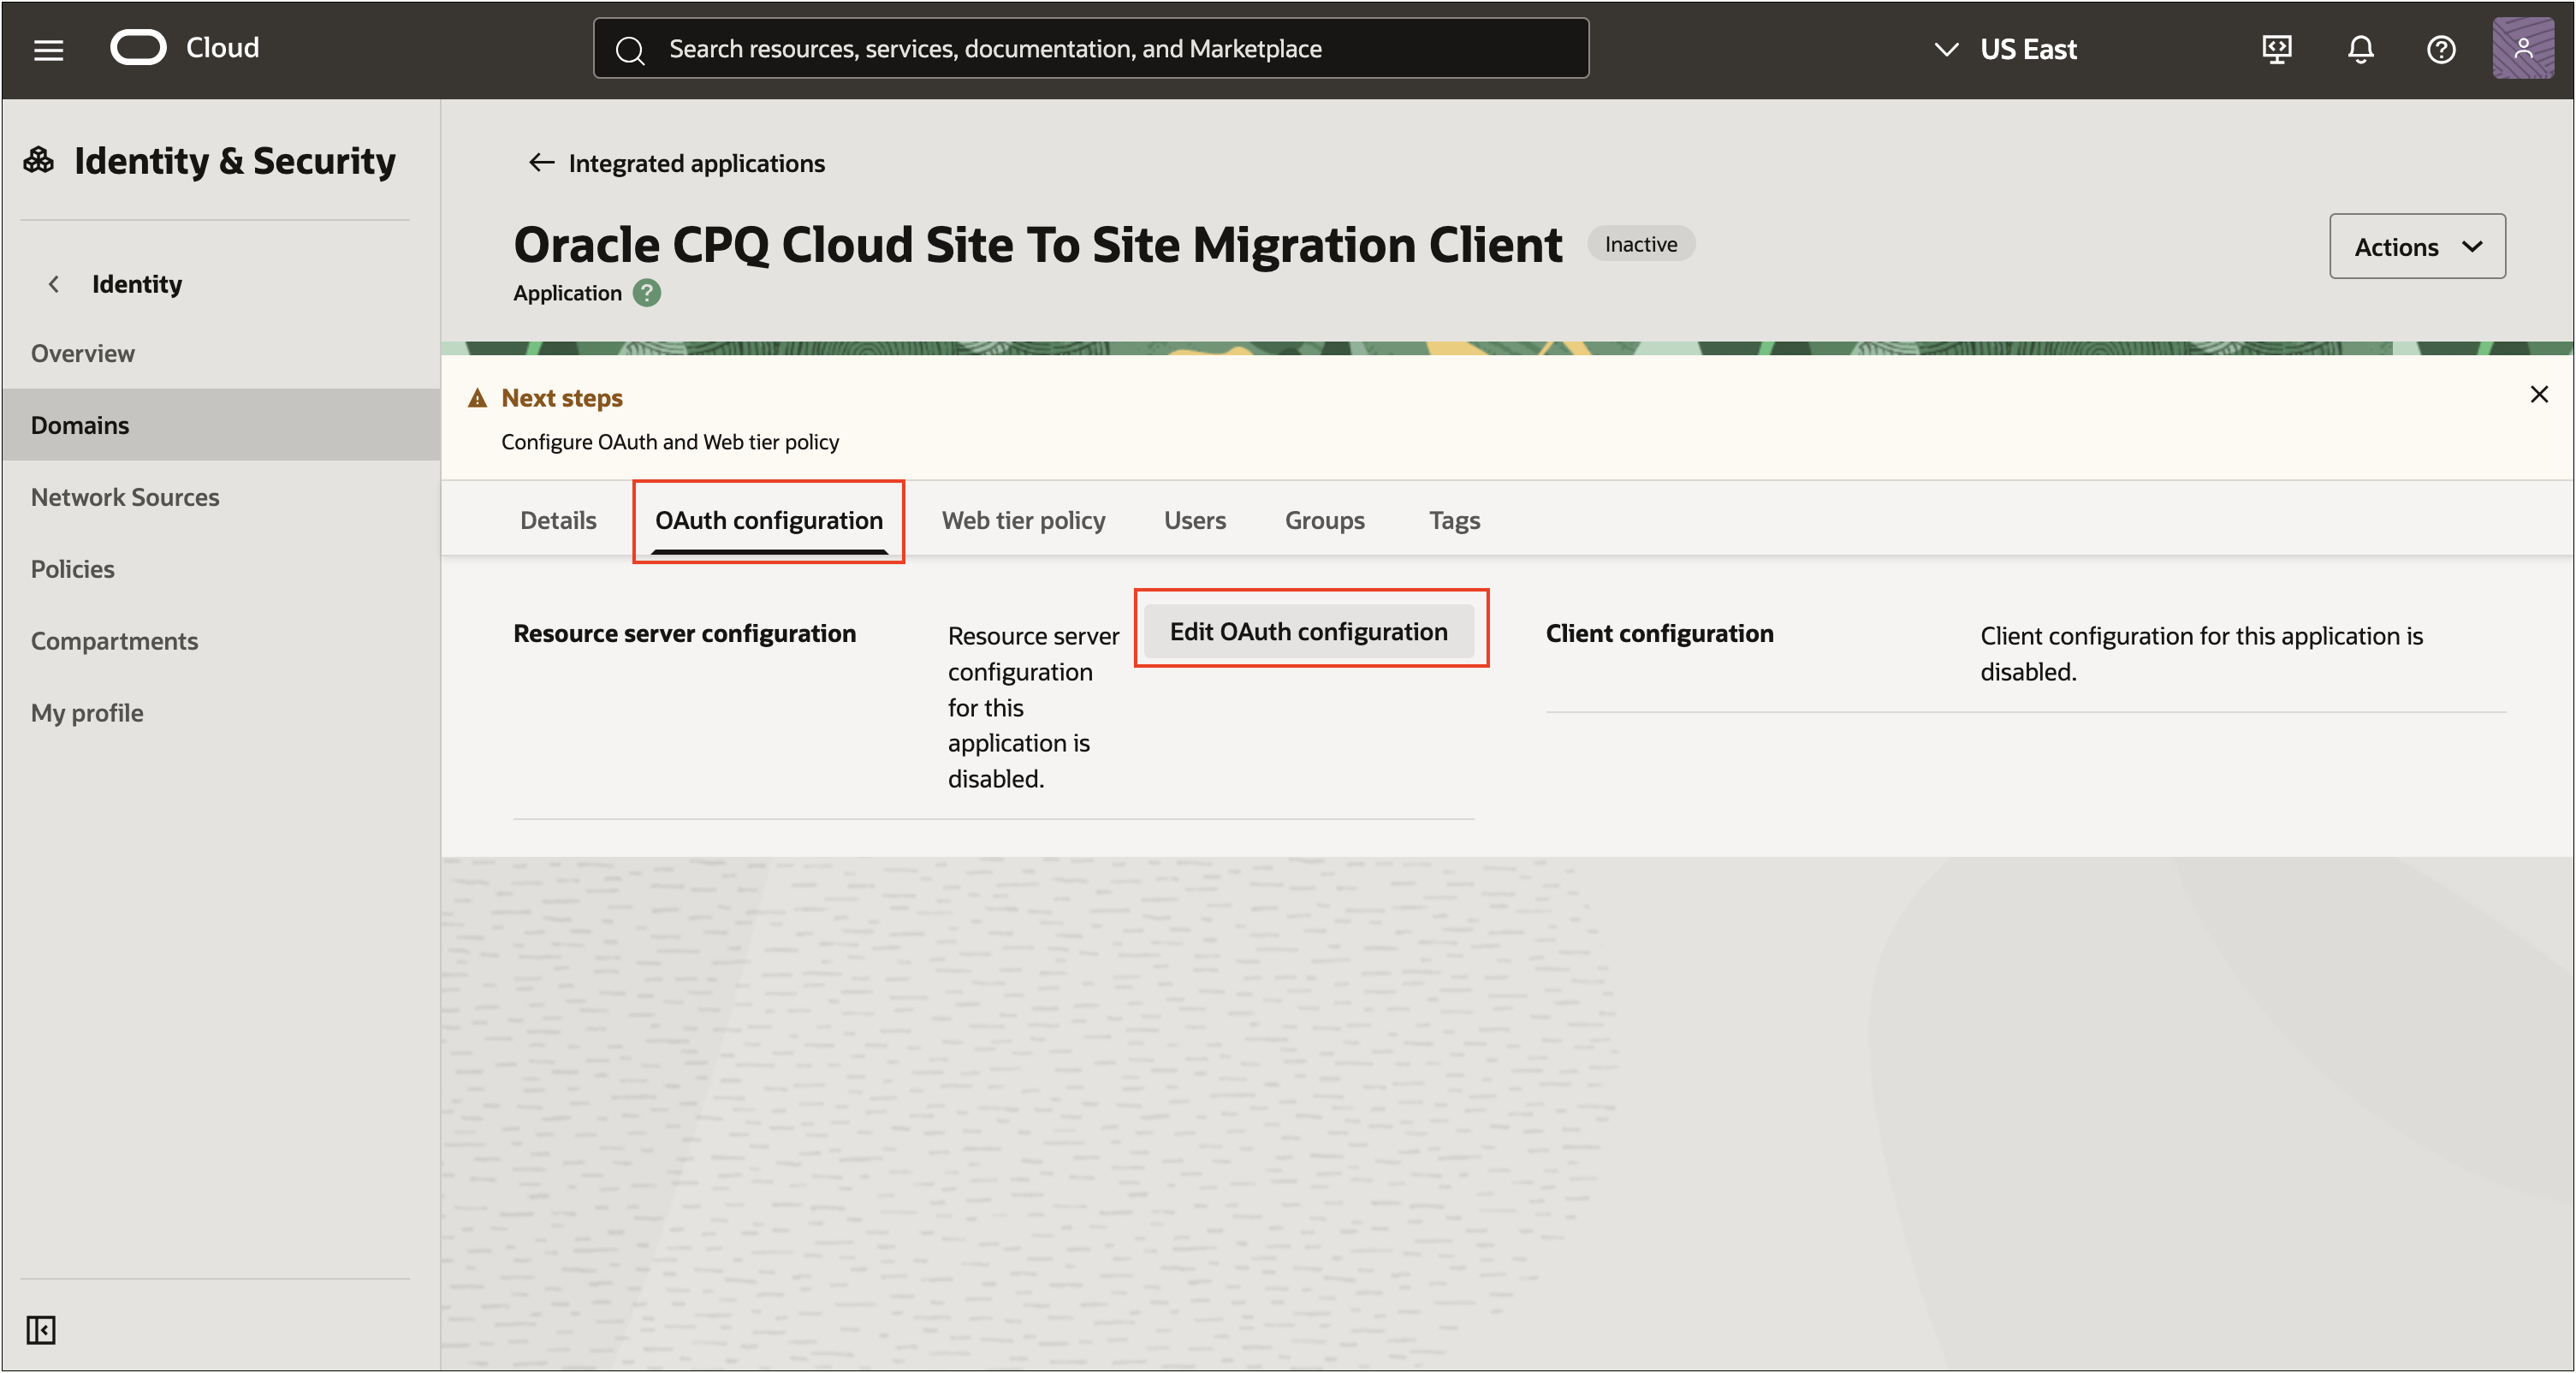
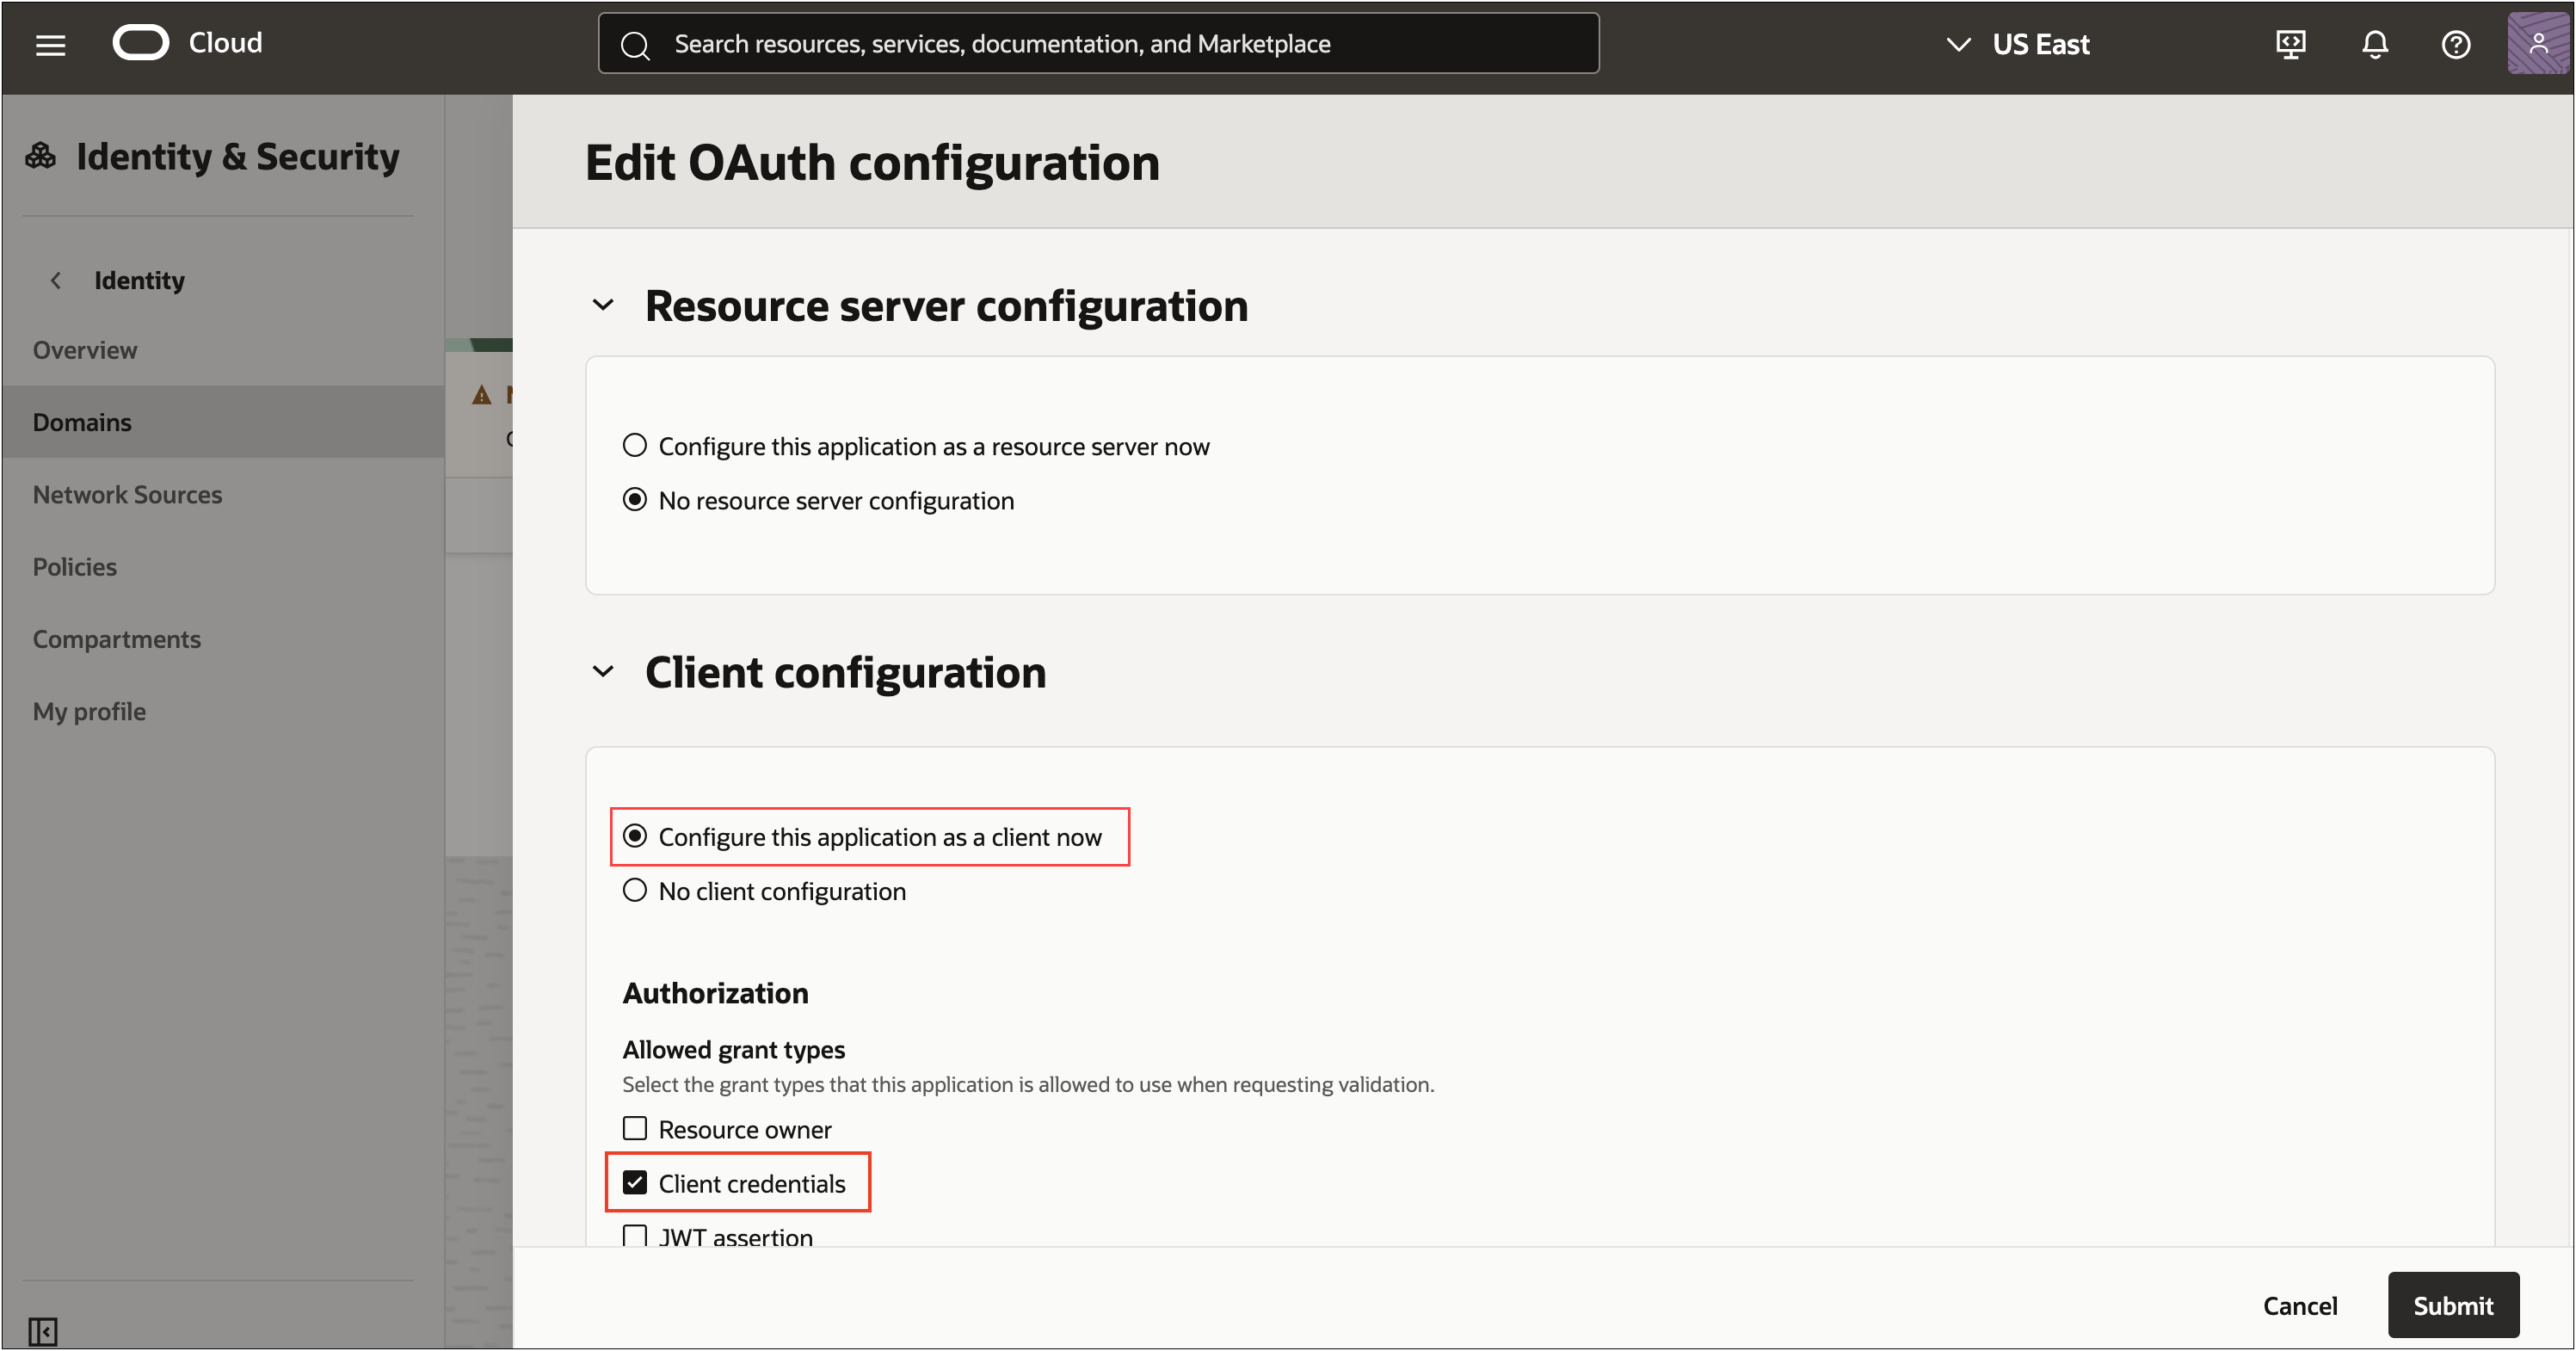
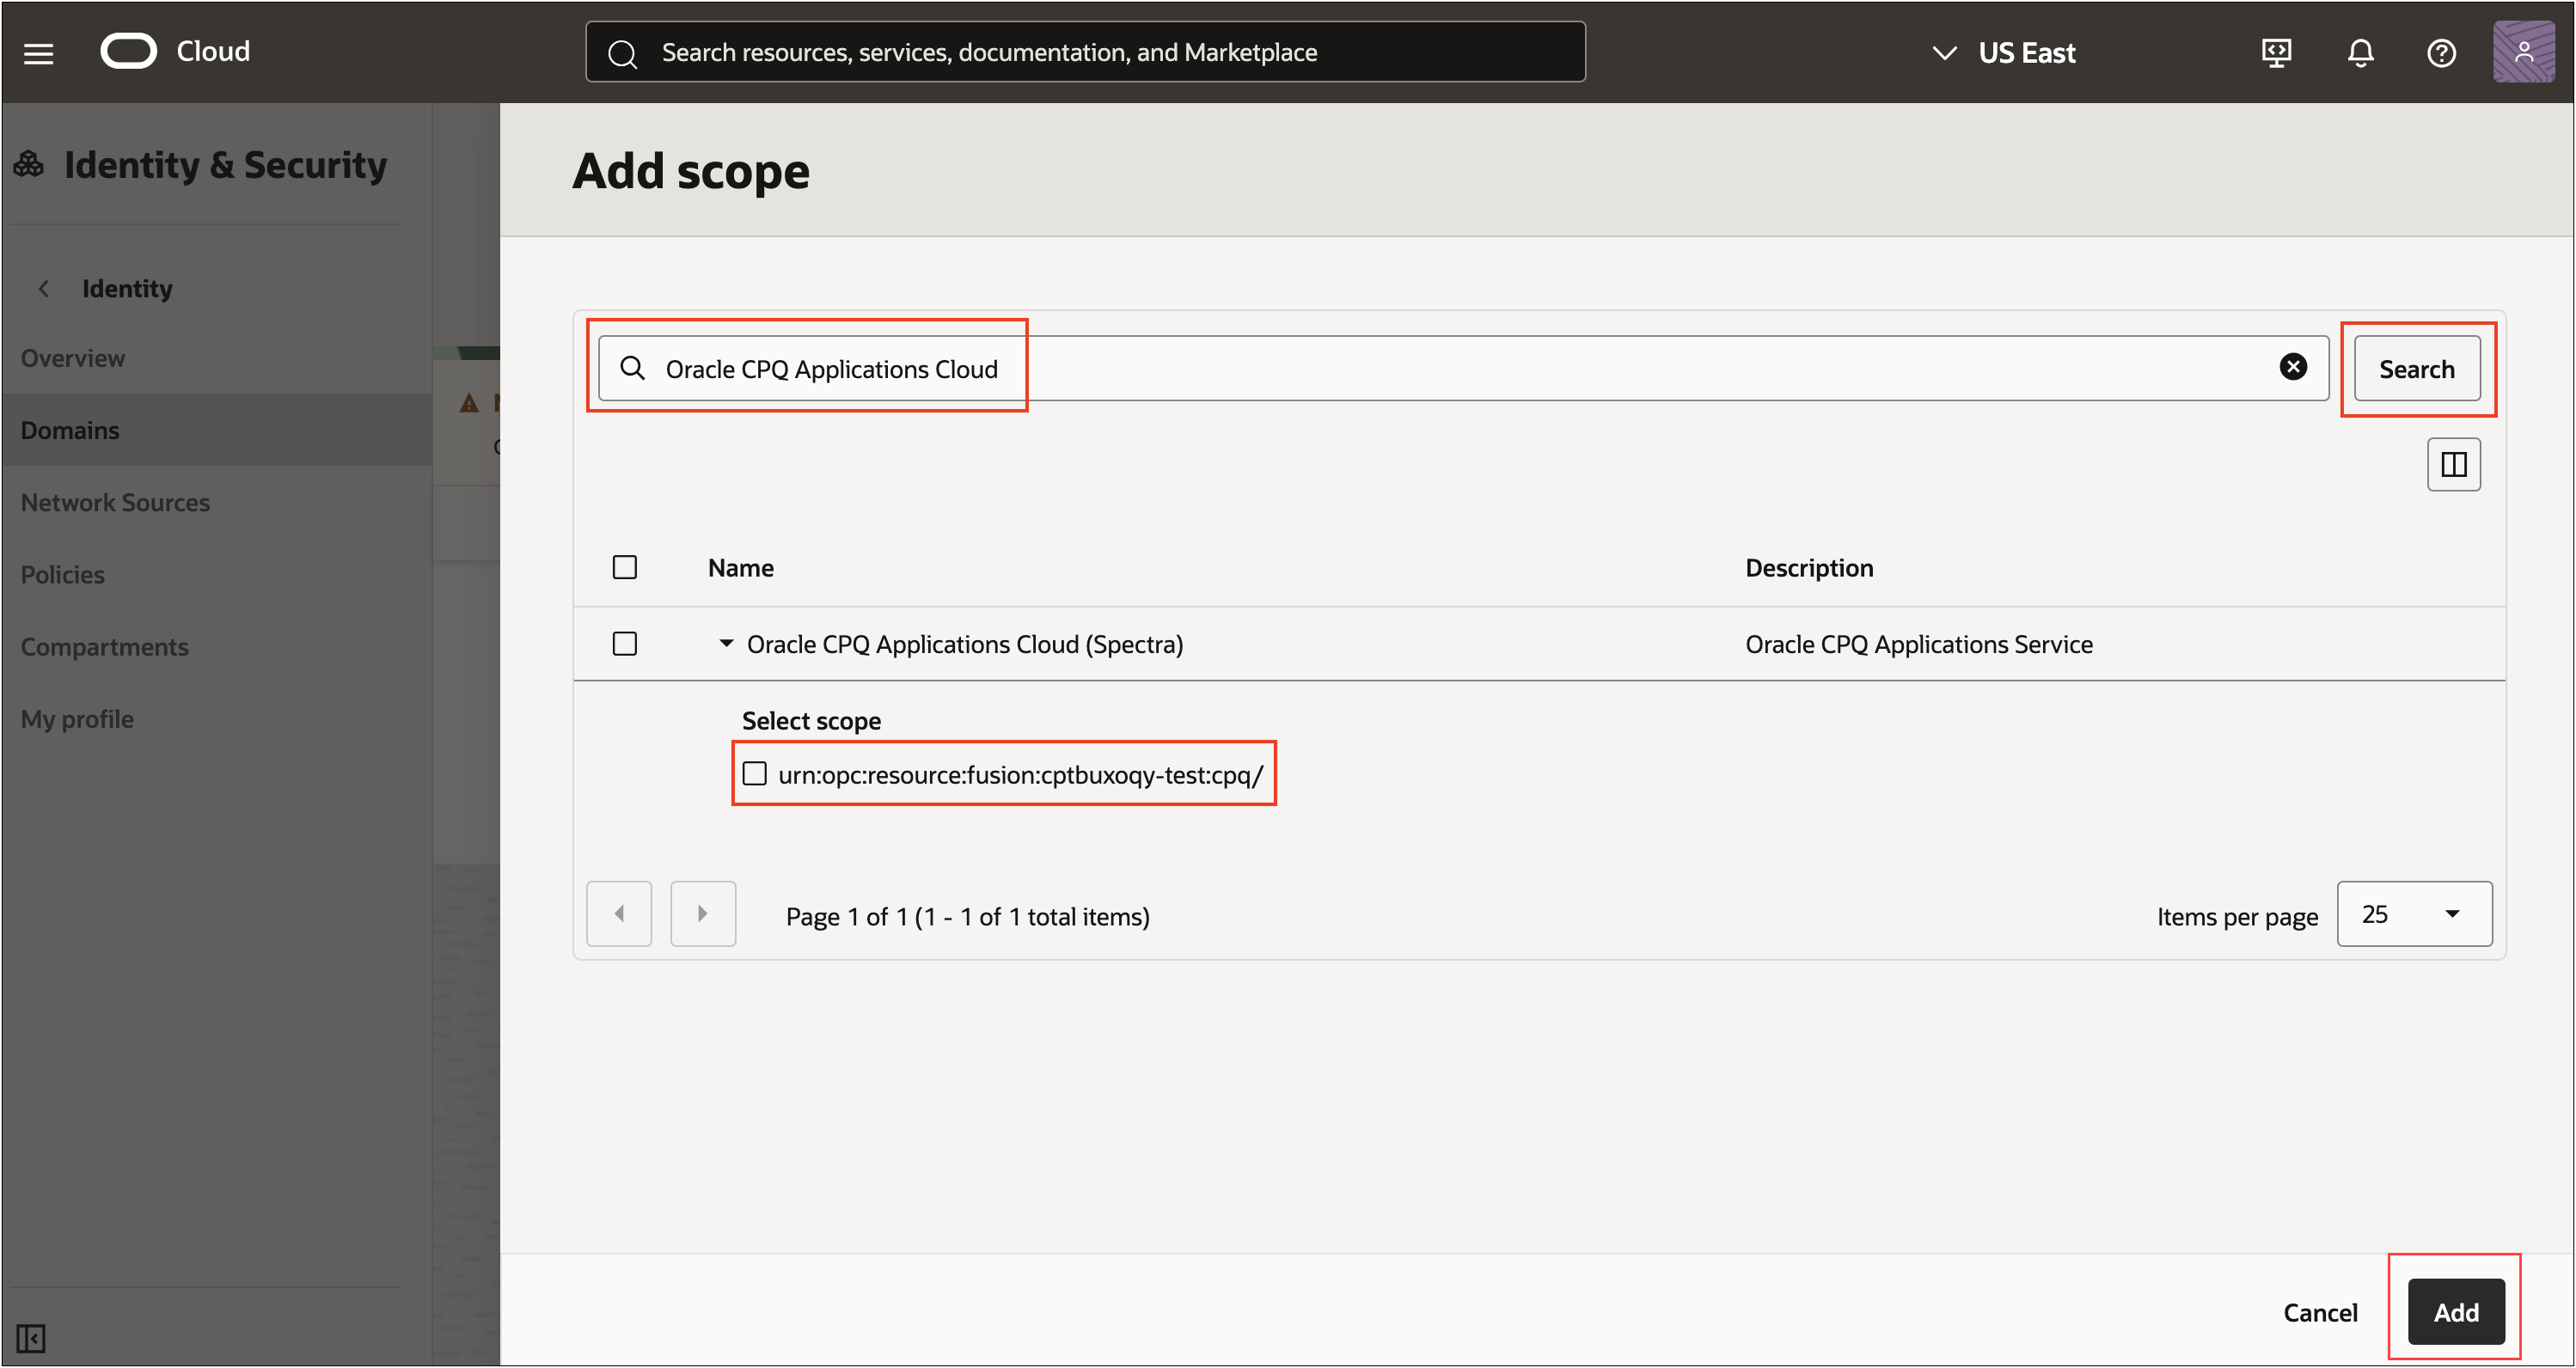
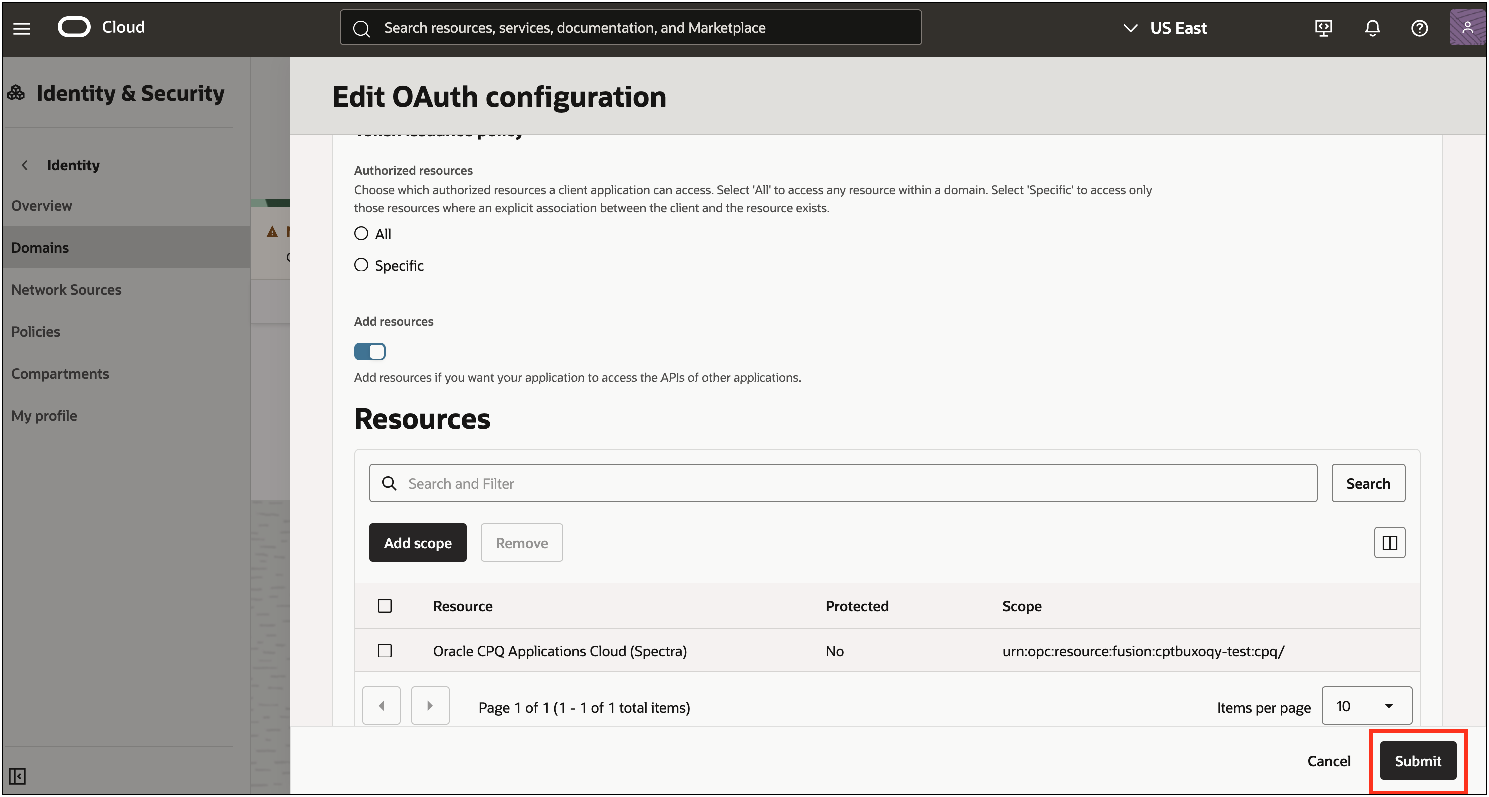
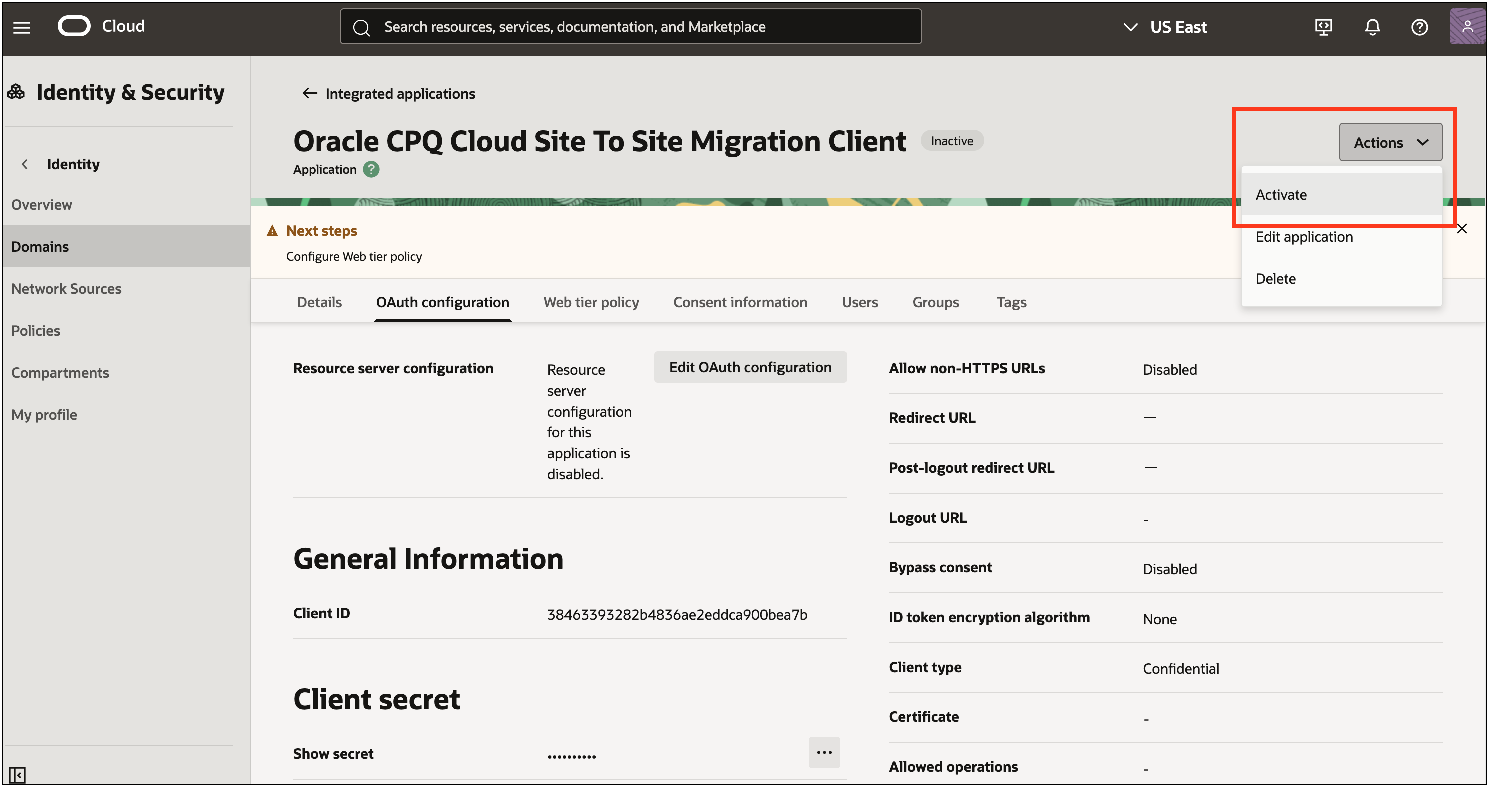
![]() Register an External Application Client in IAM for Oracle CPQ Running in Fusion
Register an External Application Client in IAM for Oracle CPQ Running in Fusion


NOTES
Refer to OpenID Connect Single Sign-On for Oracle CPQ with Oracle Identity Cloud Service Integration Guide for the steps to setup OpenID Connect SSO between Oracle CPQ Cloud & Oracle Identity Cloud Service (IDCS).


