Overview
Performance Management provides a collection of features to increase Oracle CPQ site stability and performance.
![]() Access During Extremely High Loads
Access During Extremely High Loads
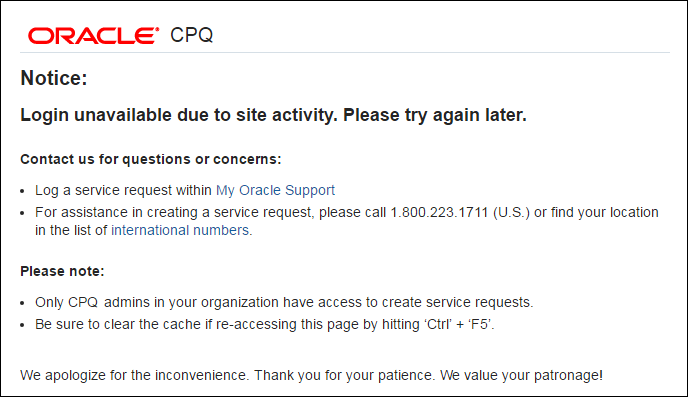
To keep environments running during extremely high loads, otherwise known as "Overcrowded Mode", the Oracle CPQ site temporarily prevents users, integrations, and BML URL access functions from creating new sessions. During this restriction period, the timeout of idle sessions is reduced to ensure active users can complete their Transactions. Users will receive the following message if login is unavailable during an Overcrowded Mode.
When a site reaches its threshold, both service users and users already logged in can still access the site.
During the migration process, target sites cannot connect to source sites that are in "Overcrowded Mode".
When the site is in "Overcrowded Mode", the following occurs:
- Inbound REST and SOAP calls are blocked. The exception is when the call is a SOAP V1 call that is using a session generated prior to the site entering "Overcrowded Mode".
- Responses from eSignature vendors will fail. The site receives the responses via REST.
- Proxy log in and logout will not work as both of these operations generate sessions.
- Quick registration accounts cannot be created.
Note: Application Administrators can access the site during Overcrowded mode to enable site administrators to address performance issues.
![]() Performance Log Overcrowded Events
Performance Log Overcrowded Events
Oracle CPQ logs an event in the Performance Log when a site is low on resources and enters or exits "Overcrowded Mode".
To view the Performance Log navigate to: Admin > Developer Tools > Performance Log.

![]() Timeouts for BML URL Access Functions
Timeouts for BML URL Access Functions
The URL Access functions contain an optional timeout parameter. The timeout is in milliseconds and overrides the BML URL Function Timeout. In the event of a timeout, the output of each of the URL Access Functions is as follows:
- urldatabypost: If the optional "returnErrorResponse" parameter is set to "true", an error message is returned.
- urldata: An error message is returned with a status code.
- urldatabyget: An error message is returned.
- urldatabypostasync: If the optional "returnErrorResponse" parameter is set to "true", an error message is returned.
- urlmultipartbypost: An error message is returned.
Refer to URL Access for more information on these BML functions.
Beginning in 2017 R1, users cannot loop over line items when they use an Advanced function in new sub-document attribute defaults. Previously created default Advanced functions remain unchanged. If administrators uncheck the sub-document attributes in the Variable Name for (Line Item) tab, the associated checkboxes are removed on Save.
Similarly, administrators cannot create line item loops in sub-document Commerce rules. This applies to Commerce rules that have Advanced conditions or Advanced actions. Existing Advanced Commerce rule functions will not change. If administrators uncheck the sub-document attributes associated with a sub-document Commerce rule using the Variable Name for (Line Item) tab, the associated checkboxes are removed on Save.
![]() Preventing Advanced Line Default Looping
Preventing Advanced Line Default Looping
Beginning in 2017 R1, the "Run Scripts Once for All Line Items" property will be set to "true" to resolve performance issues related to unnecessary looping on the Advanced line result. If "Run Scripts for all Line Items" is set to "false", the Advanced line default will run once for each line added to the Transaction, resulting in poorer performance compared to running once for all line items.
- When the "Run Scripts Once for All Line Items" property is set to "true", the related option is no longer visible on the sub-document properties page.
- The "Run Scripts Once for All Line Items" property is set to "true"
- For new customers
- For existing customers who update to 2017 R1
Administration
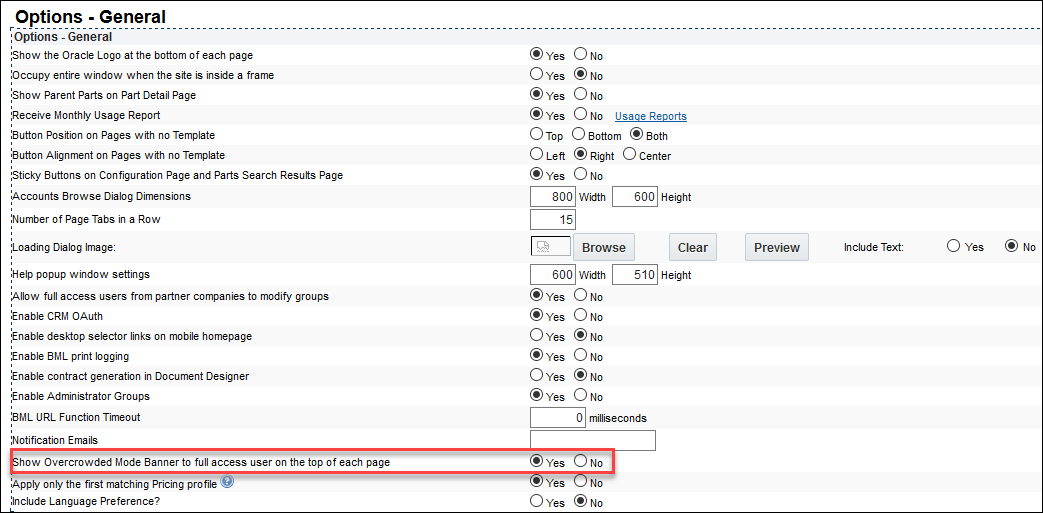
An Overcrowded Mode banner can be displayed at the top of each page for FullAccess users while the system is in "Overcrowded Mode". Beginning in Release 18C, Administrators can enable or disable the Overcrowded Mode banner display.

The General Site Options page includes a Show Overcrowded Mode Banner to full access user of the top of each page option that allows administrators to enable or disable the Overcrowded banner display.
Complete the following steps:
-
Navigate to the
 General Site Options page.
- Click Admin to go to the Admin Home page.
-
Click General Site Options in the General section.
The Options - General page opens.
- Click Yes to enable or No to disable the banner display.
![]() Email Notifications for Overcrowded Events
Email Notifications for Overcrowded Events
Email notifications are sent when a site enters or exits "Overcrowded Mode". Beginning in Release 18B, a timestamp is included to indicate when a site enters or exits Overcrowded mode. The timestamp, which corresponds to the site server time, allows administrators to identify the Overcrowded mode time-frame. Beginning in Release 18D, resource percentage and threshold setting percentage performance details are added to notification emails that are sent when a site enters or exists Overcrowded Mode.
The following are examples of the performance-related details provided in email notifications, for Release 18D and later, when entering and exiting Overcrowded Mode. Email text varies slightly depending on the specific event and status.
![]() Example Email Content When Entering Overcrowded Mode
Example Email Content When Entering Overcrowded Mode
Email Subject: Production Site sitename entered at 7:09 AM CST with 93%
Email Body: Production Environment sitename has gone into overcrowded mode due to system resources at 7:09 AM CST. Value was 93% against threshold of 95%. New logins will not be allowed for the duration of the event.
![]() Example Email Content When Exiting Overcrowded Mode
Example Email Content When Exiting Overcrowded Mode
Email Subject: Overcrowded State: Production Site sitename exited at 7:39 AM CST after 30 minutes with 98.88%
Email Body: Production Environment sitename has left overcrowded mode and is now in ordinary operating mode at 7:39 AM CST after 30 minutes. Value was 98.88% against threshold of 97%. All logins are allowed.
The General Site Options page includes a Notification Emails option that allows administrators to specify the email addresses for Overcrowded Mode notifications.
Complete the following steps:
-
Navigate to the
General Site Options page.- Click Admin to go to the Admin Home page.
-
Click General Site Options in the General section.
The Options - General page opens.
- Enter your email address in the Notifications Emails field.
- Click Apply.
![]() Set the Default BML URL Access Function Timeout
Set the Default BML URL Access Function Timeout
Defined in milliseconds, this timeout value serves as the default timeout threshold for any URL Access function making an external call when the timeout parameter is not used. This timeout is applicable to the following URL Access functions:
- urldata
- urldatabyget
- urldatabypost
- urldatabypostasync
- urlmultipartbypost
Complete the following steps:
-
Navigate to the
General Site Options page.- Click Admin to go to the Admin Home page.
-
Click General Site Options in the General section.
The Options - General page opens.
- Enter the BML URL Function Timeout value.
- Click Apply.
![]() Set Integration XSL or Middleware Integration Timeouts
Set Integration XSL or Middleware Integration Timeouts
Administrators can set a timeout period that defines how long an integration XSL (e.g. Integration Cloud Service, Oracle Sales, Salesforce, Oracle On Demand), or a middleware integration runs before timing out. By default, Oracle provides a timeout of 5 seconds for all integration calls.
Complete the following steps:
-
Navigate to the
Integrations page.- Click Admin to go to the Admin Home Page.
-
Click Process Definition in the Commerce and Documents section.
The Processes page opens.
-
For the applicable Commerce Process, select Integration from the Navigation drop-down menu, then click List.
The Integrations page opens.
-
Select the name of the integration for which you are setting the timeout period.
The Edit Integration page opens.
-
In the Timeout field, enter a timeout for the integration. The timeout is defined in milliseconds.

- Click Apply.
When the integration XSL or middleware integration reaches the timeout period, the integration times out on the site and fails. Administrators can choose whether actions continue when the timeout occurs.
![]() Define an Action for Integration XSL or Middleware Integration Timeouts
Define an Action for Integration XSL or Middleware Integration Timeouts
Administrators have the option of allowing an action to execute when an integration XSL or a middleware integration times out. When administrators select the Execute Action If Associated Integrations Timeout checkbox, the action continues regardless of any associated integration timeout. A warning message displays to the end user, and Oracle CPQ logs information about the integration that timed out.
Complete the following steps:
-
Navigate to the
Action List page.- Click Admin to go to the Admin Home Page.
-
Click Process Definition in the Commerce and Documents section.
The Processes page opens.
-
For the applicable Process, select Documents from the Navigation drop-down,
then click List.The Document List page opens.
-
For the main document, select Actions from the Navigation drop-down menu,
then click List.The Action List page opens.
-
Select the link associated with the Action Name to execute when the integration XSL or middleware integration times out.
The Admin Action page opens.
-
Select the Execute Action If Associated Integrations Timeout checkbox.

- Select the Integration tab.
-
Select the Integration to associate with the action from the Integration List, then click
 to move the item to the Selected Integration list.
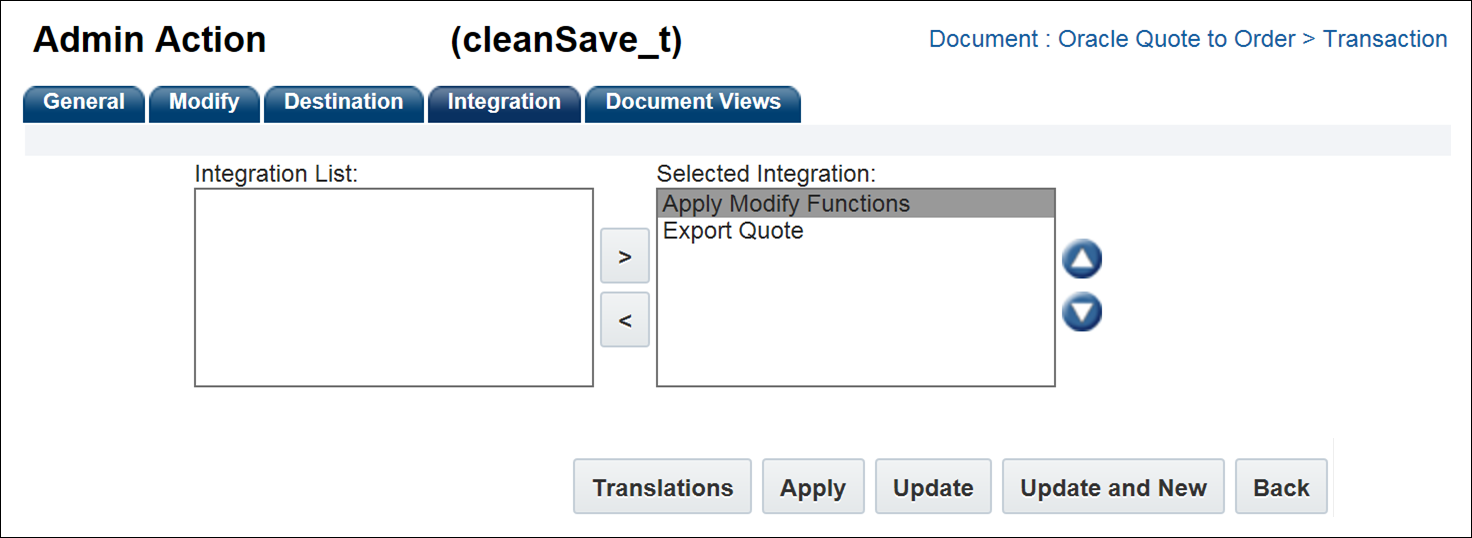
- Click Apply.
When the integration XSL or middleware integration times out, the Modify actions will execute.


