Document Engine & XSL
Overview
The Document Engine and XSL work hand-in-hand to allow you to create your desired document output.
The Document Editor reduces the need for writing custom XSL code to produce fully customized and branded commerce documents. If you need to further customize documents, however, you can use custom XSL code.
XSL code is used in different section of the document, for different results.
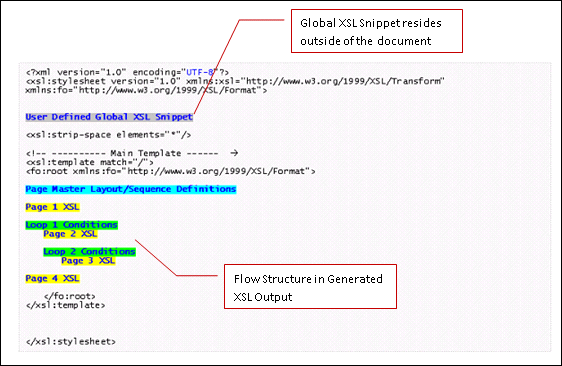
A document can contain the following types of custom XSL:
In the Document Engine, select Edit Global XSL Snippet in the Document Application panel drop-down.
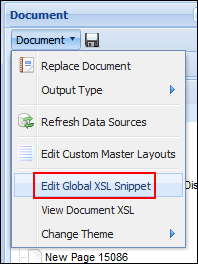
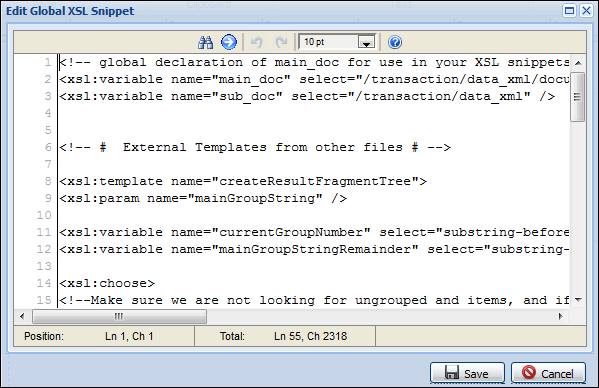
The Edit Global XSL Snippet dialog box appears.
-
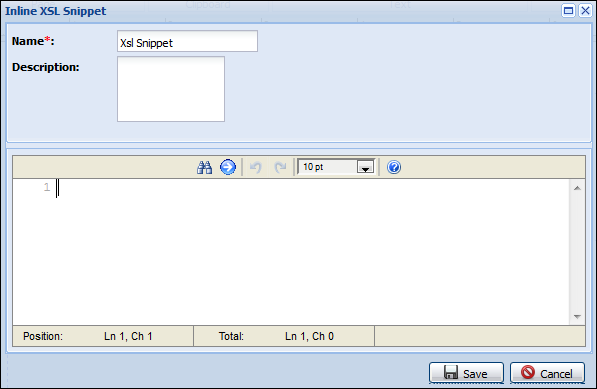
InLine XSL Snippet
An inline XSL Snippet is custom XSL that can be embedded within a page.
Navigate to the Home tab and click Insert Custom Code Snippet in the Quick Insert group.
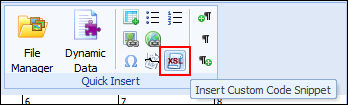
The Inline XSL Snippet dialog box appears.
-
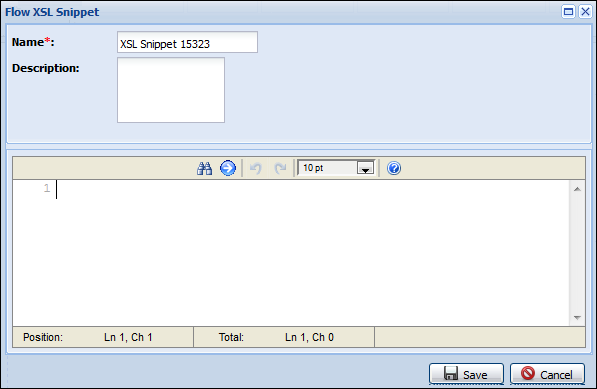
Flow XSL Snippet
The Flow XSL can be inserted between the pages. Adding or editing this type of custom XSL is independent of editing a page in the Page Design Mode.
Select Add XSL in the Document Application panel's Add drop-down.
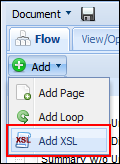
The Flow XSL Snippet dialog box appears.
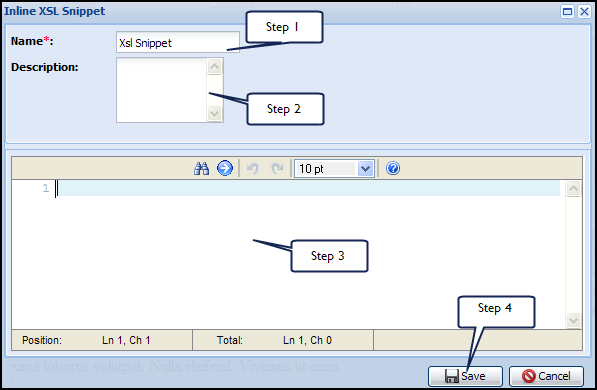
Use the XSL Code Window to add and edit custom XSL code within the Document Engine.
- Enter a Name.
- Enter a Description.
-
Write the custom XSL code in the editor.
Use the actions provided in the XSL Code Window tool bar to help in writing the code.
-
Click Save.
The XSL views created on this page can be used to format print forms, email forms, and change history logs. For more information, see the topic Printer-Friendly and History XSL Views.
-
Click Admin to go to the Admin Home Page.
-
Click Process Definition under Commerce and Documents.
The Processes page opens.
-
For the Commerce process to which you want to add the Printer-Friendly XSL converter, select Printer Friendly/XSL Views in the Navigation column for the Quote/Transaction and click List.
The Printer Friendly / History XSL Views page opens.
-
Click Add.
The Add/Update XSL View page opens.
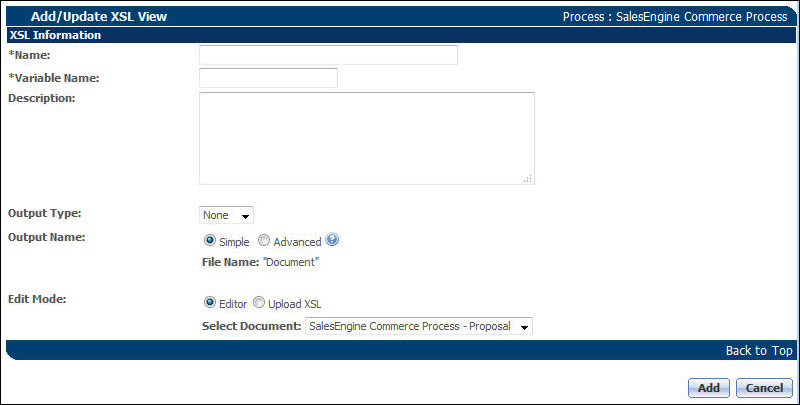
-
Enter a Name.
When you leave the Name field, the Variable Name field automatically populates. You can change the Variable Name if you want to.
The name you enter here is shown in this page and other administration pages, but is not shown to the end user.
- Select an Output Type:. The options are:
- XML
- RTF
- DOCX
- XSL
- HTML
For a Document Engine document template, .RTF, .DOCX, and .PDF are the recommended outputs. - If you select PDF, the Is PDF Read-Only: option appears. Check the box to make the generated PDF read-only.
- Select an Output Name:.
- Select Simple if you want the output document to always have the name Document.
- Select Advanced and then select an attribute whose value will dynamically name the output.
This option is available on any user-created document that is generated through XSL Views. Administrators can only apply this feature on Quote-level Text Attributes.
Example Use Case: Sales users can distinguish documents by their file name, if each file name has the Quote Number in it.
- Select an Edit Mode:
- Editor: Select this option if you are using the Document Engine. From the list of deployed documents, choose the one that you want to link to the XSL view.
Upload XSL: Select this option to upload a custom XSL file.
Click Browse to select a file from your local system, using the File Upload dialog box.
If you upload a custom XSL file, it must be written in the same XML version as the other XML files in Commerce.
-
Click Add or Update to save the XSL view.
Use the Printer Friendly / History XSL Views page to edit and preview your document output
-
Click Admin to go to the Admin Home Page.
-
Click Process Definition under Commerce and Documents.
The Processes page opens.
- For the Commerce Process to which you want to edit or preview the XSL-enhanced document, select Printer Friendly/XSL Views in the Navigation column and click List.
The Printer Friendly / History XSL Views page opens.
-
Click the name of the XSL View Name you want to edit or preview.
The Add/Update XSL View page opens.

- Click Display File to preview the XSL file.
- Enter a Transaction ID to preview how the XSL file formats the actual data for Document, History, Complex Conditional Templates, Document XML, and History XML.
For more information, see the topic Finding the Transaction ID.
- Click Apply to apply the changes made and refresh the page. Click Update to save the changes and go back to the Printer Friendly / History XSL Views page. Click Back to go back without saving.
DOCX documents are not available for use on iPad. It is possible to view RTF files if the file has been emailed to someone via an Email action. The steps below use the build-in mail application, Mail, which is standard on the iPad.
- Go to the App Store and download the free app doctape.
- Go to Mail and open the e-mail containing the document you wish to view.
- Press and hold the attachment icon until a box pops up containing the options ‘Quick Look’ and ‘Open in “doctape”’.
- Select ‘Open in “doctape”’. The app will upload the attachment then take you to a list of all documents opened through doctape. The one you just uploaded will be at the top.
-
Select the document you want to open.
In the Mail app, if you click the attachment or select Quick Look through the pop-up options, a new screen will open but it will just be a blank white page.
If this happens, click the Action button in the upper-right corner (it looks like a box with a curved arrow pointing to the right) and then select ‘Open in “doctape”’.Disclaimer: This is what we tested with. We are not responsible for the functionality of any 3rd party application.
Administration
On the Printer Friendly/History XSLs, there is a bullet on existing XSLs that lets you choose between old and new XML version. If you accidentally select “New” and Apply, then you lose the ability to use the Old XML for that specific view. Fortunately, with a Web Developer tool you can get the option back:
- Edit the HTML.
- Input the option into the form.
-
Insert the following HTML into the form below the table row containing Edit Mode:
<tr class=“bgcolor-form”>
<td> </td>
<td>
<div id=“preSuf” style=“display: block;”>
<table>
<tbody><tr class=“bgcolor-form”>
<td class=“form-label” nowrap=“true”>
XML Version:
</td>
<td class=“form-input” colspan=“3”>
Old
<input value=“0” class=“form-input” name=“xml_version” checked=“true” type=“radio”>
New
<input value=“1” class=“form-input” name=“xml_version” type=“radio”>
</td>
</tr>
- Click Apply to restore the functionality.
![]() Setting the currency code dynamically
Setting the currency code dynamically
Define an XSL variable when using a Commerce quote-level Attribute to dynamically set the currency code for all currency-formatted data in your document.
- Define the
$main_docvariable in the Global XSL Snippet as shown in the section Global XSL Snippet . -
On the next line of the Global XSL Snippet, insert the following code:
<xsl:variable name=“currencyCode”><xsl:value-of select=“$main_doc/outputCurrency_quote”/></xsl:variable>
outputCurrency_quoteis a commerce attribute holding the currency code. - Select Currency as the formatting within the Expression Editor.
-
Place
$currencyCodedirectly into the currency-code field instead of entering the actual currency code.This is standard in the Base Template. Familiarize yourself with what is included by default in the Global XSL Snippet.
If applying currency formatting in Global XSL or in snippets, calls can be great simplified by wrapping a thin layer around the BMI_universalFormatPrice template. The following template's (currencyValue) only parameter is formatting the number. It applies the same conversion rate, currency code, and other formatting options every time; the parameters do not need to be passed/set every time a currency is formatted.
<xsl:template name="currencyValue">
<!-- takes number parameter and performs rounding, adds appropriate currency separators and symbols -->
<xsl:param name="value" />
<xsl:variable name="numValue" select="number($value)" /> <!--validate input is a number, and fix sci notation -->
<xsl:variable name="decimalNum">
<xsl:call-template name="convertSciToNumString">
<xsl:with-param name="inputVal" select="$numValue"/> <!-- supposedly not necessary with number(), but done for safety-->
</xsl:call-template>
</xsl:variable> <!--xsl:value-of select="round($decimalNum*100.0) div 100.0"/-->
<xsl:choose>
<xsl:when test="$numValue = 'NaN'"><xsl:value-of select="$value"/></xsl:when> <!-- echo back the value arg if it's not a number -->
<xsl:otherwise>
<xsl:call-template name="BMI_universalFormatPrice">
<xsl:with-param name="price" select="$decimalNum" />
<xsl:with-param name="currency" select="$currencyCode" />
<xsl:with-param name="multiplier" select="$conversionRate" />
<xsl:with-param name="showCurrencySymbol">true</xsl:with-param>
</xsl:call-template>
</xsl:otherwise>
</xsl:choose>
</xsl:template>
The following template incorporates a call to convertSciToNumString. Adding this template to the Global XSL snippet ensures that scientific notation will not affect documents adversely.
<xsl:template name="convertSciToNumString">
<xsl:param name="inputVal" select="0"/>
<xsl:variable name="numInput">
<xsl:value-of select="translate(string($inputVal),'e','E')"/>
</xsl:variable>
<xsl:variable name="maxExp">
<xsl:value-of select="'0000000000000000000000000000000000000000000000000000000000
000000000000000000000000000000000000000000'"/></xsl:variable>
<xsl:choose>
<xsl:when test="$inputVal = '0'">0</xsl:when>
<xsl:when test="$inputVal = '0.0'">0.0</xsl:when>
<xsl:when test="$inputVal = ''"></xsl:when>
<xsl:when test="number($numInput)">
<xsl:value-of select="$numInput"/>
</xsl:when>
<xsl:otherwise>
<!-- ==== Mantisa ==== -->
<xsl:variable name="numMantisa">
<xsl:value-of select="number(substring-before($numInput,'E'))"/>
</xsl:variable>
<!-- ==== Exponent ==== -->
<xsl:variable name="numExponent">
<xsl:choose>
<xsl:when test="contains($numInput,'E+')">
<xsl:value-of select="substring-after($numInput,'E+')"/>
</xsl:when>
<xsl:otherwise>
<xsl:value-of select="substring-after($numInput,'E')"/>
</xsl:otherwise>
</xsl:choose>
</xsl:variable>
<!-- ==== Coefficient ==== -->
<xsl:variable name="numCoefficient">
<xsl:choose>
<xsl:when test="$numExponent > 0">
<xsl:text>1</xsl:text>
<xsl:value-of select="substring($maxExp, 1, number($numExponent))"/>
</xsl:when>
<xsl:when test="$numExponent = 0">1</xsl:when>
<xsl:otherwise> <!-- when numExponent < 0 -->
<xsl:text>0.</xsl:text>
<xsl:value-of select="substring($maxExp, 1, -number($numExponent) - 1)"/>
<xsl:text>1</xsl:text>
</xsl:otherwise>
</xsl:choose>
</xsl:variable>
<xsl:value-of select="number($numCoefficient) * number($numMantisa)"/>
</xsl:otherwise>
</xsl:choose>
</xsl:template>
-
Ensure that these are the first two lines of your Global XSL Snippet:
<xsl:variable name="main_doc" select="/transaction/data_xml/document[@document_var_name='quote_process']/" />
<xsl:variable name="sub_doc" select="/transaction/data_xml" />
This is standard in the Base Template. Become familiar with what is included by default in the Global XSL Snippet.
-
Add a Flow XSL Snippet when looping over Model Line Items using the Page Loop in the flow, using the following code.
<xsl:variable name="model_line" select="."/>
With this code, you always have an XPath ($model_line) with which to access configuration attributes for the current Model, even if the current Model is out of scope on the page(s) in the loop.
Use Cases
![]() Using a multi-select menu to attach PDFs to an output Document
Using a multi-select menu to attach PDFs to an output Document
Using a recursive template, it is possible to attach multiple PDFs to an output document, based on the user's selections in a multi-select menu.
Using the following method, which is site agnostic and optimized for a multi-language output, only one multi-select menu is required.
In the example, the value of the multi-select menu is used to construct the file's URL in the File Manager. The file format is [langaugeAbbreviation][MSM Variable Value].pdf.
-
Add the following code to the Edit Custom Master Layouts page in the Document Designer or Document Engine:
<fo:simple-page-master master-name="pdfPage" page-height="11in" page-width="8.5in" margin-top="0in" margin-bottom="0in" margin-left="0in" margin-right="0in">
<fo:region-body/>
</fo:simple-page-master>
<!-- Page sequence -->
<fo:page-sequence-master master-name="pdfPageSequence">
<fo:repeatable-page-master-alternatives>
<fo:conditional-page-master-reference master-reference="pdfPage" page-position="any"/>
</fo:repeatable-page-master-alternatives>
</fo:page-sequence-master> -
Add the following templates to the Global XSL Snippet:
<xsl:template name="printablePDF">
<!-- outputs a page with a background image from the URL passed
if URL is blank, this will output a blank page.  This is used to attach data sheets.  PDFs will output the full number of pages
These are generally stored in the file manager.  Use Edit Custom Master Templates in doc engine to modify master-ref pdfPageSequence-->
<xsl:param name="insertURL"/>
<fo:page-sequence content-width="95%" content-height="95%" background-image="{$insertURL}" background-repeat="paginate" master-reference="pdfPageSequence">
<fo:flow flow-name="xsl-region-body">
<fo:block><!--xsl:value-of select="$insertURL" /--></fo:block>
</fo:flow>
</fo:page-seqence>
</xsl:template>
<xsl:template name="genDataSheets">
<!-- this template breaks apart includeDataSheet_quote attribute and builds a file URL from each value.
NOTICE: menu value must match filename of PDF MINUS language prefix and file extension, which are appended here-->
<xsl:param name="sheetList" />
<xsl:param name="sheetLanguage" />
<xsl:variable name="delim">~</xsl:variable> <!--delimiter between values in includeDataSheet_quote, which is a multi-select menu-->
<xsl:variable name="fileExt">.pdf</xsl:variable> <!-- fileExt could be made into a parameter for outputting image pages, etc-->
<xsl:variable name="thisDataSheet">
<xsl:choose>
<xsl:when test="contains($sheetList, $delim)"><xsl:value-of select="normalize-space(substring-before($sheetList,$delim))" /></xsl:when>
<xsl:otherwise><xsl:value-of select="$sheetList" /></xsl:otherwise>
</xsl:choose>
</xsl:variable>
<xsl:if test="$thisDataSheet !=''">
<!-- Note: beware of file name/location or language changes - check file manager or go to url built here if data sheet is missing-->
<xsl:call-template name="printablePDF">
<xsl:with-param name="insertURL" select="concat('/bmfsweb/', $main_doc/site_quote, '/image/Proposal/', 'en', $thisDataSheet, $fileExt)"/>
<!-- !!!MD TODO: english-only data sheets until translated ones come in - then replace 'en' above with $sheetLanguage. -->
</xsl:call-template>
</xsl:if>
<xsl:variable name="rest" select="substring-after($sheetList,$delim)" />
<xsl:if test="$rest != ''">
<xsl:call-template name="genDataSheets">
<xsl:with-param name="sheetList" select="$rest" />
<xsl:with-param name="sheetLanguage" select="$sheetLanguage" />
</xsl:call-template>
</xsl:if> <!--xsl:if test="$rest = ''"></xsl:if-->
</xsl:template>
-
Create a custom XSL page in the Document Designer or Document Engine that calls the recursive template, passing the value of the multi-select menu, as well as the language with the following code.
<!-- This snippet will attach any data sheets selected (assuming the files reside in file manager -->
<!-- Note: see globalXSL snippet for template definition.  See also Custom Master Layout used by the template -->
<xsl:if test="$main_doc/includeDataSheet_quote != ''">
<xsl:call-template name="genDataSheets">
<xsl:with-param name="sheetList" select="$main_doc/includeDataSheet_quote" />
<xsl:with-param name="sheetLanguage" select="$main_doc/outputLanguage_quote" />
</xsl:call-template>
</xsl:if>
Use the Commerce Attribute site_quote to specify the site-specific portion of the file's URL within the File Manager.
![]() Attaching images in the document using the file attachment Attribute
Attaching images in the document using the file attachment Attribute
In the following example, an XSL Snippet is used to attach an image in the document. This image is dynamically uploaded to the Quote by the user using the file attachment Attribute.
<xsl:variable name="main_doc" select="/transaction/data_xml/document[@document_var_name='quote_process']"/>
<xsl:if test="string-length($main_doc/logo_quote) > 0">
<xsl:variable name="attachLogo" select="concat('http://', $main_doc/creatorCompany_quote, '.bigmachines.com/servlet/ImageServer?&file_type=cmAttachmentAttr&file_id=',$main_doc/logo_quote)"/>
<fo:block>
<fo:external-graphic src="{$attachLogo}" content-height="1.5in" height="1.5in"/>
</fo:block>
</xsl:if>
creatorCompany_quote is a Commerce attribute which has the value of lower Attribute, _system_supplier_company_name.
This is used to have relative path in the Document Designer or Document Engine.
logo_quote is the file attachment attribute used.
![]() Implementing toUpper & toLower
Implementing toUpper & toLower
You may want to make a String all uppercase or lowercase before performing comparisons or String operations. The following sample code shows a simple way to convert a String to all lowercase using toLower
<xsl:param name="strToConvert" />
<xsl:value-of select="normalize-space(translate($strToConvert,'ABCDEFGHIJKLMNOPQRSTUVWXYZÀÁÂÃÄÅÈÉÊËÌÍÎÏÑÒÓÔÕÖÙÚÛÜCC', 'abcdefghijklmnopqrstuvwxyzàáâãäåèéêëìíîïñòóôõöùúûücc'))" />
</xsl:template>
If the second and third parameters in "translate" are reversed, then this template becomes toUpper and the String converts to all uppercase:
<xsl:template name="toUpper">
<xsl:param name="strToConvert" />
<xsl:value-of select="normalize-space(translate($strToConvert, 'abcdefghijklmnopqrstuvwxyzàáâãäåèéêëìíîïñòóôõöùúûücc', 'ABCDEFGHIJKLMNOPQRSTUVWXYZÀÁÂÃÄÅÈÉÊËÌÍÎÏÑÒÓÔÕÖÙÚÛÜCC'))" />
</xsl:template>


