Overview
This topic provides maintenance tasks for the JET Data Tables, which were introduced in Oracle CPQ 20A.
Administration
Data Tables
There are two different ways to add Data Tables to CPQ: through manual entry or through an import. In this section, we will discuss how to manually add a table, its schema, and its data. For more information on importing, see the topic Import & Export of Data Tables.
![]() Add a New Data Table Watch Video
Add a New Data Table Watch Video 
Perform the following steps to add a new data table with columns.
-
 Navigate to the Data Table Administration page .
-
Click Admin to go to the Admin Home Page.
-
Click Data Tables in the Developer Tools section.
The Data Table Administration page opens.
-
-
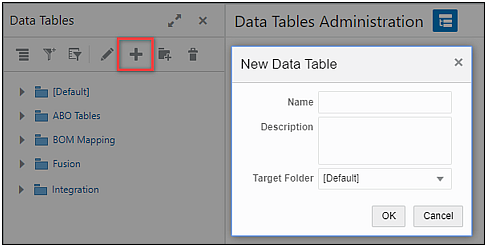
Click the "Add Data Table" icon.
-
Enter the Name, Description, and select the Target Folder.
Data table names can only contain alpha-numeric values and underscores. White space is not accepted. -
Click OK.
The new Data Table appears in the folder list beneath the selected parent folder and the right panel now displays the title of the table.
Before you can add data, you need to set the schema of the table. -
Select View > Columns to choose which columns to display when you are looking at Data Table schema.

-
Click the "Add" icon.
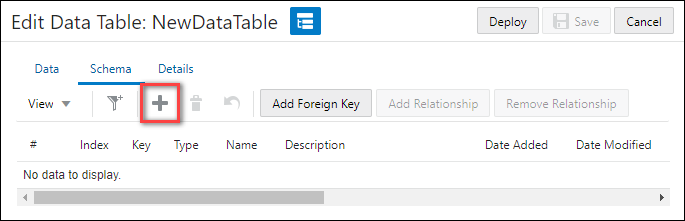
A new row will appear in the schema table.
-
Enter a column Name and Description.
Column names can only contain alpha-numeric characters and underscores. White space is not allowed.
-
Select the data Type of the column: Integer, Float, String, or Secure.
- The Secure Data Type is only available for new columns. The Secure Data Type option is not available when modifying existing columns.
- Refer to Secure Data Table Columns for additional information.
-
(Optional) Select the Index option if you will be using BMQL statements.
- By selecting an index, performance will be improved when you are using the column in a "where" clause.
- Refer to Data Table Indexing for additional information.
-
(Optional) Select the Key option to identify which Natural Keys will be unique identifiers.
- Natural Keys allow administrators to provide only changed records in bulk upload files that modify Data Table data.
- Refer to Natural Keys for additional information.
- Repeat steps 6 - 10 to add more columns.
- Click Save.
![]() Add a Data Table Column Watch Video
Add a Data Table Column Watch Video
Complete the following steps to add a Column to an existing Data Table.
- Navigate to the Data Table Administration page .
-
Click Admin to go to the Admin Home Page.
-
Click Data Tables in the Developer Tools section.
The Data Table Administration page opens.
-
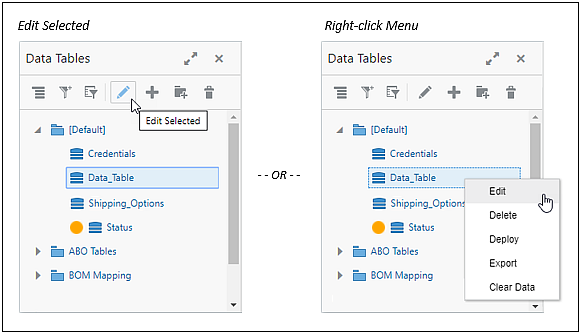
Open the applicable Data Table.
- Double-click on the data table folder or the data table
- Select the data table and then click the "Edit" icon, or
- Right-click on the data table and the select "Edit" from the pop-up menu.
-
Click the "Add" icon.
A new row will appear in the schema table.
-
Enter a column Name and Description.
Column names can only contain alpha-numeric characters and underscores. White space is not allowed.
-
Select the data Type of the column: Integer, Float, String, or Secure.
- The Secure Data Type is only available for new columns. The Secure Data Type option is not available when modifying existing columns.
- Refer to Secure Data Table Columns for additional information.
-
(Optional) Select the Index option if you will be using BMQL statements.
- By selecting an index, performance will be improved when you are using the column in a "where" clause.
- Refer to Data Table Indexing for additional information.
-
(Optional) Select the Key option to identify which Natural Keys will be unique identifiers.
- Natural Keys allow administrators to provide only changed records in bulk upload files that modify Data Table data.
- Refer to Natural Keys for additional information.
- Repeat steps 3 - 7 to add more columns.
- Click Save.
![]() Populate a Data Table Watch Video
Populate a Data Table Watch Video
Once you have set the schema for your table, you can begin to add data.
-
Navigate to the Data Table Administration page .
-
Click Admin to go to the Admin Home Page.
-
Click Data Tables in the Developer Tools section.
The Data Table Administration page opens.
-
-
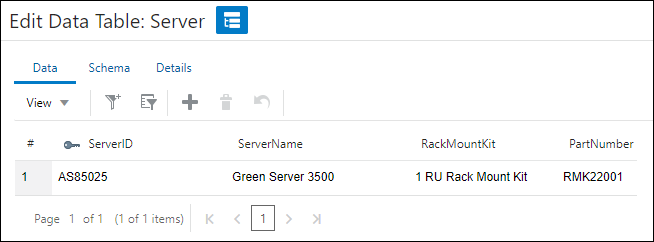
Click the Data tab in the Edit Data Table panel.
The columns you created in the Schema tab now appear on the Data Table. -
Click the "Add Row" icon.
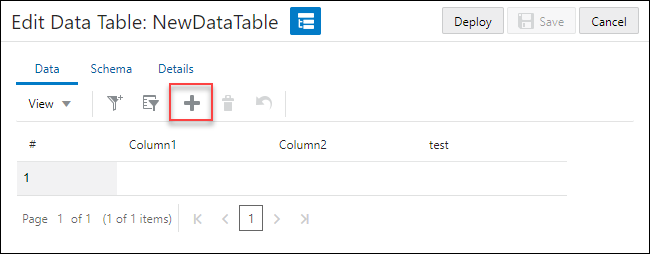
A blank row appears.
-
Enter values for each column.
 You can either click into each field or you can use Tab to move quickly through the fields.
 - Repeat Steps 3 and 4 until your table is complete.
- Click Save to save your changes.
- To quickly populate tables, add multiple rows before entering data values.
-
The first column of a Data Table can be populated with an empty string. A row with data must follow.
![]() Deploy Data Tables Watch Video
Deploy Data Tables Watch Video
The final step to manually adding a table is to make sure it is deployed.
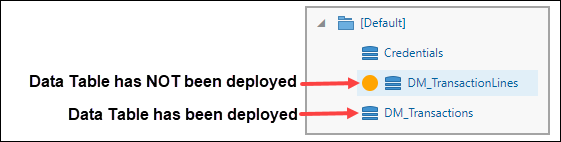
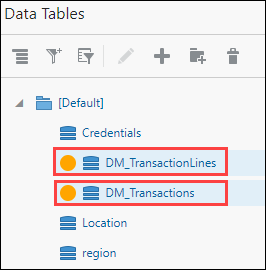
The names of tables that have been added or modified and are not deployed are proceeded by an orange status icon.
Complete the following steps to deploy a single Data Table.
-
Navigate to the Data Table Administration page .
-
Click Admin to go to the Admin Home Page.
-
Click Data Tables in the Developer Tools section.
The Data Table Administration page opens.
-
-
To deploy a single Data Table, select one of the following methods.
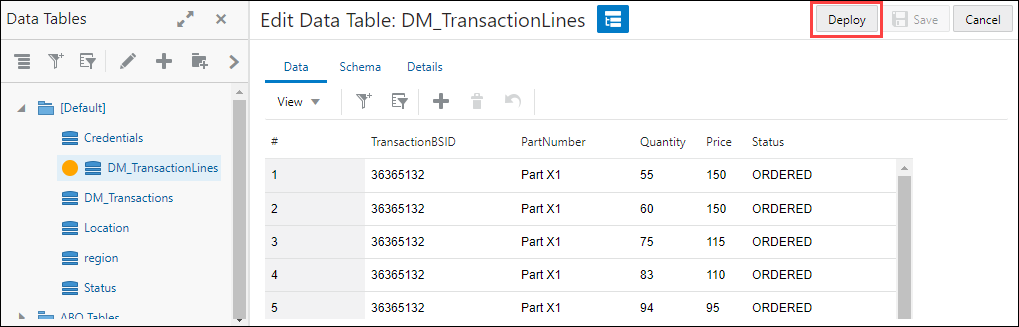
-
Click Deploy when you have a Data Table open.
- OR -
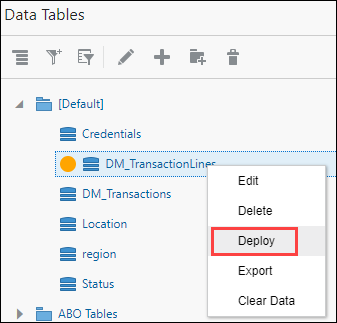
-
Right-click on the Data Table name and click Deploy.
-
- To deploy multiple Data Tables, complete the following:
Select the undeployed Data Tables in the side navigation panel.
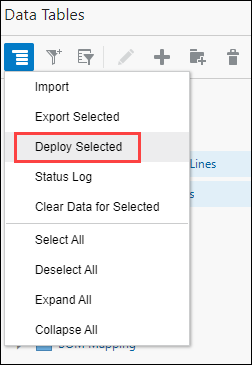
Select Deploy Selected from the side navigation panel drop-down menu.
-
Click Deploy.
The "Undeployed" status icon is removed from the deployed Data Tables and the table deployments are added to the Status Log.
Data Table Folders
- Navigate to the Data Table Administration page .
-
Click Admin to go to the Admin Home Page.
-
Click Data Tables in the Developer Tools section.
The Data Table Administration page opens.
-
From the Admin Toolbar, click on the Add Folder icon.
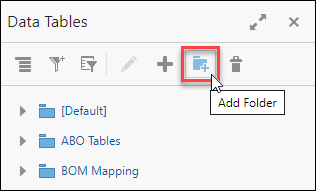
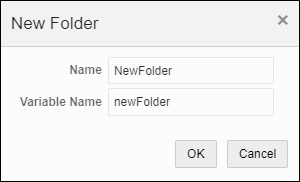
The New Folder dialog box appears.
-
Enter the folder Name and Variable Name and click OK.
The new folder will now be displayed in the Folder List.
- Navigate to the Data Table Administration page .
-
Click Admin to go to the Admin Home Page.
-
Click Data Tables in the Developer Tools section.
The Data Table Administration page opens.
-
Select one of the following methods to edit a Data Table Folder.
- Select the data table folder and then click the "Edit" icon, or
- Right-click on the data table folder and the select "Edit" from the pop-up menu

The folder name is the only property that can be modified.
-
Click Save to save your changes.
Foreign Keys
Administrators can add a new Foreign Key column to a Data Table. The procedure below assumes another Data Table has already been created with a single Natural Key column defined to establish a parent/child relationship.
To add a new Foreign Key record to a Data Table, perform the following steps:
- Navigate to the Data Table Administration page .
-
Click Admin to go to the Admin Home Page.
-
Click Data Tables in the Developer Tools section.
The Data Table Administration page opens.
-
Open the applicable Data Table.
- Double-click on the data table folder or the data table
- Select the data table and then click the "Edit" icon, or
- Right-click on the data table and the select "Edit" from the pop-up menu.
- Click the Schema tab.
-
Click Add Foreign Key.
The Foreign Key Column window displays.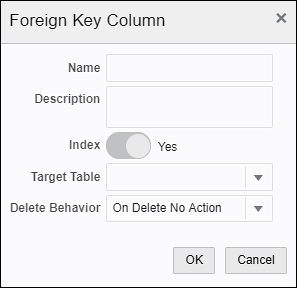
- In the Name field, type the name of the column to establish a Foreign Key relationship.
- (Optional) Enter a Description of the Foreign Key.
- (Optional) Select the Index option if you will be using BMQL statements.
- From the Target Table drop-down, select the parent table to which the Foreign Key relationship is established.
- From the Delete Behavior drop-down, select one of the following three options:
- On Delete No Action – deletion of a referenced record from the parent Data Table is prevented
- On Delete Set Cascade – deletion of a referenced record from the parent Data Table results in deletion of the referencing record from the child Data Table
- On Delete Set Null – deletion of a referenced record from the parent Data Table results in removal of the value in the Foreign Key column from the referring record of the child Data Table, leaving a null or empty value
-
Click OK.
The foreign key row displays in the Schema tab with the Relationship Name, Target Table, Delete Behavior, and Target Column fields populated.

The Index column defaults to selected and Key column is disabled by default. Administrators cannot change these default selections.
-
Click Save to save your changes. .
![]() Convert an Existing Column to a Foreign Key Column Watch Video
Convert an Existing Column to a Foreign Key Column Watch Video
Administrators can modify an existing column in a Data Table to support a Foreign Key relationship.
To modify an existing column, perform the following steps:
- Navigate to the Data Table Administration page .
-
Click Admin to go to the Admin Home Page.
-
Click Data Tables in the Developer Tools section.
The Data Table Administration page opens.
-
Open the applicable Data Table. This table is considered the child Data Table.
- Double-click on the data table folder or the data table
- Select the data table and then click the "Edit" icon, or
- Right-click on the data table and the select "Edit" from the pop-up menu.
- Click the Schema tab.
-
Click the first column of the corresponding row to select the row to create the Foreign Key relationship, then click Add Relationship.
The Relationship screen displays.
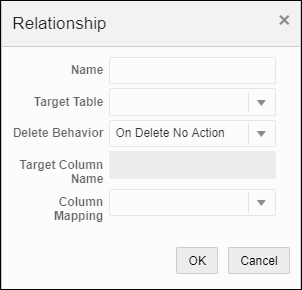
- In the Name field, type the name of the relationship for this Foreign Key.
- From the Target Table drop-down, select the parent Data Table to which the Foreign Key relationship is established.
- From the Delete Behavior drop-down, select one of the following three options:
- On Delete No Action – deletion of a referenced record from the parent Data Table is prevented
- On Delete Set Cascade – deletion of a referenced record from the parent Data Table results in deletion of the referencing record from the child Data Table
- On Delete Set Null – deletion of a referenced record from the parent Data Table results in removal of the value in the Foreign Key column from the referring record of the child Data Table, leaving a null or empty value
- In the Column Mapping drop-down, select the column to establish the Foreign Key relationship.
-
Click Add Relationship.
The selected row (new foreign key row) displays in the Schema tab with the Relationship Name, Target Table, Delete Behavior, and Target Column fields populated.
The Index column defaults to selected and Key column is disabled by default. Administrators cannot change these default selections.
-
Click Save to save your changes. .
![]() Remove a Foreign Key Relationship Watch Video
Remove a Foreign Key Relationship Watch Video
Existing Foreign Key relationships prevent the deletion of parent Data Table schema and modification of its Natural Key definition. To perform such actions, the Foreign Key relationship must first be removed from the child Data Table schema. If deleting an associated record is attempted with a Foreign Key relationship, an error message is posted indicating the deletion is denied.
To remove an existing Foreign Key relationship, perform the following steps:
- Navigate to the Data Table Administration page .
-
Click Admin to go to the Admin Home Page.
-
Click Data Tables in the Developer Tools section.
The Data Table Administration page opens.
-
Open the applicable Data Table.
- Double-click on the data table folder or the data table
- Select the data table and then click the "Edit" icon, or
- Right-click on the data table and the select "Edit" from the pop-up menu.
-
Click the Schema tab.
The existing column schema for the Data Table displays.
-
Click on the Foreign Key row to modify and then click Remove Relationship.

The Confirmation window displays.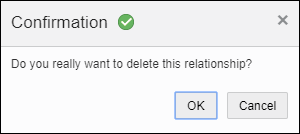
- Click OK.
The selected row displays in the Schema tab with the Foreign Key relationship removed. -
Click Save to save your changes. .
Natural Keys
Oracle CPQ has included Natural Keys within Data Tables to improve efficiency. As a result of Natural Keys, the bulk upload files that modify Data Table data now only require the table records that are to be changed.
Natural Key can be a single column or a combination of several columns that produce a unique identifier for each record, or row. The creation of these Natural Keys reduces the maintenance downtime of Data Tables by including only Data Table changes upon upload. Users no longer need to purge and reload all Data Table rows to edit a subset of rows.
- Navigate to the Data Table Administration page .
-
Click Admin to go to the Admin Home Page.
-
Click Data Tables in the Developer Tools section.
The Data Table Administration page opens.
-
Open the applicable Data Table.
- Double-click on the data table folder or the data table
- Select the data table and then click the "Edit" icon, or
- Right-click on the data table and the select "Edit" from the pop-up menu.
-
Click the Schema tab.
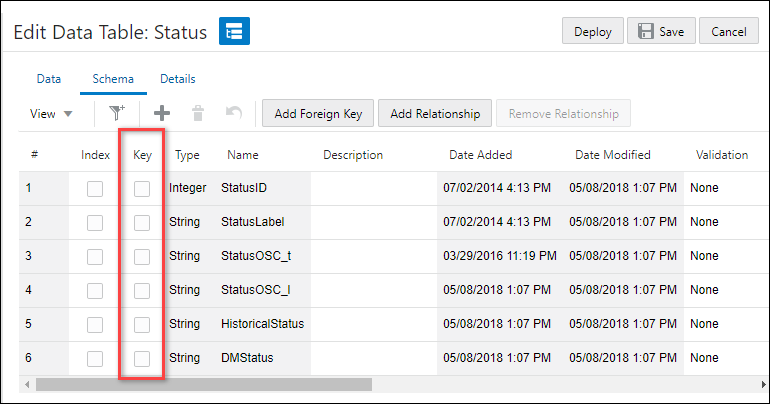
-
Check the checkboxes in the Key column to identify which Natural Keys will be unique identifiers.
- Click Save.
- Click the Data tab.
-
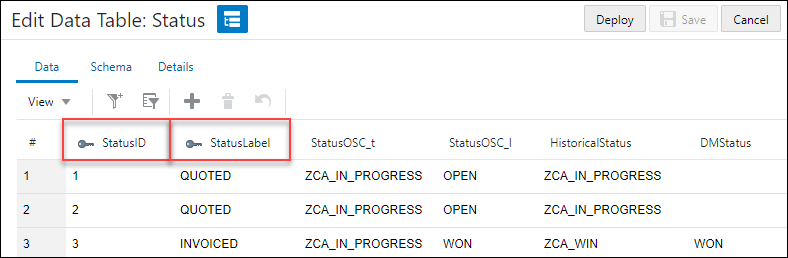
Ensure that the added natural keys are valid. Columns with valid Natural Keys look like this:
Invalid Data
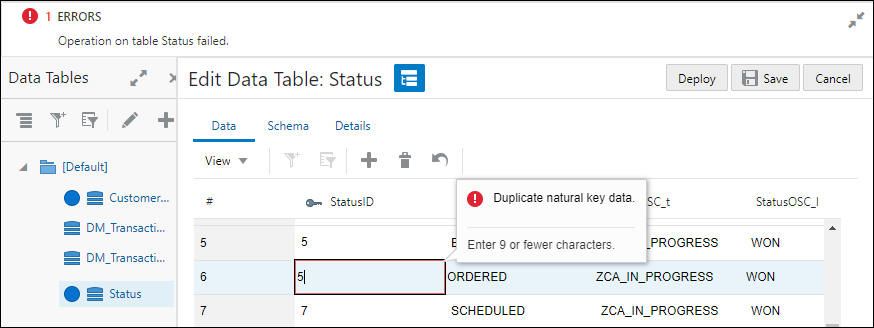
If a Natural Key is not unique, for example, if two or more rows contain identical value(s) in the column(s) designated as Natural Keys, the record is considered invalid. Invalid cell(s) will be highlighted in red.
-
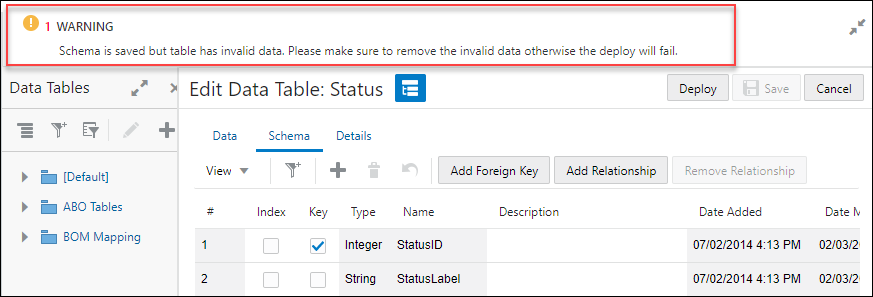
If the existing data in a saved table becomes invalid upon applying Natural Keys a warning will be displayed at the top of the page.
-
If duplicate data is introduced to a Key column. The cell is highlighted in red.The user can click on the cell to view the warning message.
- If invalid data is identified after a Natural Key is applied within existing data, you can still save the table. However, you will be unable to deploy the Data Table until all invalid data is reconciled.
-
If invalid data is identified when the user is setting up a new Data Table, or adding new data to an existing table with a Natural Key, you will be unable to save the table.
-
The maximum setting is 10 Natural Keys in a single Data Table. Contact Oracle CPQ if you require additional Natural Keys.
- The first column of a Data Table can be populated with an empty string. However, a row with data must follow
- When using the Data Table Natural Keys feature, it is strongly recommended that no more than five string columns be assigned to a part of the key.
-
Legacy Customers: When modifying a Data Table via XML Upload be mindful of row ID tags. Since an ID is already associated with your row, uploading an XML version with an ID may identify the row twice. If you choose not to use Natural Keys, you must use the row ID when modifying your table.
Status Logs
![]() View Status and Error Logs for Data Tables Watch Video
View Status and Error Logs for Data Tables Watch Video
After you have imported or deployed a Data Table, you can check the status and corresponding error logs to ensure that all of your data loaded correctly.
- Navigate to the Data Table Administration page .
-
Click Admin to go to the Admin Home Page.
-
Click Data Tables in the Developer Tools section.
The Data Table Administration page opens.
-
Click on the system navigation panel menu and select Status from the drop-down.
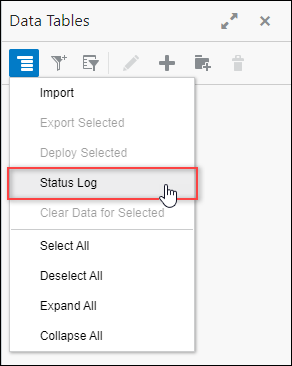
The Status Log dialog box appears.
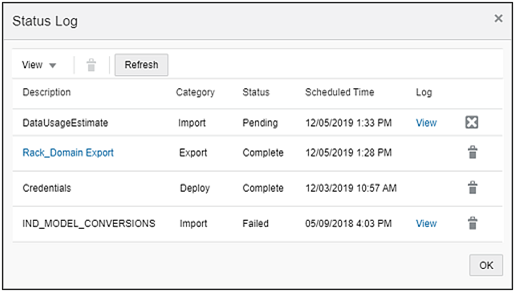
-
Check the status of each Data Table import or deployment.
The Category column indicates which kind of status is displayed.
-
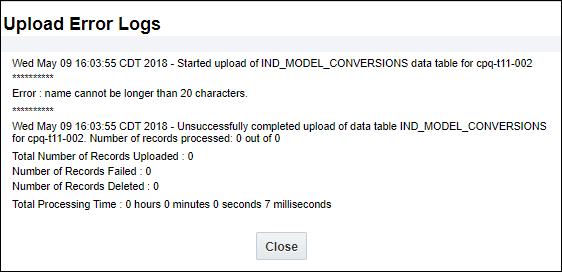
If available, click the Log link to check the error logs.
Data Table Access Rights Tab
![]() Assign Data Table Access Rights
Assign Data Table Access Rights
![]() Administrator Group Access Levels for Data Tables
Administrator Group Access Levels for Data Tables
Administrator group functionality provides administrator group access rights at the data table level. In addition to providing access at the data table level, administrators can now employ administrator groups to assign View, Edit, and Full Access permissions. The following administrator group access levels are now available for data tables:
-
No Access: Members of this group have no access to the data table.
When a new administrator group is added, the group is assigned No Access to all existing data tables.
- View Access: Members of this group are only able to view the contents of the table.
- They don't have the ability to edit, delete, or deploy the data table.
- They can export data records, but can't import data records or make any changes to the schema.
- Edit Access: Members of this group can view, add rows, and edit the contents of the data table.
- They can add new rows to the data table and modify content.
- They can deploy the data table changes.
- They can import new rows if there are no schema changes
- They can't modify data table schema or delete an existing data table.
- Full Access: Members can read, edit, and delete existing records and data tables. They can also make changes to the data table schema.
- They can add new rows into the data table.
- They can view, modify, and delete records of an existing data table.
- They can make changes to the data table schema.
- They can deploy the data table changes, including data table schema changes.
- They can import new rows, including row with schema changes.
- They can delete existing data tables.
- This is the default access level when assigning access rights to an existing administrator group.
Administrators with Full Access rights can perform the following steps to assign administrator group data table access rights from the data table user interface.
- Navigate to the Admin Home page.
- Click on Data Tables under Developer Tools.
- Open the applicable data table folder.
- Open the applicable Data Table.
- Double-click on the data table,
- Select the data table and then click the "Edit" icon, or
- Right-click on the data table and the select "Edit" from the pop-up menu.
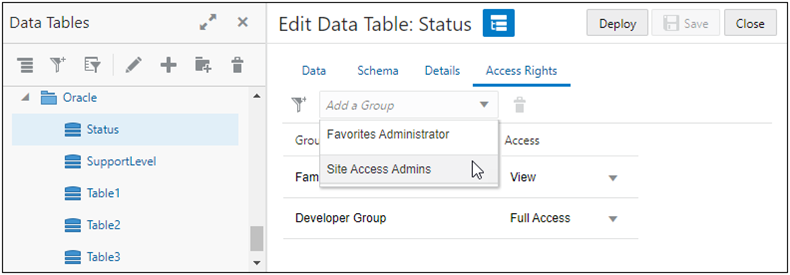
- Click the Access Rights tab.
-
Select the applicable administrator group from the Add a Group drop-down.
Note: The access level will default to Full Access.
-
To change the access level for an administrator group, click on the Access drop-down for the applicable group, and then select the desired access level.
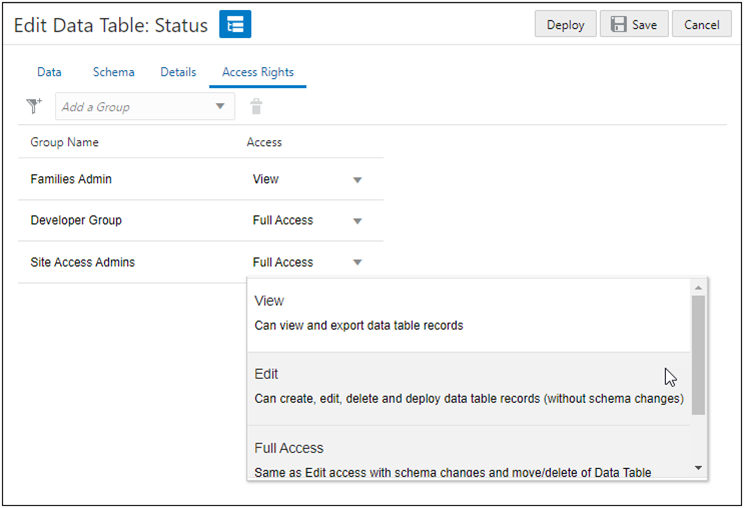
- Click Save.
Notes:
- When assigning or modifying data table access rights for an administrator group, changes must be saved but the affected data table does not need to be deployed.
- Deleting a group from the Access Rights tab in the data table UI does not remove access to the data table folder. To remove access to a data table folder, you must go to Group Administration UI.
- Users can also navigate to a table item in the tree via the keyboard, and then pressing SHIFT+F10 to see the Set Table Access Rights option.
- Refer to the Data Table Access Rights Tab for more information about data table access rights.
- Refer to Create and Edit Administrator Groups for administrator access group procedures.
Notes
Request Offline Backup
- On My Oracle Support, log a case requesting a retrieval of information as of XX date/time.
-
Oracle CPQ only creates back-ups of the entire site. If you require specific Data Table(s) back-ups, you must do so yourself.
-
Oracle CPQ does full back-ups every Sunday evening, and incremental backups every 30 minutes. Back-ups are stored for a while, so previous backups are available if needed. The recovery process is labor-intensive and will take many hours.
-
The recovered data is loaded on your test site; this overwrites other changes that have been made.


