Overview
This topic provides maintenance tasks for the JET Data Tables, which were introduced in Oracle CPQ 20A.
It is possible to maintain Data Tables outside of CPQ, such as in Excel (.CSV) and other file formats. You can import Data Tables and their schema directly into CPQ.
Before uploading a Data Table, refer to Prepare a .CSV File for Import to set up the .CSV file with the appropriate meta data tags.
Administration
![]() Prepare a .CSV File for Import Watch Video
Prepare a .CSV File for Import Watch Video 
- Open your Excel file or create your Data Table in the .CSV file format.
- Enter
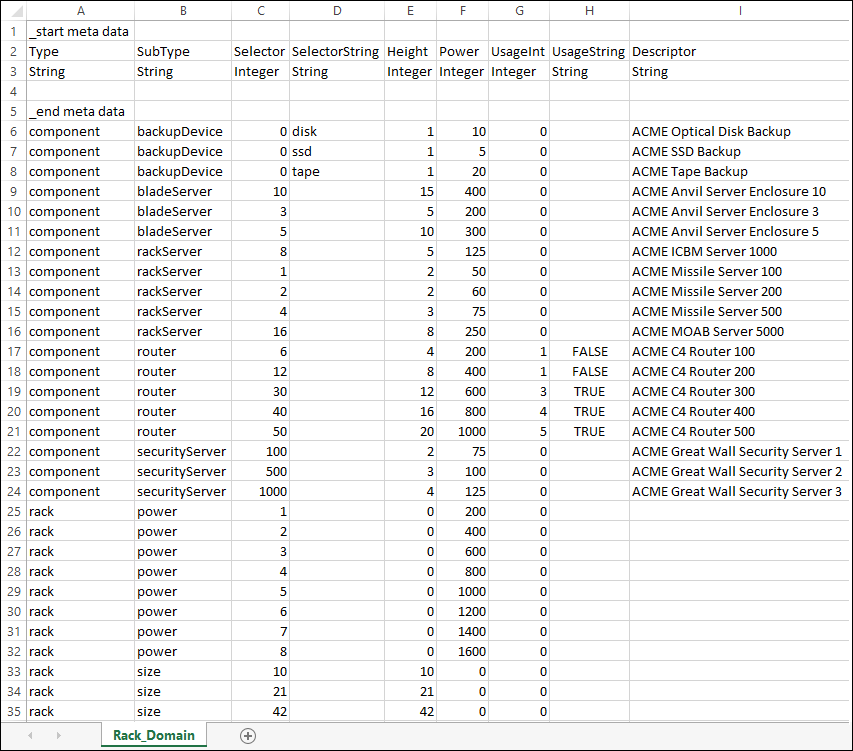
_start meta datainto cell A1. -
Use Row 2 for your Column Headers and Row 3 for the Data Type.
Data types need to be either String, Integer or Float. The first letter of the data type must be capitalized, or your import will fail. - Enter
_end meta datainto cell A5. -
Populate your table. It should look like this:
-
Save the file as a .CSV file format.
- The name of your file will also be the name of your Data Table when it is imported into CPQ. If a table of the same name already exists, the data will append to the existing file.
- Data table names can only contain alpha-numeric values and underscores. White space is not accepted.
![]() Import a .CSV Data Table Watch Video
Import a .CSV Data Table Watch Video
Once you have properly created your .CSV file, begin the import to CPQ.
 Navigate to the Data Table Administration page .
-
Click Admin to go to the Admin Home Page.
-
Click Data Tables in the Developer Tools section.
The Data Table Administration page opens.
-
Select Import from the from the side navigation panel menu drop-down.
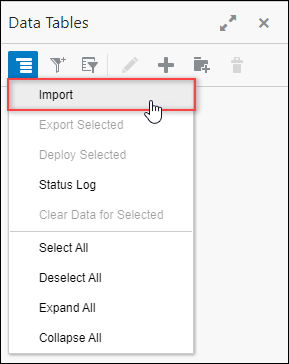
The Import dialog box appears.

- Drag and drop files into the Import window, or click inside the dashed box to browse and select your Data Table.
- Select your Column Delimiter. The default, and the most commonly used setting, is Comma.
- Select Newline as the Row Delimiter, or select the Other radio button and enter a value.
- For Data with Delimiter, select MS Excel .csv format.
-
In the Destination Folder drop-down, select where you would like to store the Data Table.
The list of folders reflects the available folders in your deployment.
-
Click Import.
The Data Table, based on the File Name and the Destination Folder, is displayed in the Folder list. The data table is proceeded by an orange status icon, meaning it has not been deployed.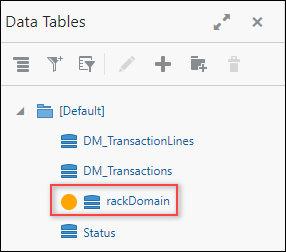
-
Deploy the table using one of the following methods:
- Click Deploy when you have a Data Table open,
- Right-click on the Data Table name and click Deploy,
- Select the Data Table and select Deploy Selected from the navigation panel menu drop-down.
![]() Stop a .CSV Data Table Import Watch Video
Stop a .CSV Data Table Import Watch Video
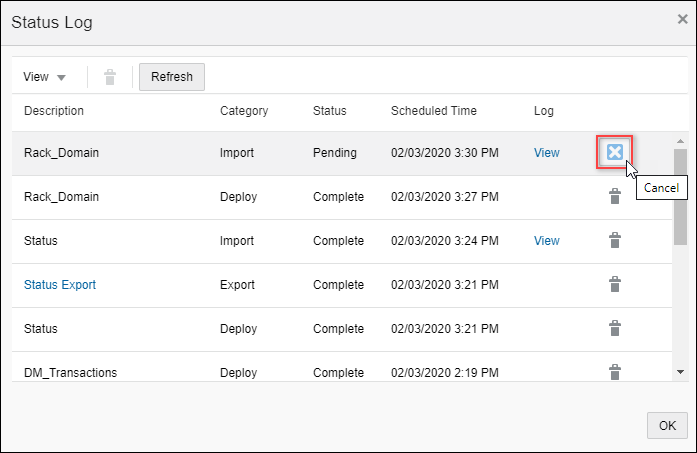
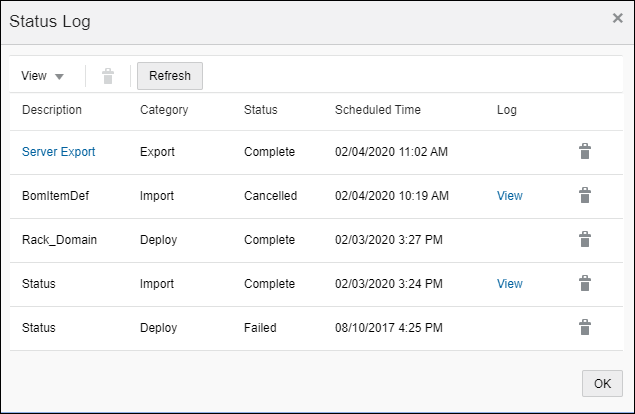
To stop a .CSV Data Table Import that is currently running, open the Status Log and click on the "Cancel" icon, as shown below.
![]() Export .CSV Data Table(s) Watch Video
Export .CSV Data Table(s) Watch Video
You can make changes to a Data Table and then export the Table, as a .CSV file, to your work station.
- Navigate to the Data Table Administration page .
-
Click Admin to go to the Admin Home Page.
-
Click Data Tables in the Developer Tools section.
The Data Table Administration page opens.
-
Select one of the following options:
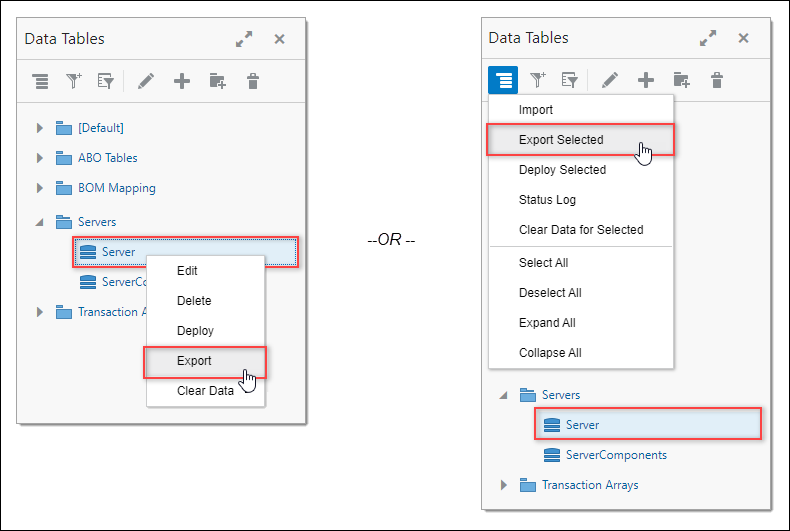
Use one of the following methods to export a single Data Table:
- Select the applicable Data Table, then select Export Selected from the navigation panel menu drop-down, or
- Select the applicable Data Table, then right-click on the selected Data Table name and click Export.
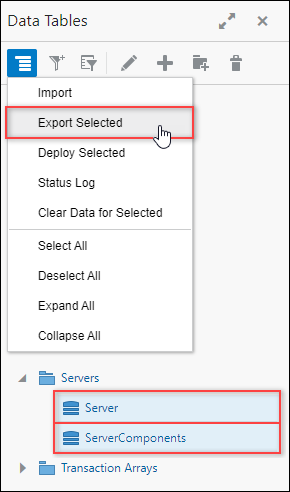
Use Ctrl to select multiple Data Tables, then select Export Selected from the navigation panel menu drop-down.
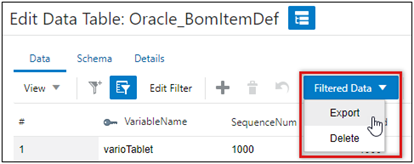
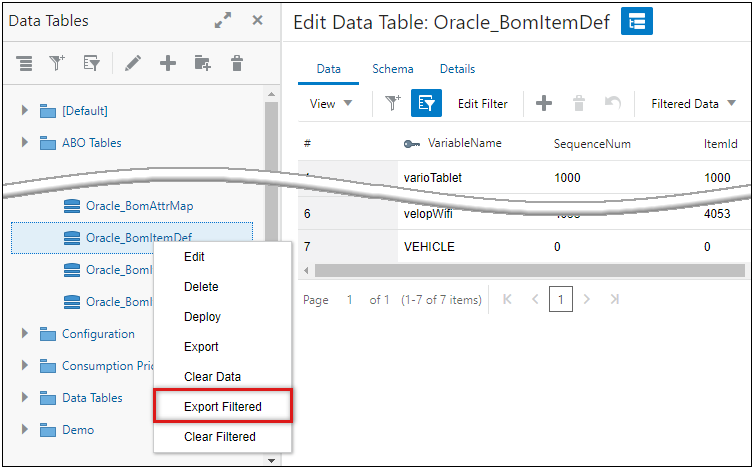
After filtering data using a simple or advanced search, use one of the following methods to export filter records:
-
Select Export from the Filtered Data menu.
-
Right-click on the filtered Data Table name and select Export Filtered from the popup menu.
-
After exporting a single Data Table, multiple Data Tables, or a filtered Data Table the Export Status dialog indicates the export status.
-
If the export is successful, click on the export link to download the exported file.

-
Click on View Status Logs to view export status details.
-
![]() Import and Export of Data Tables with Secure Columns
Import and Export of Data Tables with Secure Columns
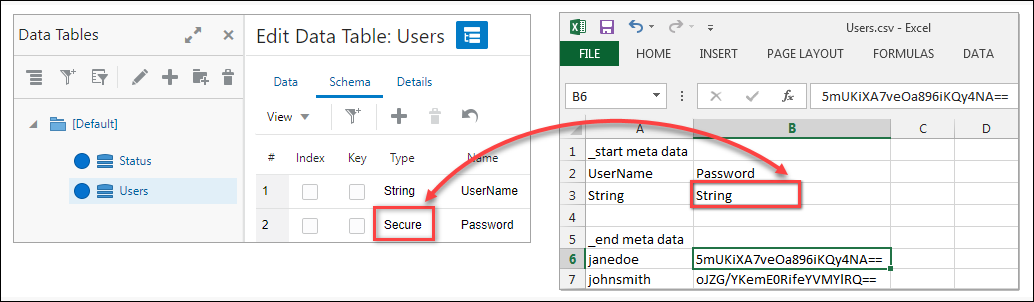
When Oracle CPQ Data Tables with secure columns are exported to a .CSV file:
-
The Oracle CPQ Data Table column Type is displayed as Secure, as shown below in the Schema Type.
- The .CSV meta data Type is displayed as String, as shown below in cell B3.
-
The data within secure fields is encrypted, as shown below in cell B6
![]() Import and Export Data Tables with Foreign Key Relationships
Import and Export Data Tables with Foreign Key Relationships
When importing or exporting bulk or individual Data Tables with Foreign Keys relationships, the Foreign Key data values are part of the Data Table files. Foreign Key-related schema import and export is not supported. Administrators cannot add or modify Foreign Key relationships via data table import. Therefore, following the import of a new Data Table, Foreign Keys must be manually added. If a Foreign Key relationship error is detected during import or export, an error message displays and the record is not modified.
Due to the inter-dependencies of records in separate Data Tables with Foreign Keys, the sequence of steps is very important when importing Data Tables with Foreign Key relationships. As applicable, perform the import in the following sequence order:
- Import files specific to deleting Foreign Key child records with the deletion behavior defined as On Delete No Action. Administrators must identify records that are only referencing parent records which are intended to be deleted during Step 2 below. Failing to do this will prevent the deletion of the referenced parent records during Step 2.
- Import files for parent records. We recommend modify actions be grouped and performed first, followed by delete actions. This is important because sets of modify and deletes are processed separately upon import and have different behavior, as follows:
- First modify set is processed when field records are processed individually. Therefore failed records do not affect successful update of other records in the set.
- Delete set is processed as a whole and any failure results in failure of the whole set of deletes. When deleting records, the On Delete Behavior setting of the Foreign Key schema determines the disposition for deleting or disassociating the child records.
- Import files for child records that will be explicitly modified.
For Data Tables with Natural Keys enabled, a column called _update_action is created in imported .CSV Data Tables. This column allows admins to delete Data Table rows.
Valid values for this column include:
- Delete: Looks for the Natural Key defined in the row and deletes it.
- Modify: Upserts data into the Table.
To create the _update_action column in your .CSV file:
- Create a .CSV file with your data headings, according to the instructions in the section Prepare a .CSV file for Import.
- Import the .CSV file as a Data Table into CPQ.
- Apply Natural Keys, according to the instructions above.
- Export the .CSV file.
-
Open the .CSV file.
By default, there is a new first column,
_update_action. The column can be moved. -
As desired, change the value in this new column and import the .CSV file into CPQ.
Depending on the value, the data in Oracle CPQ will be modified or deleted.
- If you attempt to import duplicate records (where data with the same Natural Keys already exist in the Table) during an XML/CSV import, the duplicate records will be deleted and the new records will replace the pre-existing ones.
- If your Data Table does not have Natural Keys, the duplicate data is added as a new row.
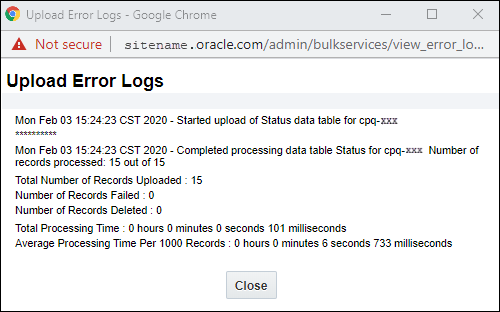
- Use the logs to evaluate the success of your import. For more information, see the topic Import Status and Error Logs.
![]() View Status and Error Logs for Data Tables Watch Video
View Status and Error Logs for Data Tables Watch Video
After you have imported or deployed a Data Table, you can check the status and corresponding error logs to ensure that all of your data loaded correctly.
-
Navigate to the Data Table Administration page .
-
Click Admin to go to the Admin Home Page.
-
Click Data Tables in the Developer Tools section.
The Data Table Administration page opens.
-
-
Select Status Log from the side navigation panel drop-down menu.
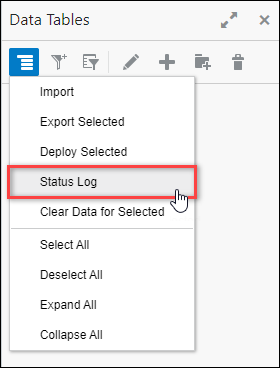
The Status Log dialog box appears.
-
Check the status of Data Table imports, exports, and deployments.
The Category column indicates which kind of status is displayed.
-
If available, click the log link to check the error logs.