Transaction Manager
Overview
A Transaction Manager is a list of Transactions or quotes that you can access. This is most frequently where approvers will go to approve quotes and where you can download your quotes or Transactions.
Oracle CPQ automatically creates a Transaction Manager for each Commerce Process, such as "[Commerce Process Name] Manager". Individual users may have access to different information within the Transaction Manager based on their participant profile and the step the Transaction is in.
You can re-size the columns in the Transaction Manager. You can also sort the columns by clicking the specific column header. This will sort the data and display the sorting order next to the column header (ascending or descending).
Administration
 Action Bar
There is an action bar at the top and bottom of each Transaction Manager. These are , which trigger events within a Transaction Manager.
Views
Oracle CPQ can search transaction data based on Commerce main document and line item attribute data as long as the attributes have been mapped in the data columns. Search results will be returned based on user permissions. A View Manager will be made available for every Commerce Process in the system. Users can save searches and use them to create Reports. Saved searches are known as Views.
Note: An Application Administrator can save a maximum of 100 total views (50 created by a Application Administrator and 50 shared views by other users). All other users can save a maximum of 50 total views combining both user-created and/or shared views.
Commerce attributes mapped in the and Process manager can be used as filter inputs to the search. The user can specify criteria for the attributes so that the search returns only those records that satisfy the criteria. A user can also pass in blank values as criteria for the filter attributes. In that case, all records are returned.
If no Data Column Mapping is available, then no Process Manager Columns can be mapped. In that case, the Transaction Manager will show just the ID# of the quote created.
Creating Views
-
Navigate to the Transaction Manager.
Steps to open the Transaction Manager differ based on the implementation.
-
On the left, click in the Views section, click Manage.
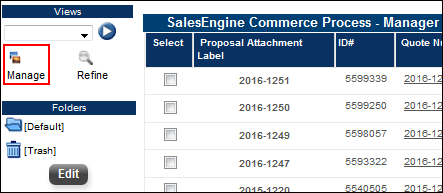
The View Manager page opens in a new window.
-
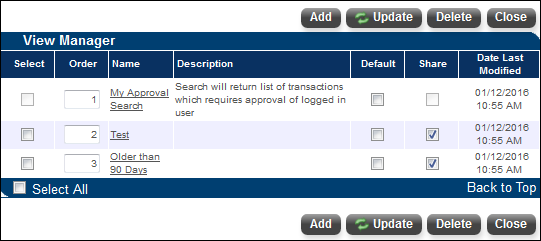
Click Add.
The Filter Attributes page opens.
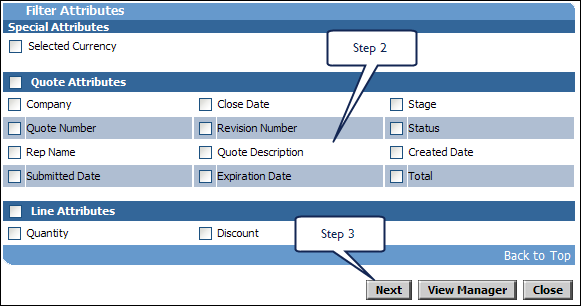
- Select the Filter(s) you'd like to apply to the search, based on Special, Quote and Line Attributes.
-
Click Next to proceed and select the columns you'll use to organize the view.
- Select the Column(s) that you'll use to organize the view, based on Special and Quote Attributes.
-
Click Next.
The Search Editor page opens.
- Specify any specific criteria for the filter attributes selected in the preceding steps.
-
Click Search.
The Ad Hoc Search page opens.
If you select View Manager, you will be returned to the Transaction Manager without saving your changes.
-
Enter a name in the Name filed and click Save As View to save the search, if you plan on referring to it again.
If you need to create a view (or perform a search) on Transactions, or if you have already created a view, you'll be able to do so from the View Manager.
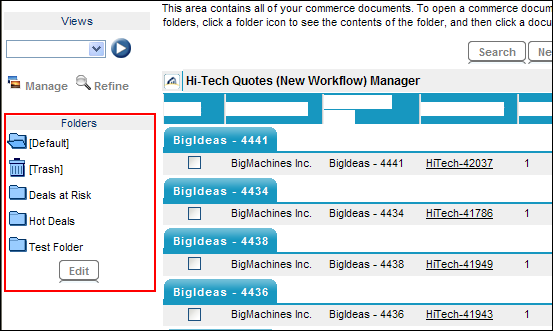
Folders
You have the ability to organize transactions by moving them to different folders. This can be done in two ways:
- Select one or more Transactions, then click then select the appropriate folder from the Move drop-down.
- Select multiple Transactions and then drag them from one folder to another. As you drag the row(s), a red icon will appear to show you where you cannot place them and a green icon will appear if you can drop them.
Creating Folders
-
Navigate from Oracle CPQ to the Transaction Manager.
Steps to open the Transaction Manager differ based on the implementation.
- Click Edit under the Folders header in the left sidebar.
- Enter a name in the Folder Name field.
-
Click Create.
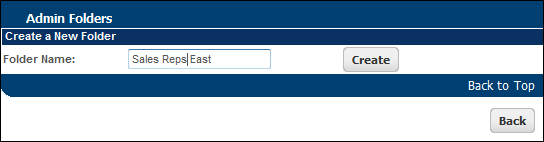
- Click Back to return to the Transaction Manager.
Transaction Count
Beginning in 19B, a new Disable Transaction Count setting is added to the Commerce Settings page. Administrators have the ability to determine if the system performs an exact Transaction count when the Transaction Manager is displayed. Disabling the Transaction count, when there are a large number of Transactions, may improve the time required for the Transaction Manager to load.
When the Disable Transaction Count setting is selected, the Transaction count displayed on the page does not provide the exact total number of Transactions but rather indicates “of Many”. For example, the Transaction count at the bottom of the page may indicate 1 – 25 of Many, 1 – 50 of Many, or 51 – 100 of Many.
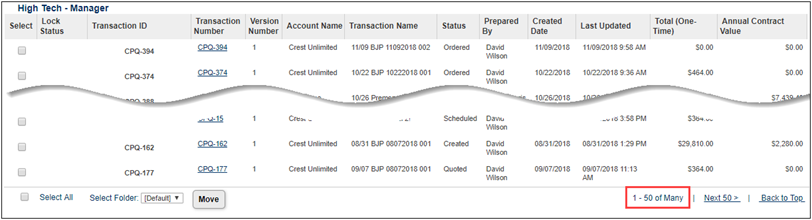
The Disable Transaction Count setting default is No.
To disable Transaction Counts, complete the following steps:
- Navigate to the Commerce Options page.
Admin Home > Commerce and Documents > Commerce Settings
-
Click Yes for Disable Transaction Item Count.
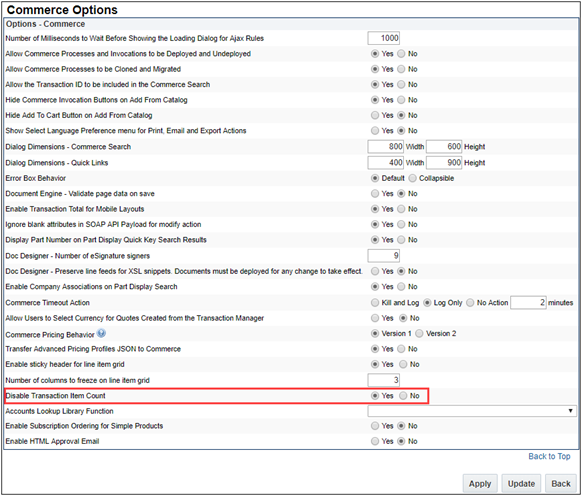
-
Click Update. The Transaction count will not perform an exact Transaction count.
Notes
Note: Use caution when deleting archived transactions. Transactions deleted from the archive are immediately removed from the database and cannot be restored.
Notes:
-
After a Transaction is archived, it can no longer be accessed from within the CPQ Cloud admin interface, and all record of it will eventually be erased from the server. Archive Transactions with caution.
-
If Transaction archiving is disabled on your site open a Service Request (SR) on My Oracle Support to enable Transaction archiving.
-
The default setting for cleaning up archived Transactions is 30 days after the Transaction was archived. Open a ticket on My Oracle Support to change this setting,
-
Process Manager columns are displayed in the Transaction Manager in the order that they are maintained in the Process Manager Columns page.
-
Trashed items do not appear in any Transaction view, other than the Trash view.
-
Transaction data is stored indefinitely unless archived. This includes file attachments, which are treated the same as transaction data.
Refer to Archiving Transactions for additional information.
Related Topics
See Also


