Overview
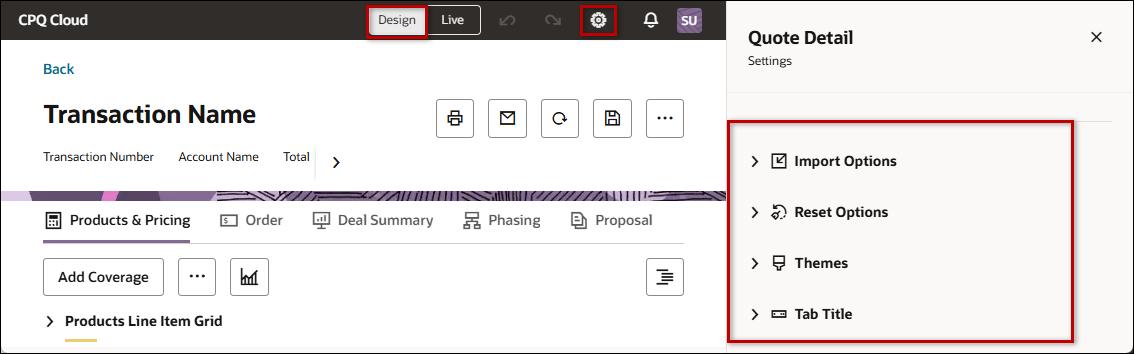
To access Redwood Quote Settings, open or create a Redwood quote, click Design, then click the Settings  icon in the page header.
Redwood Quote Settings provides the following functionality:
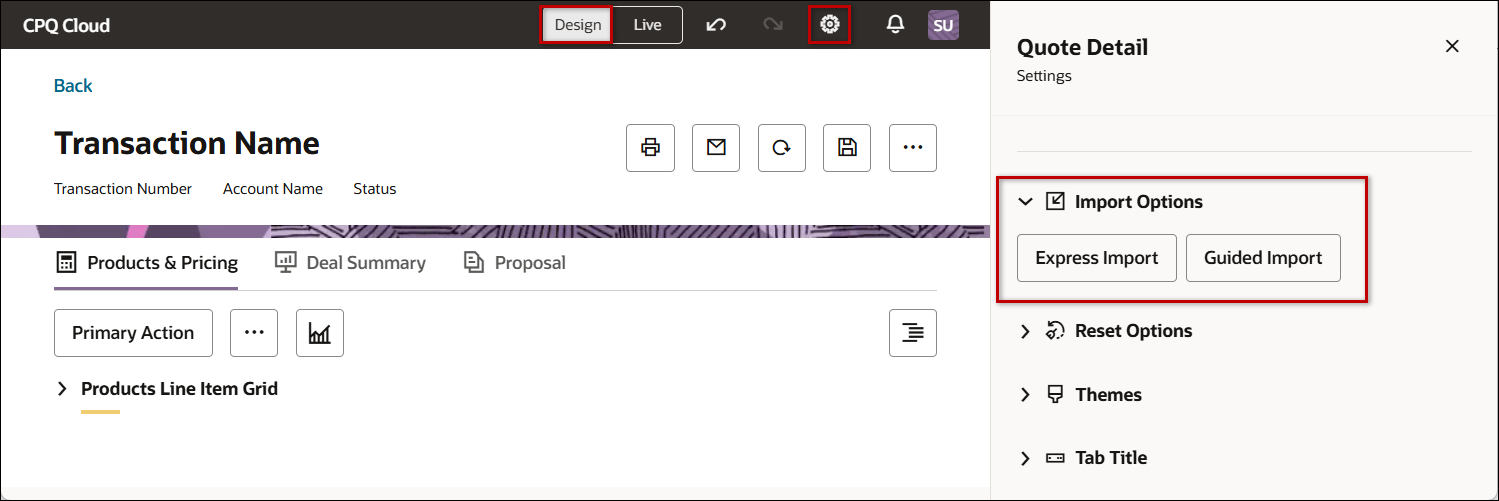
Express and Guided Import options simplify and streamline the migration process from JET and Legacy layouts to the Redwood layout. They provide a user-friendly design to guide administrators step-by-step through the migration process to ensure a smooth transition with minimal disruption to business operations.
-
The Express Import will import all layout items from the previous JET or Legacy layout.
-
The Guided Import allows selection of Transaction and Transaction Line layout items to import.
Clears all modifications made to the layout and reset the layout to an empty state.
The Redwood Quote Designer provides multiple pre-built themes to match your company's branding and ensure a uniform appearance across quote documents and user interfaces. Layout themes are applied to the Redwood Quote UI and the Redwood Quotes List UI. CPQ provides the following themes:
- Redwood
- SFDC
- Custom
Customize the browser tab title for the Redwood Quote UI.
Overview
Import Options
Complete the following steps to import all layout items from the previous JET or Legacy layout into the Redwood Quote UI.
-
Open or create a Redwood quote, click Design, then click the Settings icon
 .
.
-
Click Import Options.
-
Click Express Import.
-
Click Import JET Layout. (for Legacy layouts click Import Legacy Layout)
When the import has finished a "Layout successfully imported banner" is displayed.
Complete the following steps to select individual Transaction and Transaction Line layout items to import into the Redwood Quote UI.
-
Open or create a Redwood quote, click Design, then click the Settings icon
.
-
Click Import Options.
-
Click Guided Import.
-
Click JET Layout. (For Legacy layouts click Legacy Layout)
-
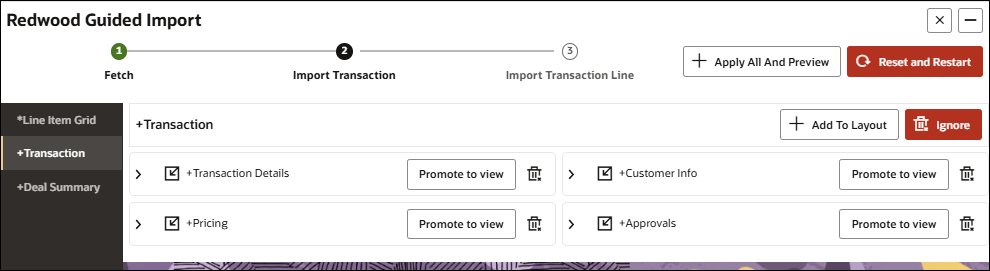
Click Import Transaction to import the transaction layout.

-
Import tabs to the transaction layout.
-
Click Apply All And Preview to import all tabs, or
-
Select the desired tab and click Add To Layout.
-
You can click Promote to view to a raise a section item to the tab level.
-
You can click the Delete icon to exclude a section from import.
-
Repeat this step to add all desired tabs and sections are added.
-
-
-
Click Import Transaction Line to import the transaction line layout.

-
Add items to the layout.
-
Click Apply All And Preview to import all items, or
-
Select the desired item and click Add To Layout.
-
You can click Promote To Tab to a section item to a tab.
-
You can click the Delete icon to exclude a section from import.
-
Repeat this step to add all desired items are selected.
-
When the import has finished a "Layout successfully imported banner" is displayed.
-
Reset Options
Complete the following steps to clear all modifications made to the layout and reset the layout to an empty state.
- Open or create a Redwood quote, click Design, then click the Settings icon .
-
Click Reset Options.
-
Click Reset Layout.
-
When prompted, click Reset to continue.
Note: You cannot use the Undo Action to restore layout settings that are cleared using Reset Layout.
Themes
![]() Apply / Customize Redwood Theme (default theme)
Apply / Customize Redwood Theme (default theme)
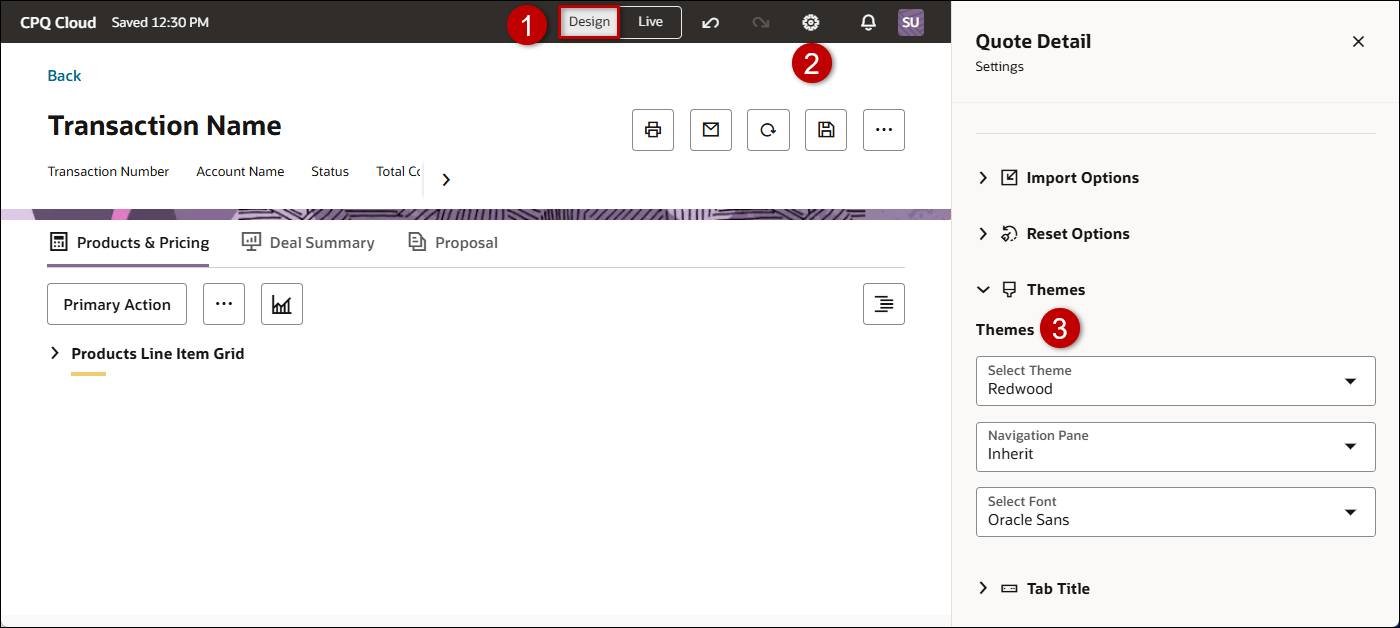
Complete the following steps to apply or update the Redwood theme.
-
Open or create a Redwood quote, click Design, then click the Settings icon
. -
Click Themes.
-
Select Redwood from the Select Theme drop-down.
-
(optional) Select one of the following Navigation Pane options.
-
Dark

-
Light

-
Inherit - This option will apply the Dark option for the Redwood theme.
-
-
Select the desired font from the Select Font drop-down to change the base font for all Redwood Quotes List and Redwood Quote UI elements (headers, UI text, buttons, etc.).
Complete the following steps to apply or update the SFDC theme.
-
Open or create a Redwood quote, click Design, then click the Settings icon
. -
Click Themes.
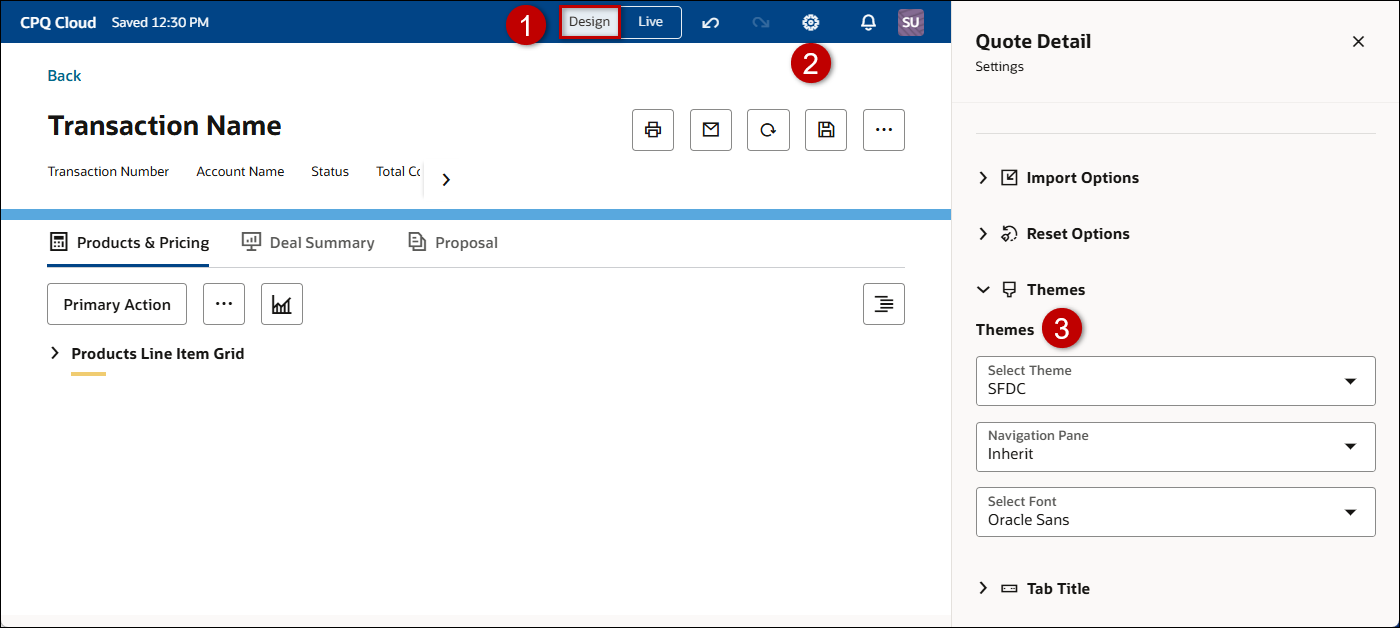
-
Select SFDC from the Select Theme drop-down.
-
Select one of the following Navigation Pane options.
-
Dark
-
Light
-
Inherit - Sets the navigation pane to the primary SFDC color.

-
-
Select the desired font from the Select Font drop-down to change the base font for all Redwood Quotes List and Redwood Quote UI elements (headers, UI text, buttons, etc.).
![]() Apply / Customize Custom Theme
Apply / Customize Custom Theme
Complete the following steps to apply or update a custom theme.
-
Open or create a Redwood quote, click Design, then click the Settings icon
. -
Click Themes.
-
Select Custom from the Select Theme drop-down.
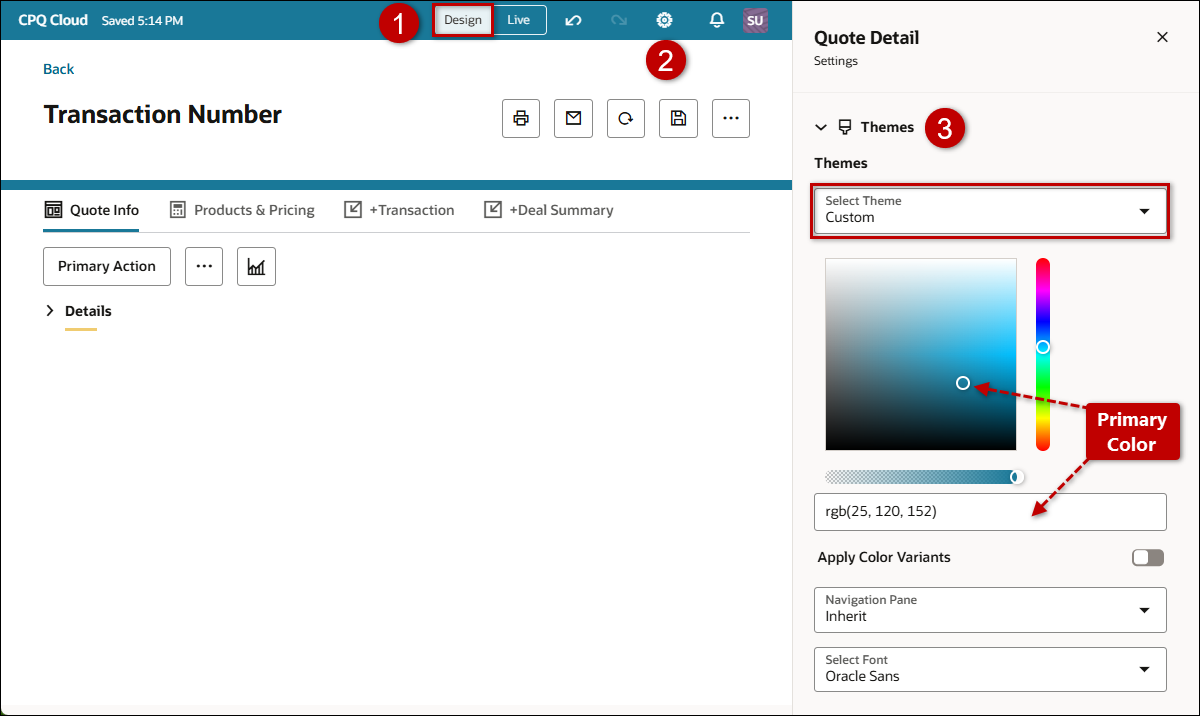
-
Select or enter a primary color.
-
Enable Apply Color Variants to apply complementary colors to Redwood layout sub-elements.
-
Select one of the following Navigation Pane options.
-
Dark
-
Light
-
Inherit - Sets the navigation pane to the primary custom color.

-
-
Choose the desired font from the Select Font drop-down to change the base font for all Redwood Quotes List and Redwood Quote UI elements (headers, UI text, buttons, etc.).
Browser Tab Title
![]() Customize Redwood Quote Browser Tab Title
Customize Redwood Quote Browser Tab Title
- Open or create a Redwood quote, click Design, then click the Settings icon .
-
Click Browser Tab Title.
-
Select the desired attribute from the Tab Title drop-down.


