Steps (Redwood)
Overview
This topic covers Workflow Steps administration using the new Redwood interface pages. Refer to Commerce Workflow Steps for administration using the classic interface pages.
Workflow administration is the final step in setting up a process. The Redwood Steps interface displays the workflow in a diagram view to allow users to visualize the process flow. Workflows are made up of steps, profiles, actions, and transitions.
For example, an RFQ process could have steps like "Submitted", "Quoted", "Accepted", "Declined" and "Expired". These steps could transition a transaction from an RFQ document, to a Quote document, then to a PO document.
-
Workflow Steps use profiles to define access rights, transition notification, and transaction views. The Commerce system automatically creates a default profile for each workflow step. You can customize the default profile and create additional ones to support different transaction access rights.
-
Profile permissions can be granted based on user access type, user groups, or previous performers. In addition to these permissions, you can add forwarding rules to workflow steps to support a collaborative sales environment, one in which multiple users can work on the same transaction.
-
Transitions move documents between workflow steps. Transitions from one step to another will also trigger forwarding rules that have been set up for the step a transaction moves into.
-
Forwarding rules direct the system to share transactions between members of certain user groups. Forwarding rules enable you to set up collaborative transaction handling. The benefit of setting up auto-forwarding is that it happens in the background and guarantees that documents become available to groups of users as soon as the document transition occurs.
The Standard Process automatically creates a workflow with several steps to manage quote approvals and order management when a new Standard Process is created. These steps can be modified to meet customer workflow requirements. Note that steps cannot be deleted once a process is deployed. refer to Standard Process Workflow for more information.
Steps Page
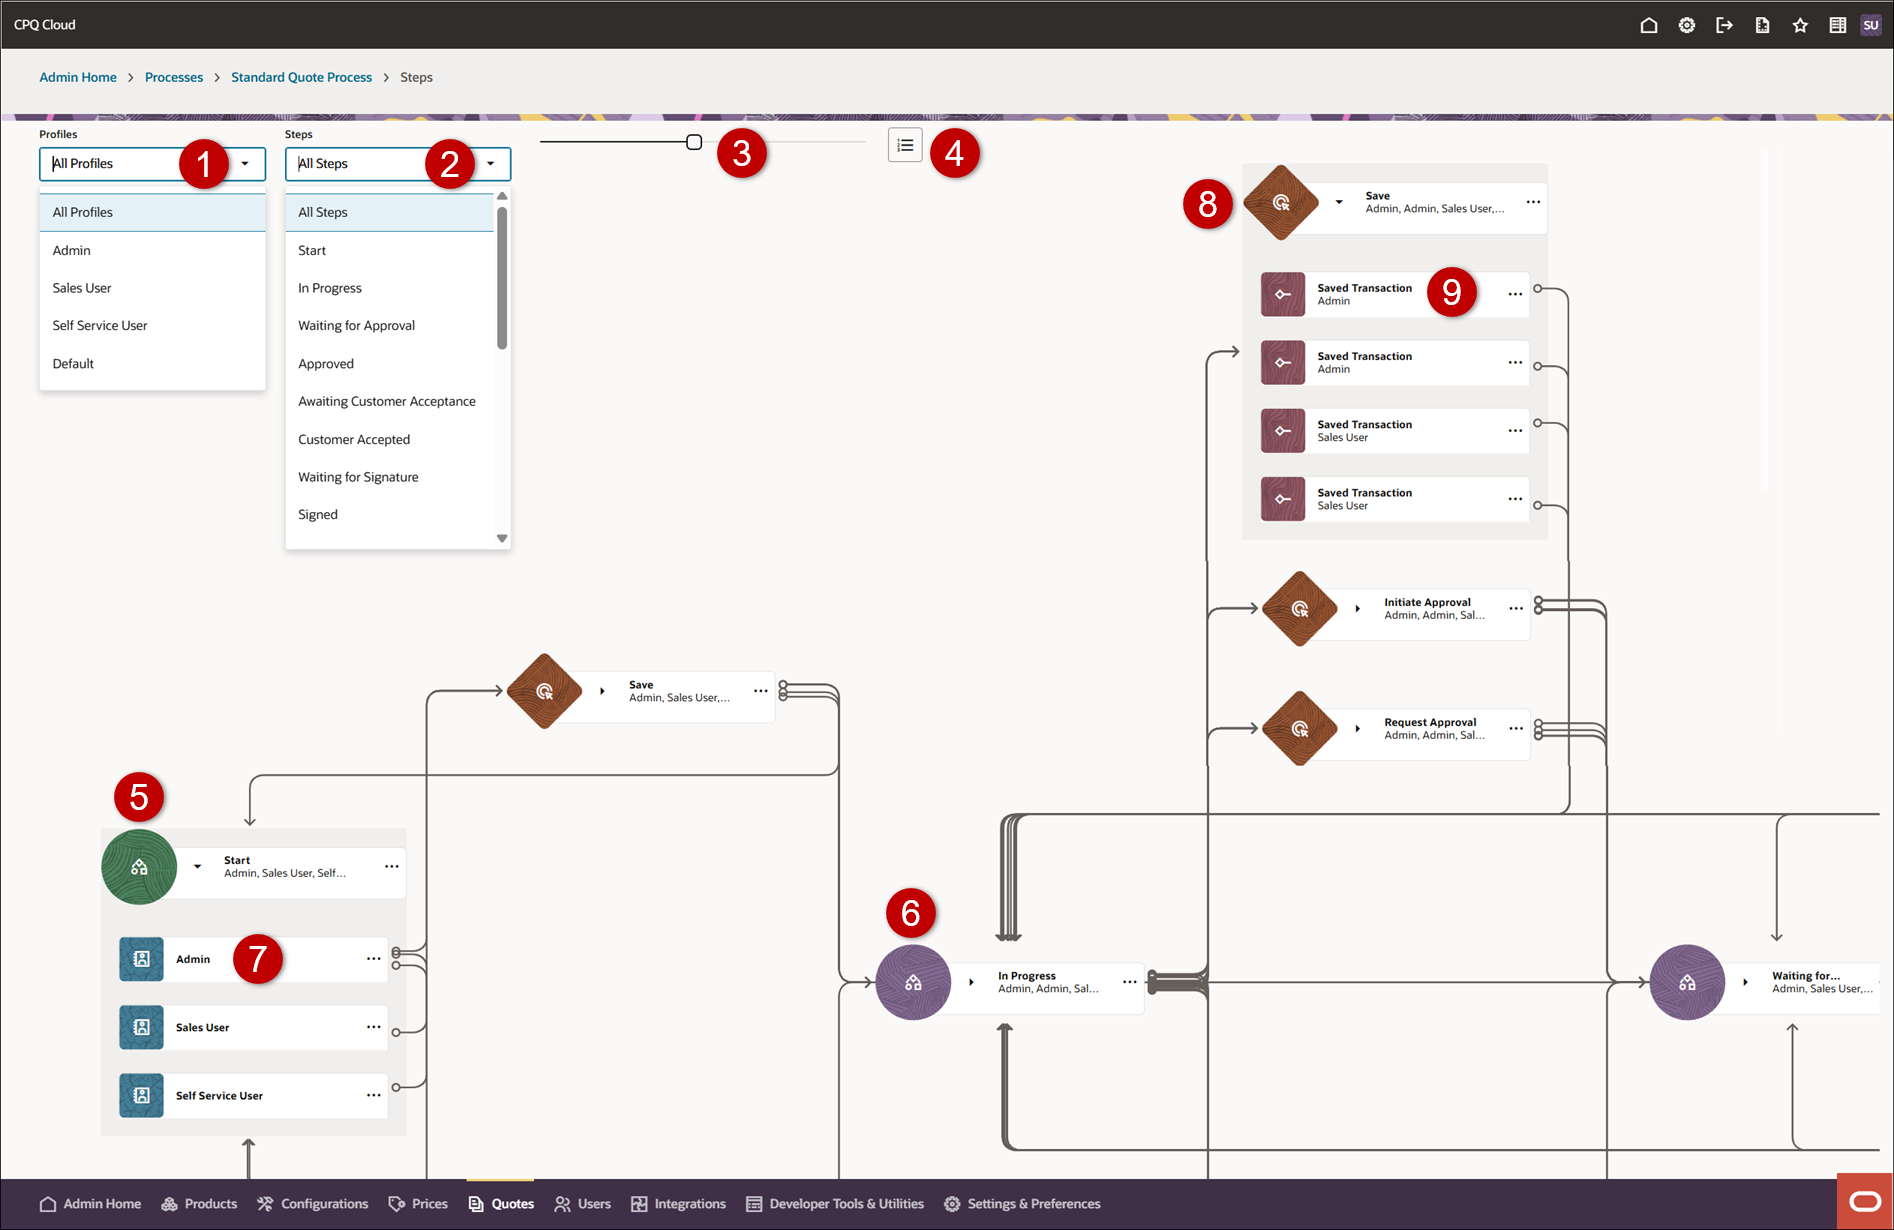
The Steps page is used to manage steps, profiles, actions, and transitions from a single page.
|
1
|
Profiles Filter: Use this menu to display steps for all profiles or just the steps associated with the selected profile. |
|
2
|
Steps Filter: Use this menu to display all steps or just the select step. |
|
3
|
Use the slide bar to zoom in and zoom on the display. |
|
4
|
Reorder steps
|
|
5
|
The Start Step is the beginning of the workflow. When you click on a step, the actions related to this step are highlighted.
|
|
6
|
All other Steps represent different states in the workflow. When you click on a step, the actions related to this step are highlighted.
|
|
7
|
Profiles are used to create different rules for different user types. When you click on a profile, the actions related to this profile are highlighted.
|
|
8
|
Actions trigger the next document state for the assigned profile. When you click on an action, the steps related to this action are highlighted.
|
|
9
|
Most actions have Transitions that take the assigned profile users to a different step. When you click on a transition, the steps related to this action transition are highlighted.
|
 Steps Action Menu
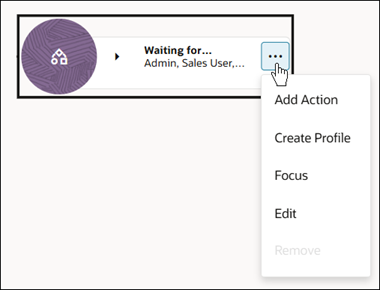
The following functions are available from the steps action menu.
-
Add Action: Add an action to this step.
-
Create Profile: Add a profile to this step.
-
Focus: Display just the steps directly before and after this step.
-
Edit: Edit the Name, Description, Stage, Forwarding Rule, or Enable Timer for this step.
-
Remove: Remove this step. A confirmation message will show profiles, actions, and transitions that will be removed if the step is deleted.
Note: Standard process steps cannot be deleted once a process is deployed.
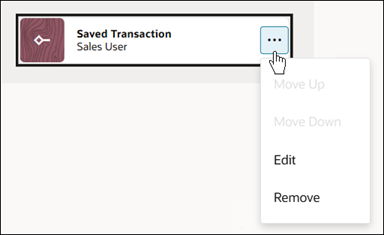
Profiles Action Menu
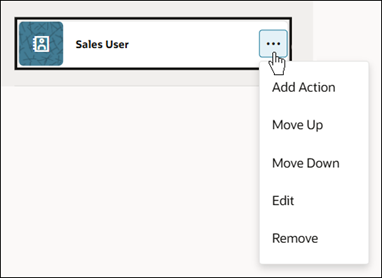
The following functions are available from the profiles action menu.
-
Add Action: Add an action to this step for this profile.
-
Move Up: and Move Down: Change profile order in the step. If a user matches multiple profiles, the action for the highest profile is applied.
-
Edit: Edit the Name, Description, Initial Step setting, User Access Rights, Groups, Performer Steps, Stage, or Document Views for this profile.
-
Remove: Remove this profile from the step. A confirmation message will show profiles and transitions that will be removed if the profile is deleted.
Actions - Action Menu
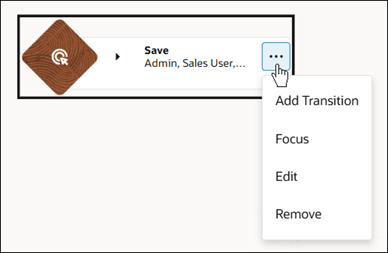
The following functions are available from the action menu for actions.
-
Add Transition: Add a transition to this action.
-
Focus: Display just the steps directly before and after this transition.
-
Edit: Edit the commerce action selected for this action.
-
Remove: Remove this step. A confirmation message will show transitions that will be removed if the action is deleted.
Transitions Action Menu
The following functions are available from the transition action menu.
-
Move Up: and Move Down: Change profile order in the step. If a user matches multiple profiles, the action for the highest profile is applied.
-
Edit: Edit the Target Step, Name, Description, Conditions, or Notifications for this transition.
-
Remove: Remove this profile from the step.
Administration
Add a Step
Steps (document states) can be created individually from the Steps page.
- Navigate to Admin > Quotes > Process > Steps.
-
Right-click on the page, then click Create Step.
-
Enter the step Name, Description, and Variable Name.
-
The name is displayed when a user encounters the step. For example, Start.
-
The Variable Name field populates automatically. Variable names can only contain alpha-numeric characters and underscores. The entry can be changed before saving, but after saving the value is read-only.
-
Select the Stage:
This setting is only available when the process Order and/or Agreement stages are enabled.
-
Quote - used to identify steps that are in the quote phase of the process flow. (default stage)
-
Order - used to identify steps that are in the order phase of the process flow. This option is only available when the process Order stage is enabled.
-
Agreement - used to identify steps that are in the order phase of the process flow. This option is only available when the process Order stage is enabled.
-
Click Create.
Add a Step Forwarding Rule
Complete the following steps to add a forwarding rule.
- Navigate to Admin > Quotes > Process > Steps.
-
Select Edit from the step action menu.
- If you do not want to add a forwarding rule, select No Forward Rule (default option).
- To link this step to all the groups or select individual group names:
- Select All Groups
- If applicable, select a Profile.
- To add an advanced forwarding rule:
- Select Advanced Forward Rule
- Click Define Function.
- Define the function in the BML Editor, and then click Save.
-
Click Save.
Add a Step Timer
You can schedule the system to automatically perform a Commerce action by using Timers. Based on a defined duration of time, a Timer triggers when the elapsed time exceeds the specified duration.
Complete the following steps to add a timer to a step.
-
Navigate to Admin > Quotes > Process > Steps.
-
Select Edit from the step action menu.
-
Activate Enable Timer.
-
Enter a Name, Variable Name, and Description for the timer.
-
Choose a Profile to map the timer to from the Map to Profile menu.
This is the profile with which the application executes the Timer action. Since timers are used in transition steps, and transition rules are tied to the junction of actions and profiles, by mapping the Timer action to a particular profile, the admin can specify which transition rules will operate.
-
Choose a User to map the timer to from the Map to User menu.
This is the user that the application 'proxies' to accomplish the named action when the timer executes. This mapping allows the FullAccess user to specify 'who' initiated the action.
- Select the Document.
- Select an Action.
-
Define the Elapsed Time Days, Hours, and Minutes.
-
Select the Relative to Date Attribute.
The Relative to Date Attribute drop-down contains commerce Date Type attributes that have been added to the data columns. To view a commerce date attribute in this list, add the date attribute to the data columns.
- Click Save.
Add an Action
Complete the following steps to add an action to a step.
-
Navigate to Admin > Quotes > Process > Steps.
-
To add an action to a step, click on the step's action ellipsis, then select Add Action.
-
To add an action to a step profile, click on the profile's action ellipsis, then select Add Action.
-
Select the Target Step.
-
If applicable, select the Profile.
-
Select a Process or Quote action from the Action menu. This is the action that will trigger the transition.
-
Enter the Transition Name and Transition Description.
-
If you want to create a new step:
-
Enable Create New Step,
-
Enter the New Step Name, New Step Name, and New Step Description.
-
Click Create.
Add a Transition
Complete the following steps to add a transition to a step action.
-
Navigate to Admin > Quotes > Process > Steps.
- Click on the action's ellipsis, then select Add Transition.
-
Select the Target Step.
-
Select the Profile.
-
Enter the Transition Name and Transition Description.
-
If you want to create a new step:
-
Enable Create New Step,
-
Enter the New Step Name, New Step Name, and New Step Description.
-
Click Create.
Add Transition Conditions
Complete the following steps to add conditions to a transition.
-
Navigate to Admin > Quotes > Process > Steps.
-
Click on the transition's actions ellipsis, then select Edit.
- To always trigger the transition, select Always Return True.
- To add an advanced conditions:
- Select Advanced Conditions
- Click Define Function.
- Define the function in the BML Editor, and then click Save
- Click Save.
Add Transition Notifications
Complete the following steps to add notifications to a transition.
-
Navigate to Admin > Quotes > Process > Steps.
-
Click on the transition's actions ellipsis, then select Edit.
- Click Define Notifications.
- Select the Method(s) of Notification. You can check either or both the options provided:
Send XML
Note: XML notifications can only be sent if XML Integrations are set up. Refer to XML Integration for more information.
Send Email
Checking this option displays the Email Information section where you must fill out the following information:
| Sender | Simple Sender Email Address: Enter comma-delimited email addressed in the text field. Advanced Sender Email Address: Click Define Function to write a BML script that will populate the sender email address(es). |
|---|
| Recipient(s) | Simple Recipient Email Address: Enter comma-delimited email addressed in the text field. Advanced Recipient Email Address: Click Define Function to write a BML script that will populate the recipient email address(es). |
|---|
| Cc Recipient(s) | Select additional recipients to be copied. Choose from: - Document Creator: Person who created the previous main document in a process containing multiple main documents
- Transaction Creator: Person who created the transaction.
- Next Step Participants: Person(s) who belong to the next step in the workflow.
- Current Step Participants: Person(s) who belong to the current step in the workflow.
|
|---|
| Subject | Type text, up to 255 characters, for the Subject line of the notification. You can also append current document attributes, on which the action is present, which will be dynamically populated when a notification email is sent. |
|---|
| Body | Choose the source of the Body: - Transaction formatted with an XSL File: This will output HTML content using a Printer-Friendly XSL/History XSL.
- Body text with Smart Tags: Type custom text, up to 4000 characters, for the Body of the notification. You can also append current document attributes, on which the action is present, which will be dynamically populated when a notification email is sent.
|
|---|
| Attachments | Select attachments to be sent with notification email. - Transaction formatted with an XSL file: Use an XSL template from the Printer Friendly and History XSL views.
- Attachment name with Smart Tags: Name your attachments using the current document attribute smart tags.
|
|---|
-
Click Save.
Manage Profile Access Rights
User access rights designate who is included in a profile. A profile determines which users can access a Transaction.
Access is granted based on company and user type, group membership, and performing actions in other document steps. For more information on the user types available, see the topic User Administration Overview.
A user is included in a profile if one of the following conditions is satisfied:
- The user belongs to both a company type and user type that has been granted access rights
- The user belongs to a group that has been granted access rights
- The user is a performer of any action in a listed step
Only Application Administrator or FullAccess users can view or modify other user profiles. All other users can only view and modify their own profile.
Complete the following steps to manage user access for a profile.
-
Navigate to Admin > Quotes > Process > Steps.
-
Expand a Step to display profiles.
-
Click on the profile's actions ellipsis, then select Edit.
-
Select one or more items from the Access Rights section.
- Restricted Admin Users do not have access to other areas of the administration platform. If a FullAccess user is restricted from any Product Family or Data Table (by folder), the user will automatically lose access to other areas of the Administration Platform. The user will only have access to the Product Family and/or Data Table that the Application Administrator has allowed them access to.
- Users can be granted access to profiles through Auto-Forwarding Rules.
-
Select one or more items in the Groups section.
-
Select one or more items from the Performer Steps menu.
- Click Save.
Manage Profile Document Views
Document views set permissions for which document attributes, document actions, and process actions are active in a profile. They control whether document attributes are read-write, read-only or hidden. Views also control whether document actions are active or inactive. Active actions appear to users, inactive ones are hidden from view.
Complete the following steps to manage document views for a profile.
-
Navigate to Admin > Quotes > Process > Steps.
-
Expand a Step to display profiles.
-
Click on the profile's actions ellipsis, then select Edit.
- Click on the applicable section to expand and set permissions:
- Main Document:
- Attributes: Select Read/Write, Read-Only or Hide for each main-document attribute.
- Actions: Select Active, Inactive or Hide for each main document action.
- Legacy Tabs: Select Show or Hide for each main-document tab for Legacy layouts.
- JET Tabs: Select Show or Hide for each main-document tab for JET Responsive layouts.
- Mobile Groups: Select Show or Hide for each main-document mobile group.
- Sub-Document:
- Attributes: Select Read/Write, Read-Only or Hide for each main-document attribute.
- Actions: Select Active, Inactive or Hide for each main document action.
- Legacy Tabs: Select Show or Hide for each main-document tab for Legacy layouts.
- JET Tabs: Select Show or Hide for each main-document tab for JET Responsive layouts.
- Mobile Groups: Select Show or Hide for each main-document mobile group.
- Templates: Select Show or Hide for each Rich Text Editor Template.
- Process Actions: Select Active, Inactive or Hide for each of the Commerce Process actions.
- Document Settings: Select Show or Hide.
- Click Save.
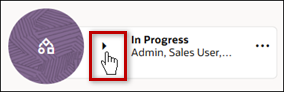
Reorder Steps
Complete the following procedure to change the order of steps.
- Navigate to Admin > Quotes > Process > Steps.
- Click the Reorder
 icon.
icon.
-
Select the applicable step and drag and drop it to the desired location.
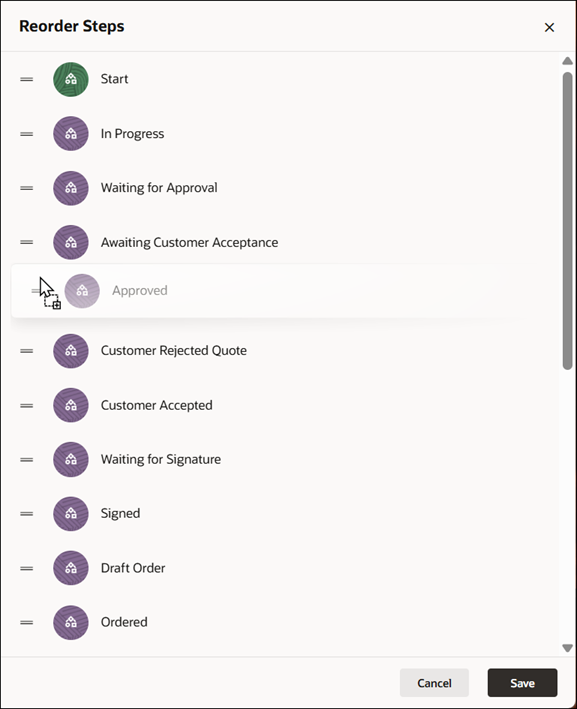
- Click Save.
Notes
Related Topics
See Also


