Overview
In a complex CPQ environment, different users interact with quotes at various stages, each requiring distinct information and actions. A static, one-size-fits-all UI creates inefficiencies, leading to longer processing times, increased user frustration, and a higher risk of errors. To address these challenges, Oracle CPQ 26B introduces support for multiple quoting layouts to allow administrators to create, customize, and assign layouts tailored to various business requirements.
By investing in this feature, we ensure that users interact with a streamlined, role-specific interface that surfaces only the most relevant information and actions at the right time. This results in faster deal cycles, improved data accuracy, enhanced compliance, and greater user efficiency. For the administrators, this feature enables a scalable and configurable UI framework, reducing customization efforts, improving system maintainability, and supporting future innovations. For customers, it enhances the overall user experience, drives adoption, and ultimately contributes to increased revenue by accelerating sales processes and reducing operational bottlenecks. This feature provides the following business benefits:
-
Provides support to manage Desktop and Mobile layouts
-
Enables a personalized quoting experience for different roles and workflows
-
Boosts user productivity by matching layouts to user needs
-
Ensures consistent, accurate presentation of quotes across devices and browsers
-
Reduces errors and rework through thorough pre-deployment validation
-
Gives administrators more control and flexibility without the need for custom coding
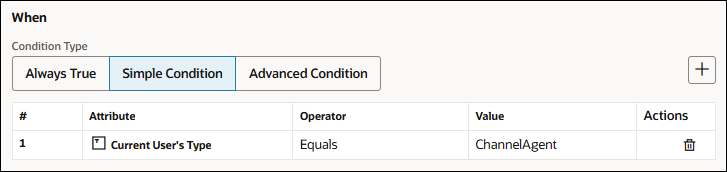
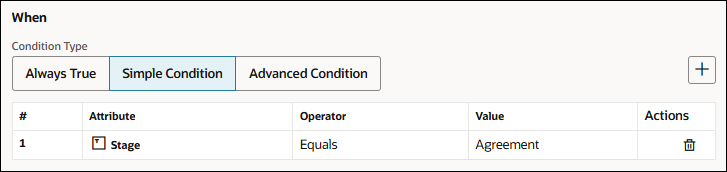
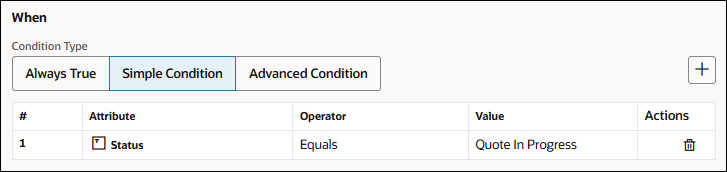
Layout rule conditions can be used to provide customized layouts, some examples include:
-
Role-based layouts based on the user's type or group (e.g., Channel Agent, Sales Representative, Sales Manager, Legal, Finance, Partner)
-
Stage-specific layouts that dynamically adjust based on the quote lifecycle stage (Agreement, Order, Quote).
-
Status-specific layouts based (Draft, Approval, Order, Renewal, Quote for Orders, and Quote for Agreement)
Administration
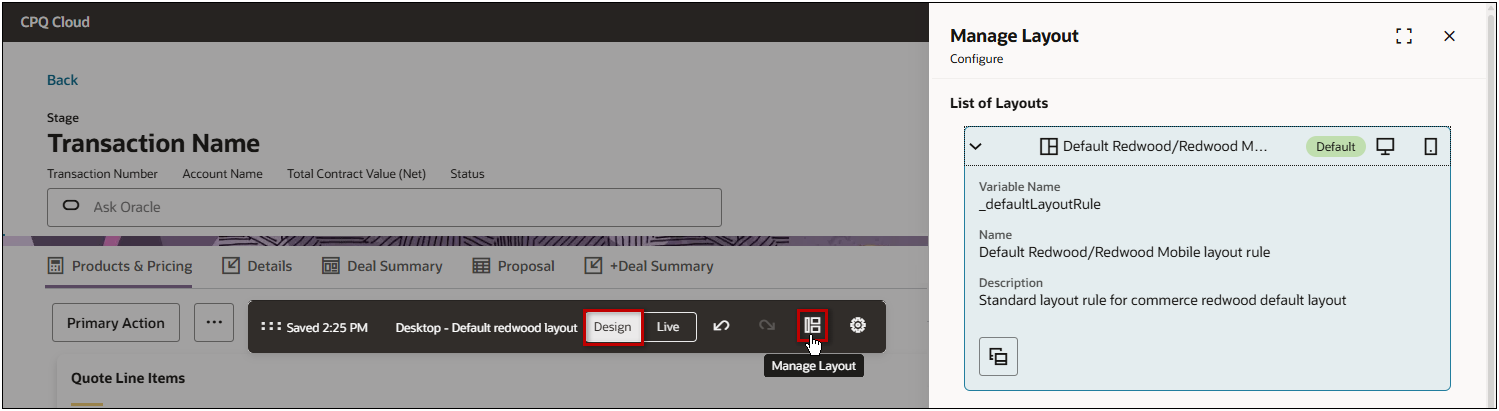
To manage layouts, administrators open a quote, click Design, then click the Manage Layout ![]() icon.
icon.
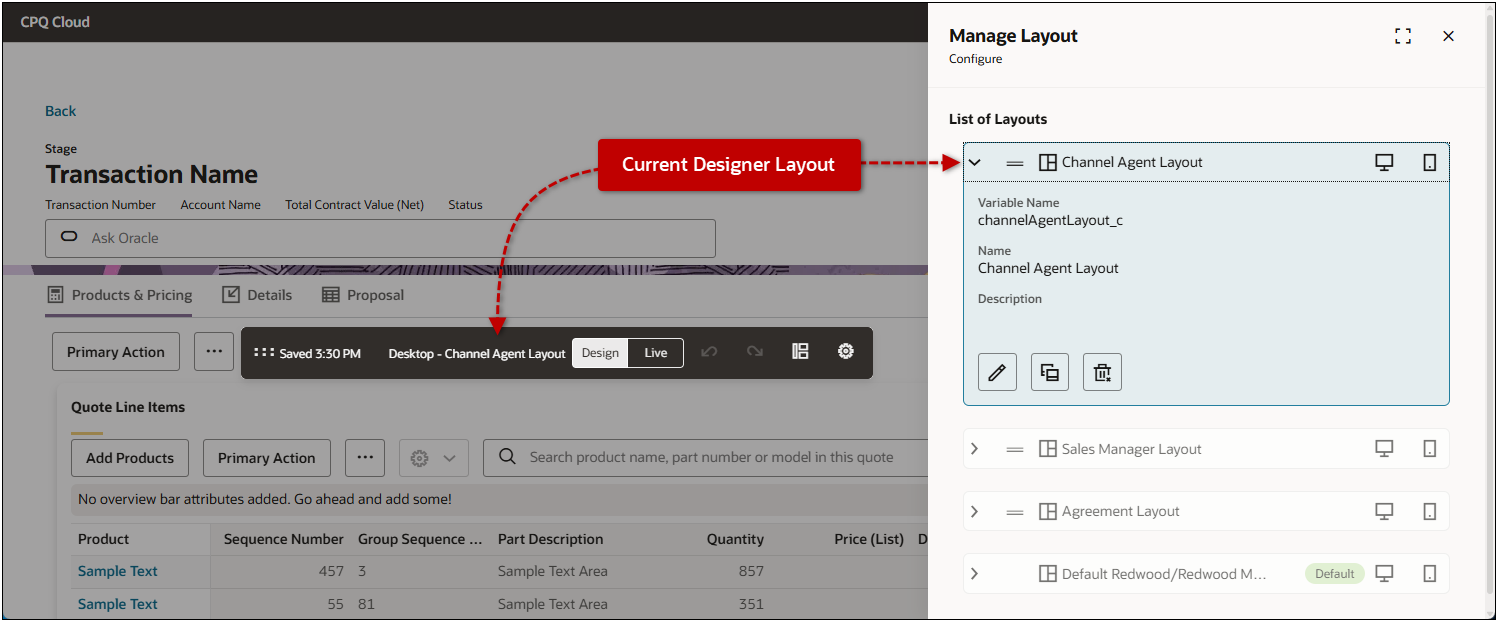
![]() Create "Clone" or Edit a Quote Layout
Create "Clone" or Edit a Quote Layout

Notes
Note: Unlike most Redwood Quote Designer settings, the applicable Commerce process must be deployed before quote layout settings are available to sales users on the Redwood Quote UI.


