Overview
The Price Guidance analytic that provides the ability to evaluate historical or optimization-based values to guide users on the appropriate and permitted discounts or prices for Commerce Transactions and Transaction Line documents. The Price Guidance analytic populates Commerce attributes with pricing guidance values for discount percentages or net prices. For example, a Starting, Target, and Maximum Discount can be defined for a type of quote or product to guide sales users on discounts that should be offered to the customer. After set up is complete, the guidance values can be displayed to sales users on the Transaction UI using attribute values or the Price Guidance Gauge.
Beginning in Oracle CPQ 20B, the "Last Price Paid" functionality is implemented using the Price Guidance feature.
To implement Last Price Paid functionality, refer to Setup Last Price Paid Using Price Guidance Analytic
Administration
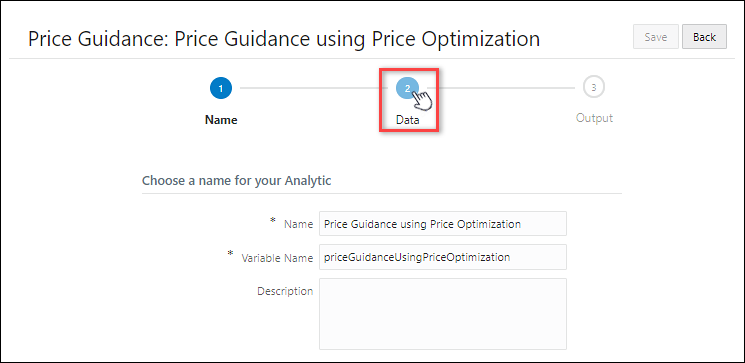
![]() Create a Price Guidance Analytic From Historic Data
Create a Price Guidance Analytic From Historic Data
-
Navigate to the Process Administration page.
Admin > Commerce and Documents > Process Definition
-
Select Analytics from the Navigation drop-down menu, then click List.
-
Scroll through the filmstrip to the Price Guidance option, then click Create.
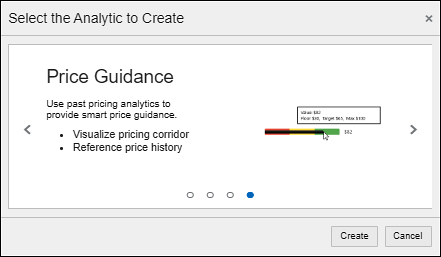
The Price Guidance wizard opens and guides administrators through the analytic creation process.
-
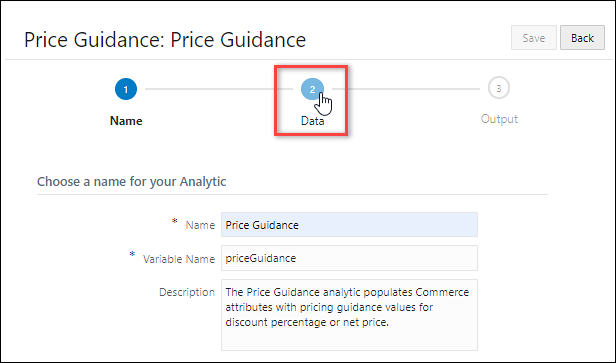
Define the following parameters:
- Name - The name for the analytic.
- Variable Name - The variable name for the analytic.
- Description (optional) - The description for the analytic.
-
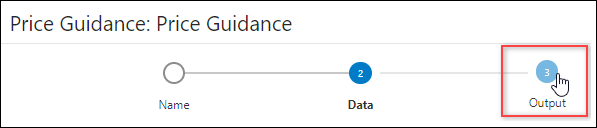
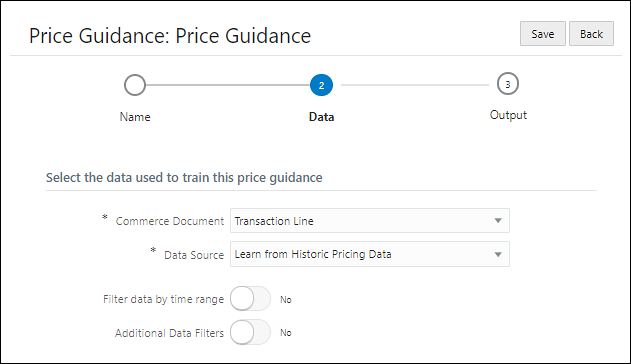
Click on the Data icon to proceed to the next page.
-
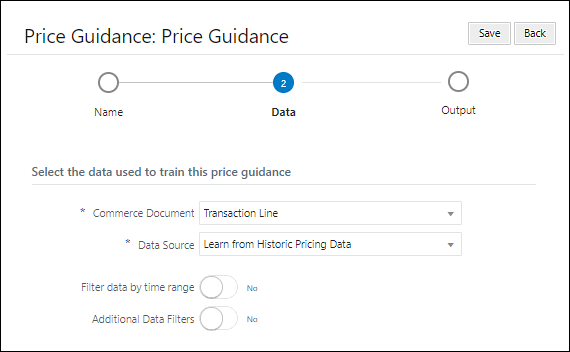
Select the Commerce Document from the drop-down menu. (e.g. Transaction or Transaction Line)
-
Select Learn from Historic Pricing Data from the Data Source drop-down menu.
Refer to Create a Price Guidance Analytic Using Trained Price Optimization to create an analytic from a trained price optimization.
-
Define time range filters (optional).

- Set Filter data by time range to Yes.
- Select the Date Attribute from the drop-down menu.
- Select the date Range from the drop-down menu.
-
Define additional data filters (optional).
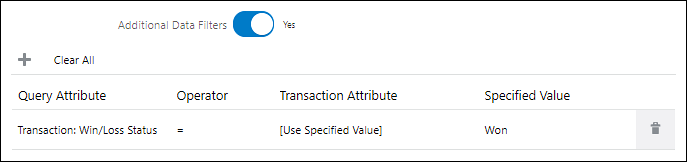
- Set Additional Data Filters to Yes.
- Click the "+" icon to add a filter.
- Specify the following criteria: Query Attribute, Operator, Transaction Attribute, and Specified Value.
-
Click on the Output icon to proceed to the next page.
-
Select one or more modify actions as Trigger Actions.
When a sales user invokes a trigger action on the Commerce UI, the price guidance calculation is executed and the calculation result is stored in the Output Attributes, which are also defined on this page.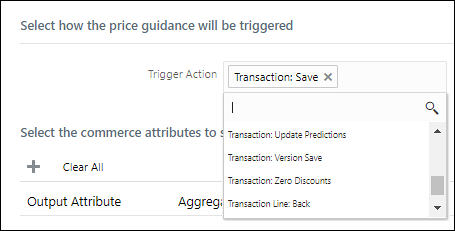
Notes:
-
The price guidance calculation is executed after "Formula", but before "Advanced Modify - After Formula" BML.
-
When a Transaction action is selected for a Transaction Line price guidance Trigger Action, the trigger action will invoke the Transaction Line price guidance against all line items of the current quote. If a quote contains a large number of line items, performance must be validated before deploying to sales users.
-
-
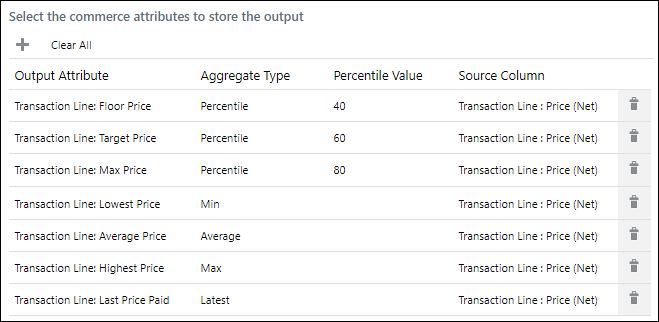
Define the Output Attributes and aggregate functions that are used to calculate a price guidance.
- Click the "+" icon to add an output attribute.
- Select the Output Attribute.
-
Select the Aggregate Type.
- Percentile - the output result is generated based on the cumulative percentile value, for more information see Percentile Aggregate Type.
- Min - the lowest historical value within the filtered data set.
- Max - the highest historical value within the filtered data set.
- Average - the average historical value within the filtered data set.
- Standard Deviation - the measure of dispersion within the filtered data set from its mean.
- Latest - the latest historical value, for more information see Last Price Paid.
- For percentile aggregate types, specify the Percentile Value.
- Select the Source Column.
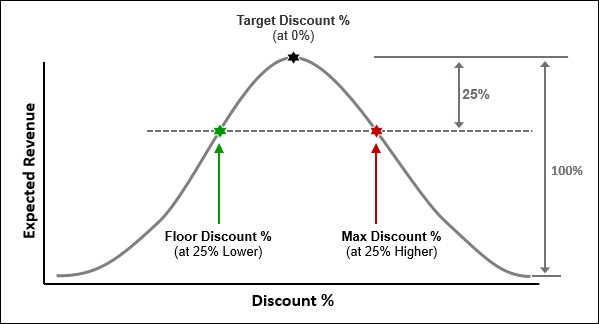
 The Output Attribute and the Source Column must be of matching data type (i.e. integer, float, currency, etc.).
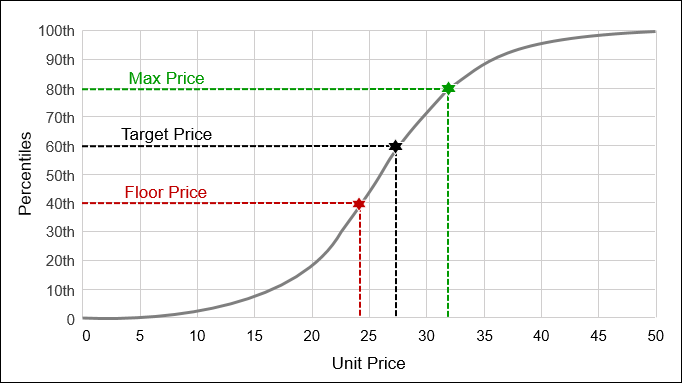
The following graph shows the price thresholds for 40th, 60th, and 80th percentile values.
- The floor price is set at the 40th percentile, i.e. 40% of the prices in the data set were lower.
- The target price is set at the 60th percentile, i.e. 60% of the prices in the data set were lower.
- The max price is set at the 80th percentile, i.e. 80% of the prices in the data set were lower.
- Click Save.
![]() Create a Price Guidance Analytic Using Trained Price Optimization
Create a Price Guidance Analytic Using Trained Price Optimization
-
Navigate to the Process Administration page.
Admin > Commerce and Documents > Process Definition
-
Select Analytics from the Navigation drop-down menu, then click List.
-
Click Create Analytic.
The Analytic wizard opens.
-
Scroll through the filmstrip to the Price Guidance option, then click Create.
The Price Guidance wizard opens and guides administrators through the analytic creation process.
-
Define the following parameters:
- Name - The name for the analytic.
- Variable Name - The variable name for the analytic.
- Description (optional) - The description for the analytic.
-
Click on the Data icon to proceed to the next page.
-
Select the Commerce Document from the drop-down menu. (e.g. Transaction or Transaction Line)
-
Select Use Trained Price Optimization from the Data Source drop-down menu.
Refer to Create a Price Guidance Analytic from Historic Data to create an analytic a based on historic pricing data.
- Select the target Price Optimization Analytic from the automatically populated list.
-
Click on the Output icon to proceed to the next page.
-
Select one or more modify actions as Trigger Actions.
When a sales user invokes a trigger action on the Commerce UI, the price guidance calculation is executed and the calculation result is stored in the Output Attributes, which are also defined on this page.
Notes:
-
The price guidance calculation is executed after "Formula", but before "Advanced Modify - After Formula" BML.
-
When a Transaction action is selected for a Transaction Line price guidance Trigger Action, the trigger action will invoke the Transaction Line price guidance against all line items of the current quote. If a quote contains a large number of line items, performance must be validated before deploying to sales users.
-
-
Define the Output Attributes and Delta Percentages for the analytic.
- Click the "+" icon to add an output attribute.
- Select the Output Attribute
- Specify the Delta Percentage.
- Specify the Direction (Lower Bound or Higher Bound).
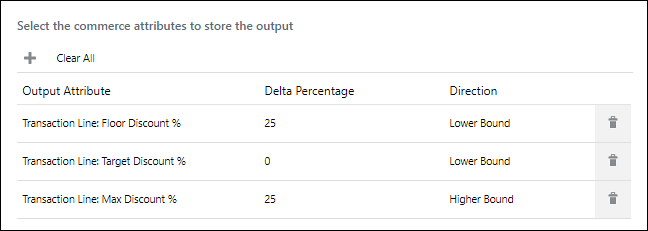
Output Attribute
Delta Percentage Direction
Floor Discount %
25 Lower Bound
Target Discount %
0 Max Discount %
25 Higher Bound
- The Floor Discount % is 25% less that the target.
- The Target Discount % adjusts the target price to optimum price.
- The Max Discount % is 25% more than the target.
- Click Save.
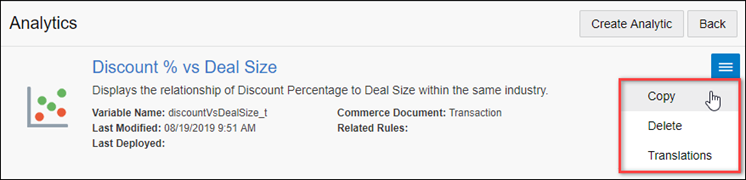
Administrators can copy Scatter Plot, Win Probability, Price Optimization, or Price Guidance analytics. This functionality allows administrators to quickly define and preview alternative analytics to evaluate the results with differing inputs.
Complete the following steps to copy an analytic:
- Navigate to the Admin Home page.
-
Under Commerce and Documents, click Process.
The Processes page opens.
- Select Analytics from the Navigation menu, next to the applicable process.
-
Click List.
The Analytics List page opens.
-
Select the checkbox next to the applicable analytic.
-
Click Copy.
The Analytics Definition Editor page opens.
- Update the analytic properties as desired.
- Initiate machine learning to train the new analytic.
- Preview the new analytic to analyze the results.
Note: Training sessions and results, and analytic output actions and attributes are not copied as part of the cloning process.
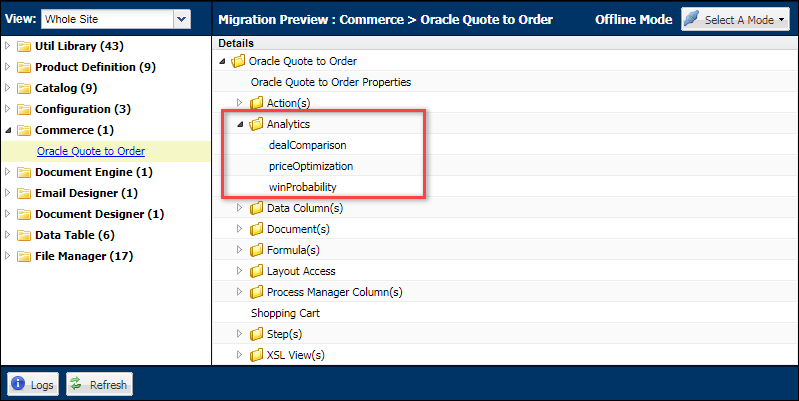
![]() Migrate Deal Management Analytics
Migrate Deal Management Analytics
The Migration Center is the user interface where all migration takes place within Oracle CPQ. Deal Management Analytics are displayed in the Analytics folder under the applicable Commerce process. Deal Management Analytics are migrated when the parent Commerce process is migrated.
Custom Variable Name Conventions Oracle CPQ appends the "_c" suffix to custom variable names to provide more consistency for integrations with Oracle Sales.
Customers can submit a Service Request (SR) on My Oracle Support to disable the "_c" suffix on variable names for custom Commerce entities
- When the "_c" is disabled, the "_c" variable name suffix will not be required for newly created custom Commerce entities.
- Disabling the "_c" variable name suffix for custom Commerce entities will not change existing variable names.
- The "_c" suffix setting will not impact existing variable names when cloning a Commerce process or migrating Commerce items. Target variable names will be the same as the variable names from the source Commerce process.


