Edit Approvals
Overview
Approval Sequences manage the reasons a quote should be approved and who is responsible for approving the quotes. In this article, we'll show you to how create and manage reasons within an approval sequence.
Administration
 Manage Reasons
Complete the following steps to manage reasons for approval sequences.
- Navigate to the main document Actions List page:
- Navigate to the Admin home page.
- Click Process Definition in the Commerce and Documents section.
- Click on the applicable Commerce process.
- Select Actions from the Navigation drop-down for the main document, and then click List.
-
Open the Submit type action.
Depending on your implementation, this action may be named Submit.
-
In the General tab, click Edit Approvals.
The Process Definition Approval Sequence page opens.
-
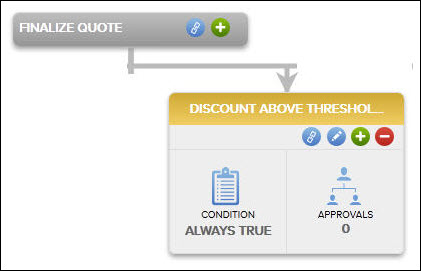
Click the Add Child  icon on the Submit action header.
If this is the first reason in a new sequence, the Add Child dialog box will appear automatically.
-
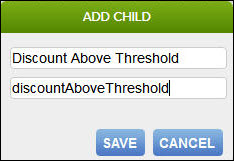
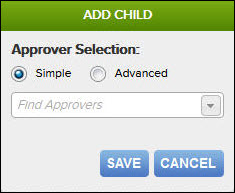
Enter a Reason Name and Variable Name in the Add Child dialog box, and then click Save.
The Variable Name field populates automatically. Variable names can only contain alpha-numeric characters and underscores. The entry can be changed before saving, but after saving the value is read-only.
- Click the Edit icon
 on the reason to edit the name or description, or to set the reason conditions.
-
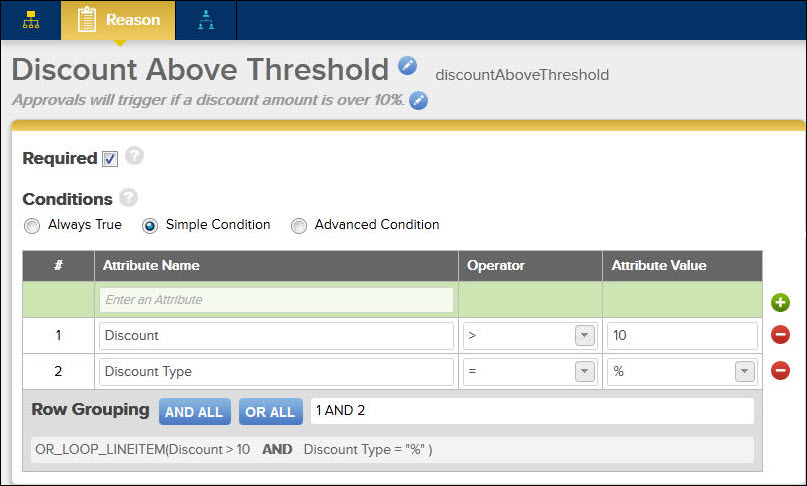
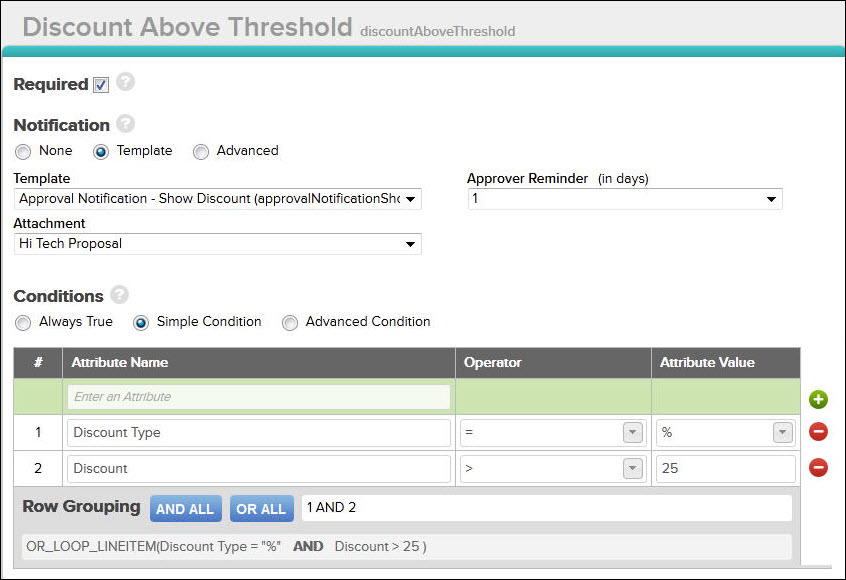
Select the Required option, if desired.
When Required is selected, reasons that follow this one in the sequence will be skipped if this reason condition evaluates to false.
-
Enter Conditions for the reason.
Conditions are evaluated when the user clicks Submit.
- If the conditions are returned true, then the approval sequence for the reason is executed and the system will modify the Approval Status and Reject/Approve icon attributes.
- The condition editor is similar to that in Configuration except:
- Click Save.
Manage Approvers
Now that you have created reasons, you can add approvers to the sequence.
- Parallel Approval Sequences: both approvers have to approve the quote for it to be considered "approved" and move to the next Step in the Workflow.
- Serial Approval Sequences: In a Serial Approver Sequence, the Reason must be approved by a first-level approver before moving to the next approver.
Follow these steps:
Complete the following steps to manage approvers for approval sequences.
- Navigate to the main document Actions List page:
- Navigate to the Admin home page.
- Click Process Definition in the Commerce and Documents section.
- Click on the applicable Commerce process.
- Select Actions from the Navigation drop-down for the main document, and then click List.
-
Open the Submit type action.
Depending on your implementation, this action may be named Submit.
-
In the General tab, click Edit Approvals.
The Process Definition Approval Sequence page opens.
-
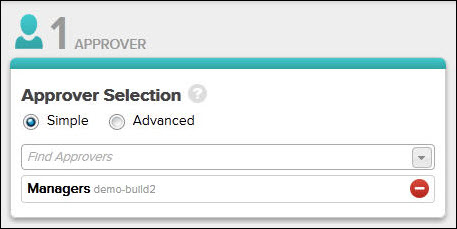
Click Approvers from within a Reason.
-
Choose an Approver Selection: Simple or Advanced.
- Advanced approvers functionality requires that at least one approver is returned. The format is:
1~ user~company|2~group~company|
- The 1 denotes that it is a user that is being designated as the approver.
- The 2 denotes that it is a group that is being designated as the approver.
- Only add the | delimiter if there are multiple approvers.
-
Select users or groups from the drop-down, then click Save.
- If a group is added, only one person in the group needs to approve the quote to move it to the next approval in the workflow.
- If more than one group or user is selected, then the values will be delimited with an "or".
-
Click the Edit icon on the Approver to enter conditions and manage notifications.
-
Select the Required option, if desired.
When selected, approvers that follow this one in the sequence will be skipped if this approver condition evaluates to false.
- Select the Notification type:
- None: Select to disable all email notifications (for example, Pending Approval, Retraction, Rejection, and so on).
- Template: Select from the pending approval notifications that were created from an Email Template. If you select Template, two more options appear: Email Template and Attachment.
- Advanced: Use BML to create the pending approval notification.
-
Select the Email Template to use for the pending approval notification email.
This is only available if you selected Template for the Notification type above.
-
Select one attachment to include in the notification email. This can be any document created by the Document Designer or a Printer-Friendly/History XSL.
This is only available if you selected Template for the Notification type.
- Set an Approver Reminder (in days). This will send a reminder to the approver, if they have not responded, every x (1-7) amount of days.
- Enter the Conditions for when this approver will need to approve the quote. You can select from:
- Always True The user / group will always to have to approve the quote for the reason.
- Simple Condition Set conditions, row by row, that must be met for the user / group to approve the quote.
- Advanced Condition Use BML to set conditions that must be met for the user / group to approve the quote.
-
Edit the users at any time by following Steps 3-4 on the Approval.
- Click Save.
- Click the Add Child icon on the Approver to add additional approvers.
- Repeat this procedure for each approver in the sequence.
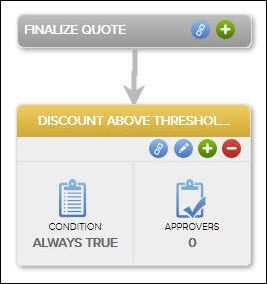
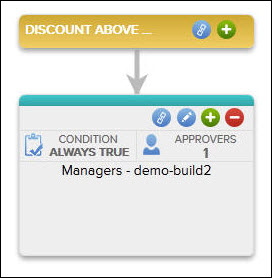
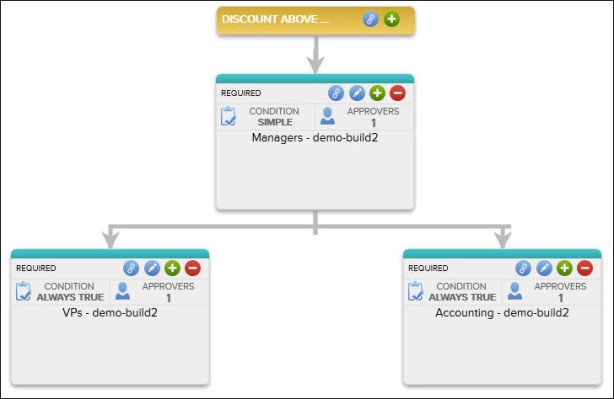
Final Result
Once you have added all approvers for a sequence, you will see a visual representation similar to the image below. The Reason will be the header at the top, with the approvers in the graph beneath it:
Notes
- Only one XSL view or document can be attached to an email notification.
- If you delete a parent reason or approver, the child is also deleted.
- If more than one reason is coming from a parent, then these are considered to be parallel reason flows. Parent / child relationships are considered serial flows. In serial flows, once a parent reason has been approved, child reason notifications are sent.
- Email templates can only be used for pending approval notifications.
- A reason will only be sent to a delegated approver when the approver is defined as an individual, not as a member of a group. See the topic Delegated Approvers for more information.
You can drag and drop reasons from one parent / child to another.
Related Topics
See Also