Overview
Administrators can extend the asset table by adding custom asset fields that suit their company's business needs.
In Oracle CPQ, the available count of Custom Asset Fields is 600. This field count includes:
- 350 text or menu fields (i.e. string type fields)
The string type field length is 1500 characters. - 200 numeric fields (i.e Integer, Float, and Currency)
- 50 date/time data fields
By clicking Assets on the Admin Home page, administrators can view custom asset fields.
This page contains a list of the custom asset fields and the count of available fields.
- The remaining Available Fields count is displayed at the top of the page.
- Asset fields displayed in red indicate an un-deployed fields After successful deployment, the fields are no longer displayed in red.
- Administrators can check the Delete checkbox to select one or more custom asset fields to delete.
- Administrators can click Add to create new custom asset fields.
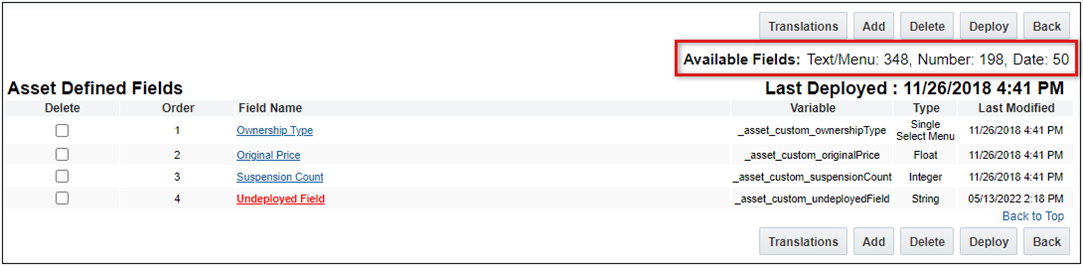
Administrators can select a link in the Field Name column to open the corresponding field editor and modify the associated field properties.
Administration
Complete the following steps to add a custom asset field.
- Navigate to the Admin Home page.
- Click Assets in the Products section.
-
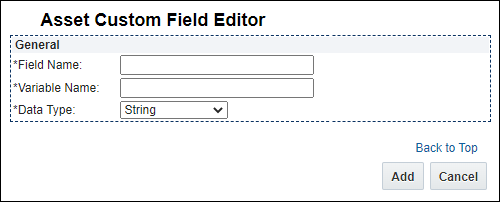
Click Add.
-
Enter the Field Name and Variable Name.
A "_c" suffix will be appended to the variable name.
-
Select the desired Data Type.
-
Click Add.
After you click Add, String, Integer, and Date field types are automatically added to the Asset Defined Fields list.
-
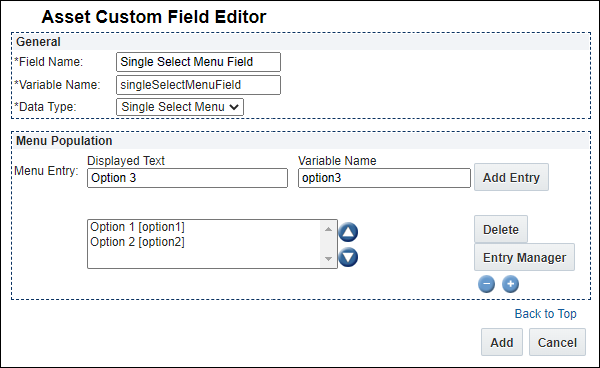
For Single Select Menu or Float field types, complete the applicable steps below:
-
Enter the Menu Entry Displayed Text and Variable Name, and then click Add Entry.
- Repeat this step for all desired menu options.
- To Change the Order of menu entries, select a menu entry and use the up ▲ and down ▼ arrows to move the selected entry.
- To Delete a menu entry, select the menu entry, and then click Delete.
-
Click Add.
-
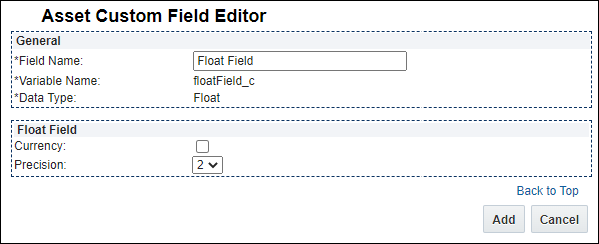
Check the Currency box currency type fields.
Currency fields are displayed as floating point number fields that will display the number in currency format. The currency displayed is the user's currency.
- Select the Precision value (the number of decimal places that will be accepted in the asset field).
- Click Add.
-
Note: Administrators cannot delete custom asset fields that are referenced in a UI Designer layout. If administrators attempt to delete a deployed custom asset field used in a layout, an error message will display. Administrators cannot delete the field until after the custom asset attribute is removed from the UI layout.
Complete the following steps to delete a custom asset field:
- Navigate to the Admin Home page.
- Under Products, click Assets.
- Under Asset Defined Fields, select the custom asset fields you want to delete.
-
Click Delete.
The custom asset field no longer displays in the Asset Defined Fields section.
By deploying one or more custom asset fields, administrators are adding the fields to the list of UI Designer attributes. Administrators can then use UI Designer to add deployed, re-deployed, and updated custom asset fields to the ABO Workbench layout.
Notes:
- After the successful deployment of a custom asset field, the field no longer displays in red under Asset Defined Fields.
- Deployed custom asset fields are available for asset REST services.
- The following deployed custom asset field types are available in the ABO Workbench layout: String, Single Select Menu, Float, Integer, and Date.
Complete the following steps:
- Navigate to the Admin Home page.
-
Under Products, click Assets.
Under the Asset Defined Fields section, all newly created or modified custom asset fields display in red.
Note: Administrators do not need to select the custom fields to deploy. Upon clicking Deploy, all custom fields displayed in red are deployed.
-
Click Deploy.
The deployed custom asset fields remain in the Asset Defined Fields section, but no longer display in red.

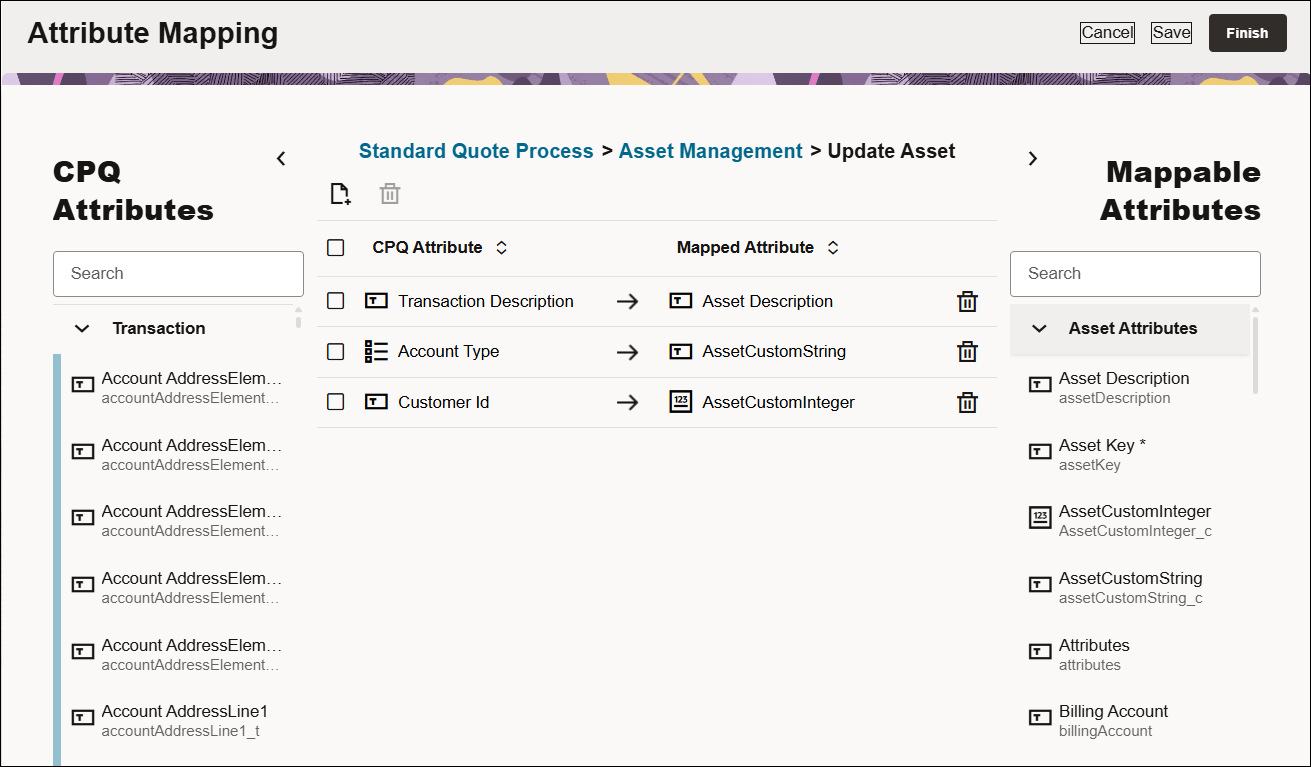
![]() Map Custom Asset Attribute to Transaction Attribute
Map Custom Asset Attribute to Transaction Attribute
The Oracle CPQ Commerce Standard Process allows you to map custom asset attributes to transaction attributes. Oracle CPQ provides a user-friendly asset management mapping interface for creating mappings, editing existing mappings, deleting a mapping, and previewing the asset mapping.
The following asset mappings are supported in Oracle CPQ 25D:
-
Update Asset maps the attributes from the Transaction to the asset when the transaction is fulfilled and the asset is created.
-
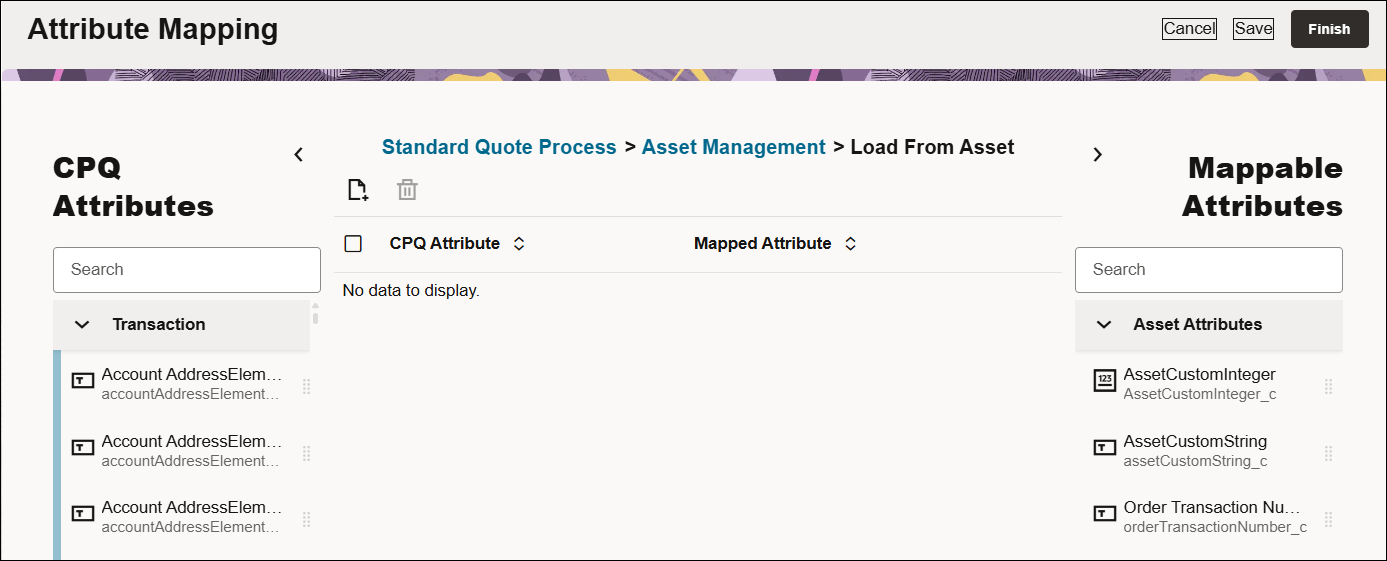
Load From Asset maps the attributes from the asset to the transaction when the asset is modified.
Complete the following steps to add new asset attribute mappings:
- Navigate to the Admin Home page.
- Click Process Definition from the Commerce section.
- Click Standard Quote Process under the Name column.
- Click the Asset Management tab.

- Click Edit next to Update Asset Mapping. The Attribute Mapping for Update Asset page opens.
-
Click the Add Row icon or drag and drop an attribute to create a new attribute mapping row.
-
Select the appropriate CPQ attribute on the left side.
-
Select the appropriate Asset attribute on the right side.
-
Click on the Apply icon or click outside the row to register the mapping.
-
Click Finish to return to the Asset Management tab.
-
-
Click Edit next to Load From Asset Mapping. The Attribute Mapping for Load From Asset Mapping page opens.
-
Click the Add Row icon or drag and drop an attribute to create a new attribute mapping row.
-
Select the appropriate CPQ attribute on the left side.
-
Select the appropriate Asset attribute on the right side.
-
Click on the Apply icon or click outside the row to register the mapping.
-
Click Finish to return to the Asset Management tab.
-
-
(Optional) If you would like to preview the asset mapping, enter the Transaction ID then click the Preview link to preview the associated mapping.
-
Click Apply or Update to save the asset mapping.


