Performance Logs
Overview
The Performance Logs page allows administrators to monitor and analyze the performance experienced by Oracle CPQ sales users. The page leverages the Performance Logs REST API and the UI Designer to deliver improved access and usability to performance log data.
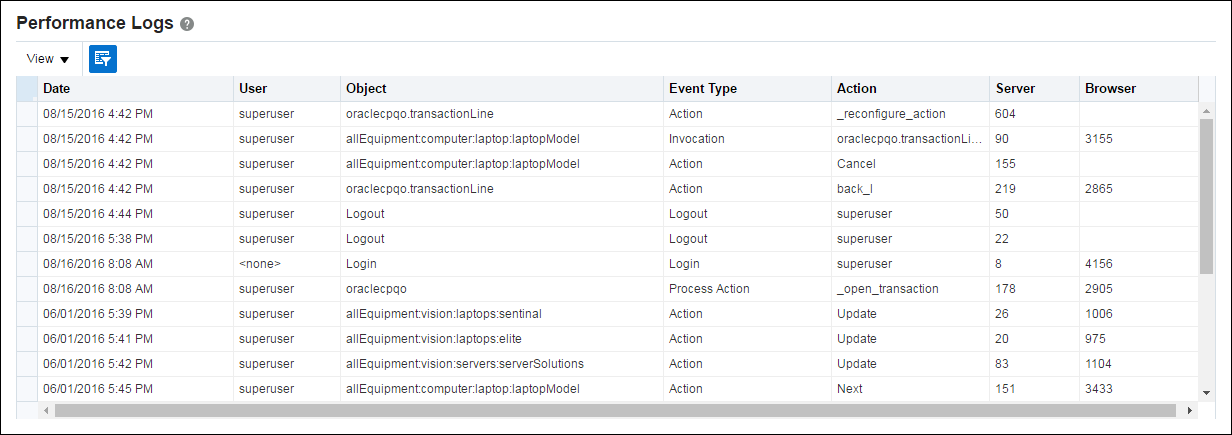
The page allows administrators to view user actions such as logins, logouts, commerce and configuration actions, with the elapsed server and browser times required to complete the actions.
Continuous enhancements have provided the following items:
 Details for Web Services
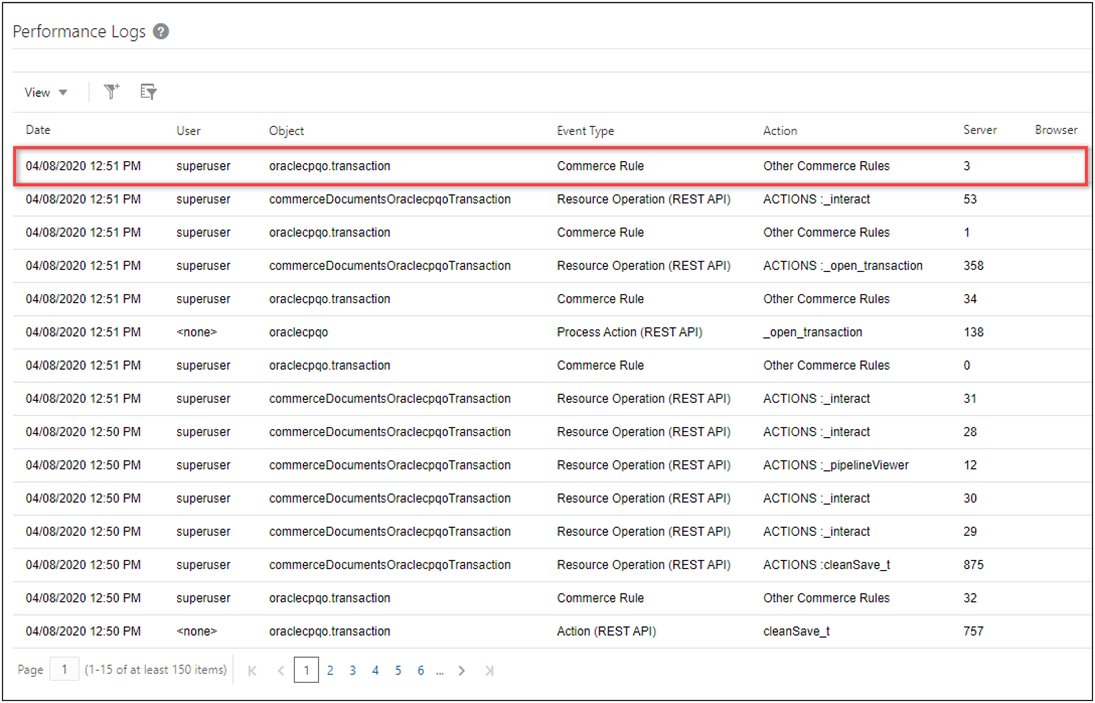
Performance Logs capture details for SOAP and REST API requests. Performance Logs record all web service calls invoked from integrations, external applications, BML scripts, etc. All properties (except the Browser time) are populated with valid data for each request. The web service type (i.e. SOAP API or REST API) is listed in the Event Type column and action (e.g. getTransaction, _change_currency, etc.) is listed in the Action column.
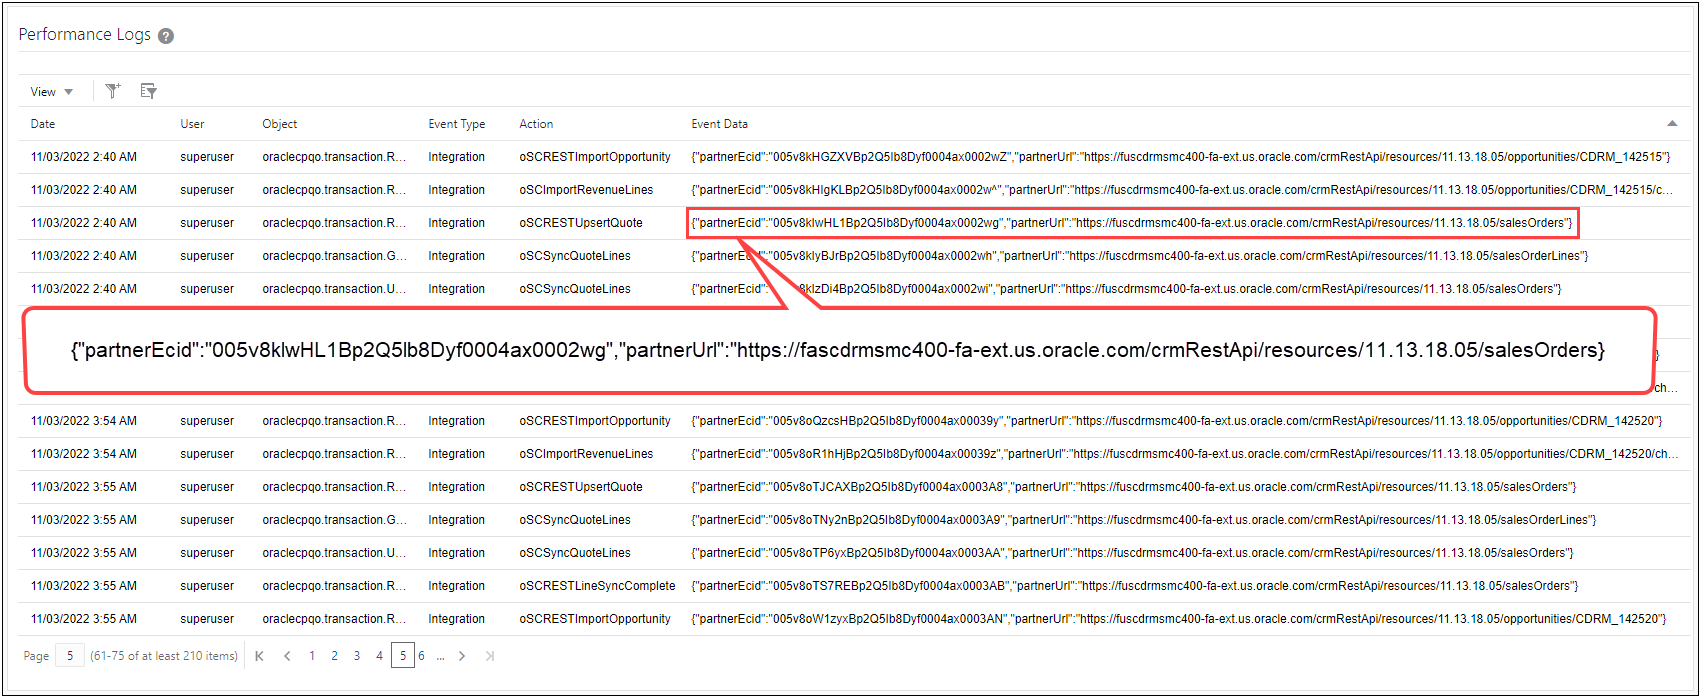
Beginning in Oracle CPQ 23A, additional Commerce integration Event Data is included in the Performance Logs to aid administrators when troubleshooting integrations, as follows:
-
The URL of the Commerce integration is included for all SOAP and REST integrations and when available for BML integrations.
-
The Execution Context ID (ECID) is included when available in the response header for SOAP/REST/BML integrations. The ECID is a unique identifier that helps in identifying and debugging processes and analyzing logs for various components on the Fusion server.

 Action Related Items, such as Rules, Formulas, and Filters
Items related to an invoked action are now included in the Performance Logs. The action related items include the following:
- Hiding rules
- Validation
- Constraints
- Filters
- Formulas
- Auto-update Rule - Before Formulas
- Auto-update Rule - After Formulas
When a Commerce action has related items, a "Commerce Rule" event type entry is logged for the invoked action.

 Details for BML URL Data Functions
Performance Logs capture the time to execute urldata, urldatabyget, urldatabypost, and urldatabypostasync functions. For asynchronous operations, the time between the request and acknowledgement is recorded.
 Details for Account Integration
Performance Logs includeTransaction ID and Action columns to capture details for partner account integration. Performance details include Transaction Number, Action requested, Autofill detail, and Contact import detail.
Access performance log data by selecting Performance Logs under Developer Tools section of the Admin Home page.

 Using Simple and Advanced Filters
The Simple and Advanced Filters provide the functionality previously available from the Query By Example (QBE) filter. Just as with the QBE filter, users can define filter criteria for multiple column items using the Advanced Filter. In addition to defining a multiple column filter, the Advanced Filter allows users to specify if the results match any or match all filter criteria. The Simple Filter searches all columns and then filters results based on a user-defined keyword or phrase.
Simple Filter
The Simple Filter supports quick text or numeric searches, such as Part Number searches. The Simple Filter Icon is located in the toolbar above the associated table for JET UI pages.

 Use the JET UI Simple Filter
To use the Simple Filter, perform the following steps:
-
Click on the table toolbar Simple Filter icon.

The keyword entry field appears in the table toolbar.

-
Type the desired keyword or phrase and then press <Enter> or <Return> to filter results.
If the keyword is present in any column, the resulting lines are returned.
- To deactivate the filter, click on the active Simple Filter icon.

Advanced Filter
The Advanced Filters supports use cases where multiple criteria are required to focus on a subset of lines. A wide range of operators and the Match all or Match any option expand the user's ability to fine tune their filtering. The Advanced Filter icon is located in the toolbar above the associated table for JET UI pages.

 Use the JET UI Advanced Filter
To use the Advanced Filter, perform the following steps:
-
Click on the table toolbar Advanced Filter icon.

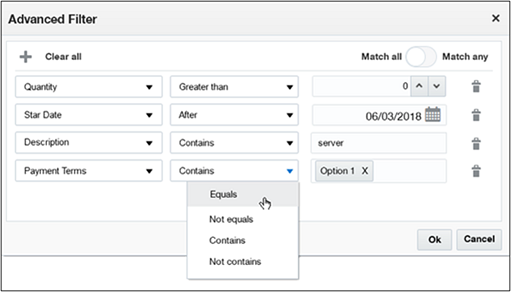
The Advanced Filter window opens.

- Define the filter criteria:
- If required, click the Add Row icon.

- In the first column, select the desired table column names.
- In the second column, select the applicable operator.
- In the third column, define the criteria for the column filter.
- To delete a row, click the Delete Row icon.

- Select Match all or Match any.
-
Click OK to filter results.
The resulting lines are returned.
- To modify the filter criteria, select Edit Filter.
- To deactivate the filter, click on the active Advanced Filter icon.

Notes
- Eligibility Rules are not included in the Performance Log rule entries.
- Pagination only retrieves a subset of pages, therefore the total number of pages is not displayed and navigate to the last page is not available.
- Performance log data is purged after 90 days. If you want performance log data for reference beyond the 90 day limit, you can periodically capture and store the data via the Performance Logs REST APIs.
Related Topics
 See Also
![]() Action Related Items, such as Rules, Formulas, and Filters
Action Related Items, such as Rules, Formulas, and Filters
![]() Details for BML URL Data Functions
Details for BML URL Data Functions
![]() Details for Account Integration
Details for Account Integration

![]() Using Simple and Advanced Filters
Using Simple and Advanced Filters


