Overview
Customers can add parts to a Transaction in a variety of ways including via Recommendation Rules, BOM Mapping Rules, Part Search, Multi-Part Search, Quick Keys, and API calls. Eligibility Rules allow administrators to define the parts available to specific customers. When customers add a part to a Transaction using any of the available methods, they can only view and add the parts available to them.
Beginning in Oracle CPQ Release 18B, all methods of adding parts now enforce Eligibility Rules. Refer to the following REST API topics for more information:
- REST APIs for Eligibility Rules allow external applications to create, read, update, delete, and deploy Eligibility Rules.
- REST APIs for Search Parts allow external applications to search and filter parts.
Administration
![]() View a List of Eligibility Rules
View a List of Eligibility Rules
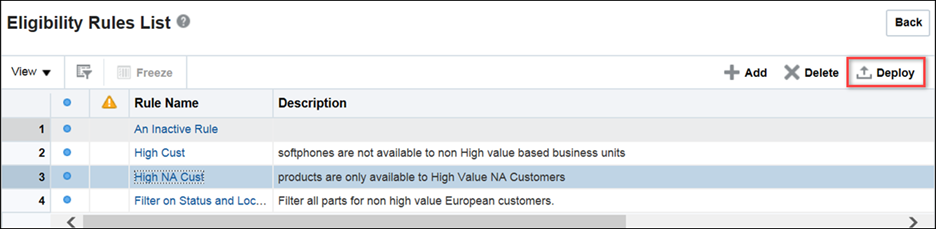
Oracle CPQ includes an Eligibility Rules option on the Admin Home page. Administrators can use this option to open the Eligibility Rules List page and view a list of existing Eligibility Rules. Administrators can also use the page to add, delete, or deploy Eligibility Rules.
- Open the Admin Home page.
-
Under Products, select Eligibility Rules.
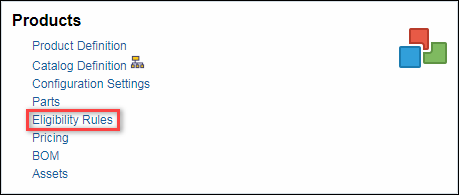
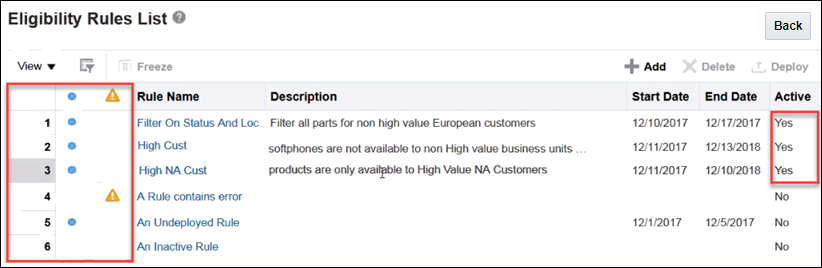
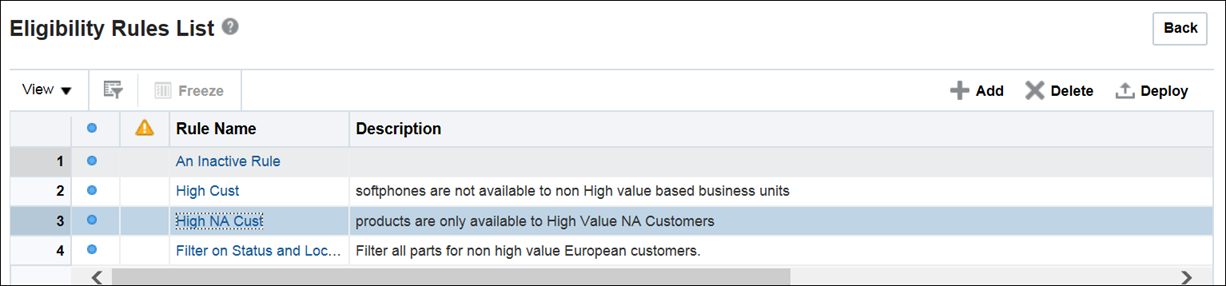
The Eligibility Rules List page opens.
-
Each Eligibility Rule name is a link to its detail page.
In the following example, there are three active Eligibility Rules on the Oracle CPQ site.
Notes:
- The first column provides a numerical list of each Eligibility Rule in the table.
- The second column contains blue bullets to indicate Eligibility Rules that are either not yet deployed or were modified after deployment.
- The third column displays a warning icon when the Eligibility Rule is invalid.
- Use the Deploy button to deploy selected Eligibility Rules. Administrators can select one or more Eligibility Rules, which are highlighted when selected.
- Click Back to return to the Admin Home page.
The Simple and Advanced Filters provide the functionality previously available from the Query By Example (QBE) filter. Just as with the QBE filter, users can define filter criteria for multiple column items using the Advanced Filter. In addition to defining a multiple column filter, the Advanced Filter allows users to specify if the results match any or match all filter criteria. The Simple Filter searches all columns and then filters results based on a user-defined keyword or phrase.
Simple Filter
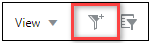
The Simple Filter supports quick text or numeric searches, such as Part Number searches. The Simple Filter Icon is located in the toolbar above the associated table for JET UI pages.
To use the Simple Filter, perform the following steps:
-
Click on the table toolbar Simple Filter icon.
The keyword entry field appears in the table toolbar.

-
Type the desired keyword or phrase and then press <Enter> or <Return> to filter results.
If the keyword is present in any column, the resulting lines are returned.
- To deactivate the filter, click on the active Simple Filter icon.

Advanced Filter
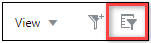
The Advanced Filters supports use cases where multiple criteria are required to focus on a subset of lines. A wide range of operators and the Match all or Match any option expand the user's ability to fine tune their filtering. The Advanced Filter icon is located in the toolbar above the associated table for JET UI pages.
![]() Use the JET UI Advanced Filter
Use the JET UI Advanced Filter
To use the Advanced Filter, perform the following steps:
-
Click on the table toolbar Advanced Filter icon.
The Advanced Filter window opens.
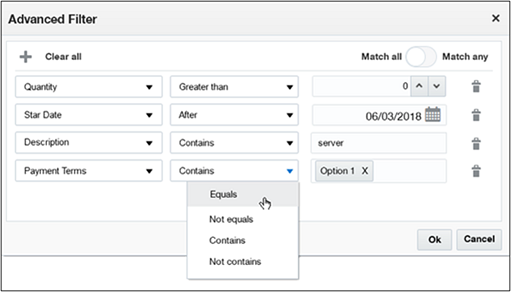
- Define the filter criteria:
- If required, click the Add Row icon.

- In the first column, select the desired table column names.
- In the second column, select the applicable operator.
- In the third column, define the criteria for the column filter.
- To delete a row, click the Delete Row icon.

- Select Match all or Match any.
- If required, click the Add Row icon.
-
Click OK to filter results.
The resulting lines are returned.
- To modify the filter criteria, select Edit Filter.
- To deactivate the filter, click on the active Advanced Filter icon.

![]() Default Columns on Eligibility Rules List Page
Default Columns on Eligibility Rules List Page
The following table identifies the columns that, by default, are visible and hidden on the Eligibility Rules List page. Administrators can use the View menu to modify the visible and hidden columns.
|
Columns Visible |
Columns Hidden |
Notes |
|---|---|---|
|
Rule Name |
Process |
The Process column only displays a value when one or more Commerce attributes are included in the Eligibility Rule. Administrators can set up an Eligibility Rule with no reference to Commerce. When this occurs, the Eligibility Rule can be applied across multiple processes. |
|
Description |
Modified date |
|
|
Start Date |
Last Deployed Date |
|
|
End Date |
Rule Type |
|
|
Active |
Use the Eligibility Rule Detail page to add an Eligibility Rule.
Complete the following steps:
- Navigate to the Admin Home page.
-
Under Products, select Eligibility Rules.
The Eligibility Rules List page opens.
-
Click Add.
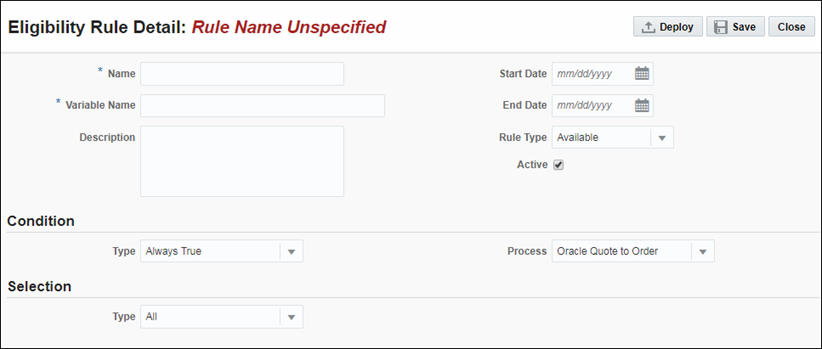
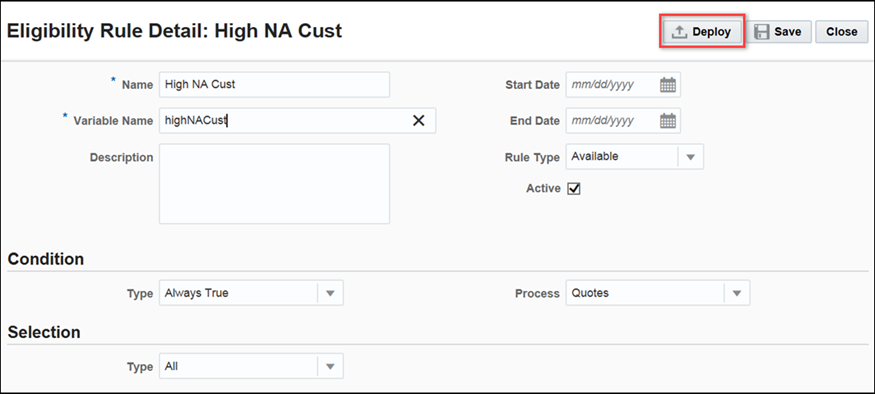
The Eligibility Rule Detail page opens.
-
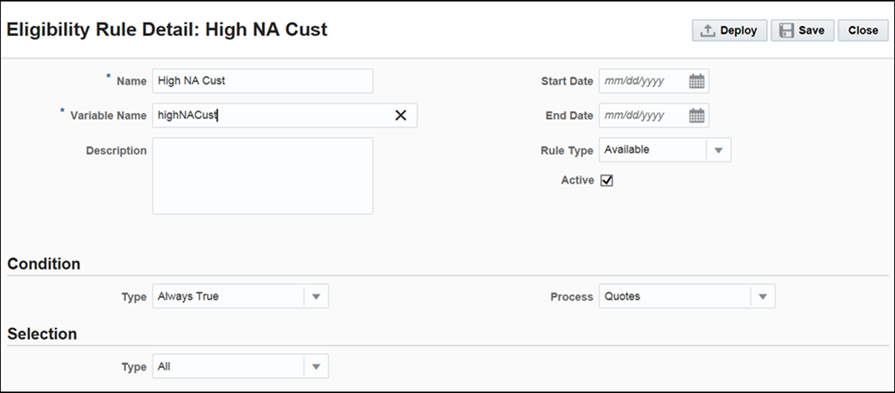
Enter a name for the Eligibility Rule.
The name is reflected in the page name, replacing the default "Rule Name Unspecified".
-
The Variable Name field auto-populates upon clicking in or tabbing to the field.
If an administrator enters a duplicate variable name, an error message will display upon saving the Eligibility Rule. The administrator must correct the variable name.
-
Enter a description, if desired.
-
If applicable, select a Start Date and End Date reflecting the effective dates of the Eligibility Rule.
-
In the Type drop-down, select a rule type
- Available: When the condition is satisfied, the selected parts are available.
- Not Available: When the condition is satisfied, the selected parts are not available.
-
The Active checkbox is selected by default, indicating the Eligibility Rule is available on the Oracle CPQ site.
-
Under the Condition heading, select one of the following options:
- Always True: The Eligibility Rule is always applied. The parts available in Recommended Items, Quick Key, Part Search, Shopping Cart, Favorites, Configuration and Commerce SOAP APIs, and BOM items are determined by deployed Eligibility Rules and part custom field filters.
- Simple: Define the condition using data source attributes, which are displayed in the attribute drop-down menu for the condition and include Commerce Attributes and User Attributes. The Eligibility Rule fires when the condition is met.
-
From the Process drop-down menu in the Condition area grid, select the Commerce process whose attributes will display in the Selection area grid. The Eligibility Rule only applies to the Commerce process when one or more of the processes' attributes are included in the rule.
-
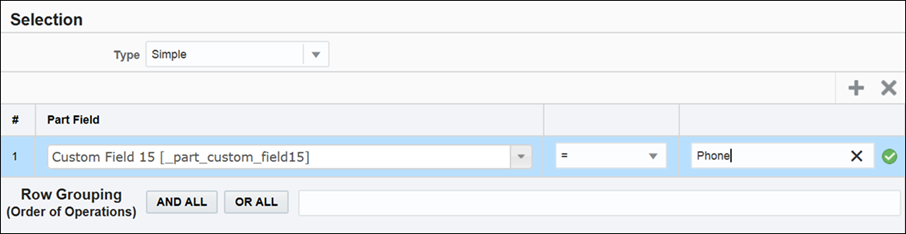
Use the Selection area to specify criteria for filtering parts.
- All: If the condition evaluates to true, all parts are included.
- None: If the condition evaluates to true, no parts are included.
- Simple: Allows administrators to specify the parameters to use for filtering parts.
-
Click Save.
-
Click Close to return to the Eligibility Rules List page.
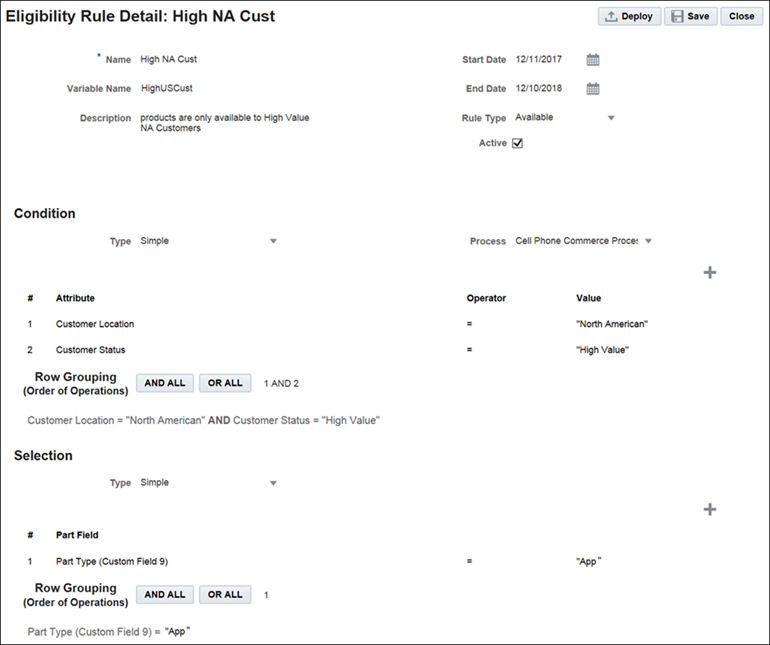
In the following example, an administrator uses a simple condition to restrict the availability of a product using the "Customer Location" and "Customer Status" attributes. As a result, the product is available to High Value customers located in North America. The administrator then uses the Selection area of the Eligibility Rule Detail page to specify the part selection.
In the following example, the Eligibility Rule is applied when a sales user in the US creates a new Transaction for a customer with a High Value status.

The sales user then clicks Add from Catalog to configure a model to add to the Transaction.
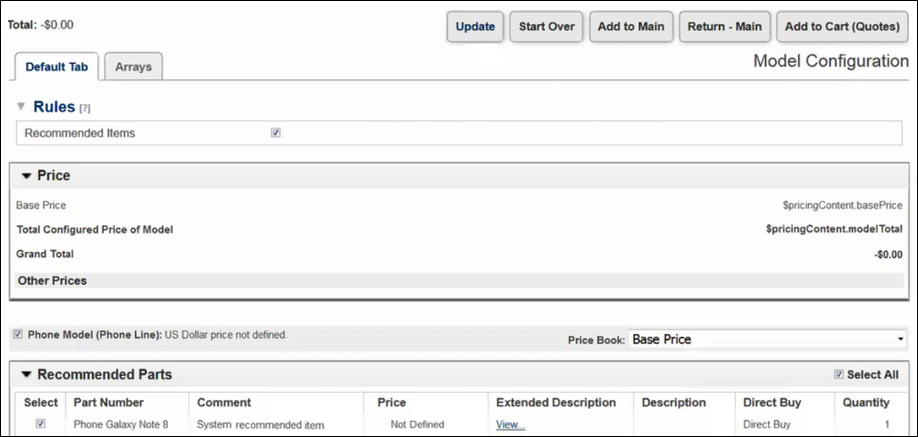
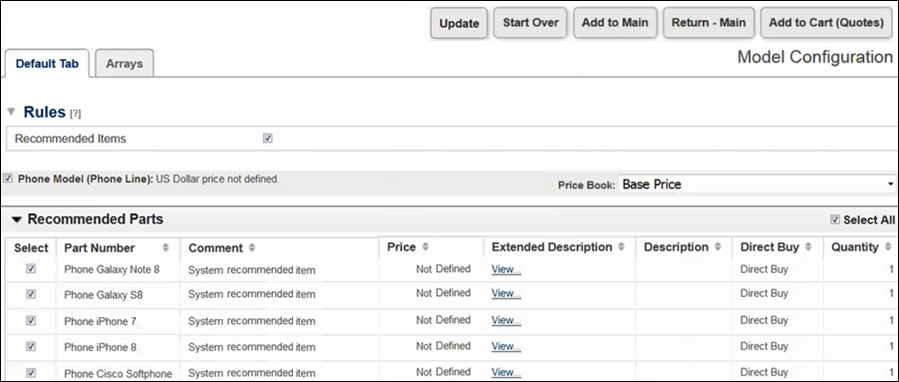
Active Eligibility Rules are executed and a list of parts are displayed in the Recommended Items window. The sales user can add available parts to the Transaction. A red "X" displays next to unavailable parts.
Administrators can use the Eligibility Rules List page to select one or more Eligibility Rules to delete. Selected rows display as highlighted rows.
Complete the following steps:
- Open the Admin Home page.
-
Under Products, select Eligibility Rules.
The Eligibility Rules List page opens.
-
Select one or more Eligibility Rules to delete.
-
Click Delete.
The Eligibility Rule is removed from the Eligibility Rules List page.
Like many elements in CPQ, Eligibility Rules require deployment. Administrators can deploy Eligibility Rules from the Eligibility Rules List page and the Eligibility Rules Detail page.
![]() Deploy Eligibility Rules from the Eligibility Rules List page.
Deploy Eligibility Rules from the Eligibility Rules List page.
Complete the following steps:
- Open the Admin Home page.
-
Under Products, select Eligibility Rules.
The Eligibility Rules List page opens.
- Select one or more Eligibility Rules to deploy.
-
Click Deploy.
![]() Deploy Eligibility Rules from the Eligibility Rules Details page.
Deploy Eligibility Rules from the Eligibility Rules Details page.
Complete the following steps:
- Navigate to the Admin Home page.
-
Under Products, select Eligibility Rules.
The Eligibility Rules List page opens.
-
Select the applicable Rule Name.
The Eligibility Rule Detail page opens.
-
Click Deploy.
![]() Bulk Upload and Download Eligibility Rules
Bulk Upload and Download Eligibility Rules
Administrators can use Bulk Data Services to add, update, and delete Eligibility Rules. They can upload or download Eligibility Rules using XML.Ad
-
During bulk upload, an error displays when more than one rule exists with the same variable name, any required field or action is missing, or extra columns exist.
-
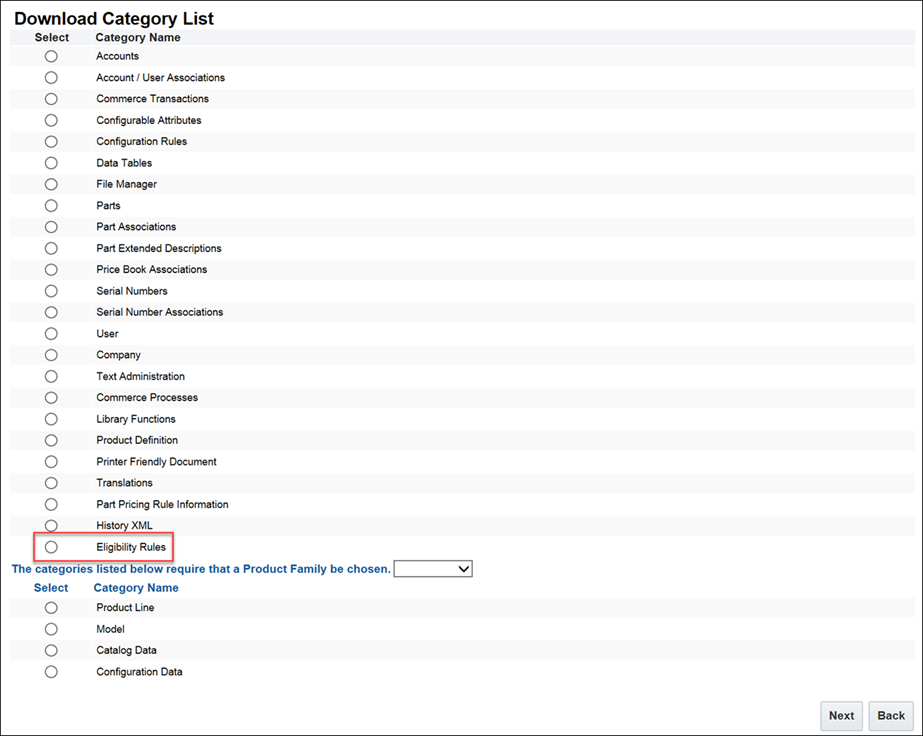
On the Download Category List page (Admin > Bulk Service > Download), an Eligibility Rule option exists and allows administrators to select the Eligibility Rules to download.
After selecting the Eligibility Rule option and clicking Next, administrators can specify the selection criteria.
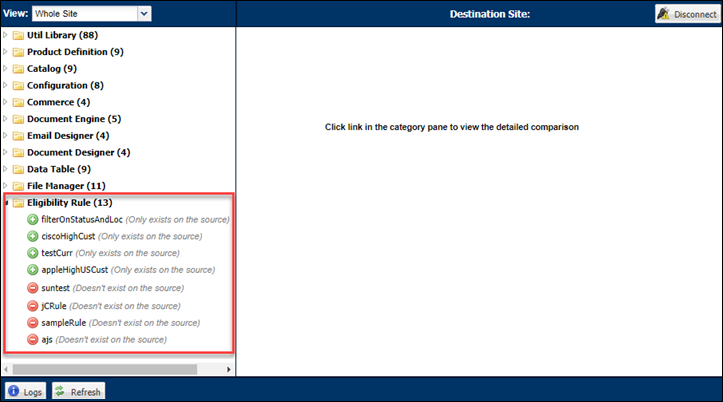
The Migration Center is the user interface where all migration takes place within CPQ. "Eligibility Rule" displays as a migration component in the Content pane. Administrators can migrate deployed Eligibility Rules as independent entities using the Migration Center functionality available in prior releases. In addition, they can view the granular differences between an Eligibility Rule on the source and target site.
Notes
Consider the following tips when using Product Eligibility Rules:
- Eligibility Rules are supported in Configuration SOAP APIs and Transaction REST APIs.
- Translation is supported for Eligibility Rules.
- The Configuration UI and the Oracle CPQ commerce UI used for editing Transactions show executed Eligibility Rules in the Pipeline Viewer.


