Overview
Conditions can be placed on Layouts and Elements so that the content will only appear in the output if a logic statement evaluates to true.
Administration
![]() Where Conditions can be Placed
Where Conditions can be Placed
Conditions can be placed on the following components:
- Heading
- Spacer
- Page Break
- Column Break
- Sections
- Text Elements
- Image Elements
- Table Elements
- Table rows
- Table columns
- XSL Snippet Elements
- Embed Document Elements
To add a Condition to an applicable component:
- Select the component that the Condition will be added to.
-
Click the Condition button (
 ) in the Dynamic Content Bar.
The Condition window appears.
-
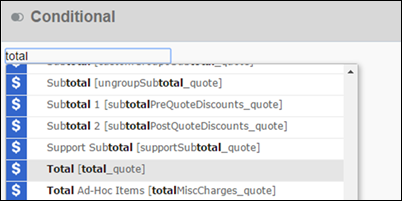
Begin typing the Condition. As you type, a combination of literal values, operators, User Attributes, and Main Document Attributes will be suggested. When the desired component is suggested in the list, click it to add it to the Condition.
-
Continuing adding components to the Condition until the expression is logically complete.

In this example, the component that has the Condition applied to it will only show in the output if the value of the Main Document Total attribute is greater than or equal to $10,000.
When evaluating a Boolean attribute in the Condition Editor, the equal (=) symbol only compares one attribute to another, such as Bool1 = Bool2.
To evaluate if Bool1 is true, putBool1. To evaluate if Bool1 does not equal true, usenot(Bool1)ornot Bool1.
-
Click OK to save the Condition.
A Condition icon is added to the component in the Template Flow.

- Click the Condition icon on the component, or the Condition button in the Dynamic Content Bar when the component is selected, to modify or delete the Condition.
Administrators can use newly supported string functions, date functions, and a between function for numbers.
String Functions
Oracle CPQ supports the following string functions in conditions and loops.
|
Function |
Returns |
Details |
|---|---|---|
|
contains (string1, string2) |
Boolean |
Search string1 for existence of string2 |
|
isNumber(string) |
Boolean |
Returns true if string is numeric |
|
startsWith (string1, string2) |
Boolean |
Checks whether string1 starts with string2 |
|
endsWith (string1, string2) |
Boolean |
Checks whether string1 ends with string2 |
|
isBlank (string) |
Boolean |
Returns true if string is empty, blank, or null |
Date Functions
Oracle CPQ supports the following date functions in conditions and loops.
|
Function |
Returns |
Details |
|---|---|---|
|
isBefore (date1, date2) |
Boolean |
Returns true if date1 is before date2 |
|
isAfter (date1, date2) |
Boolean |
Returns true if date1 is after date1 |
|
equals (date1, date2) |
Boolean |
Returns true if date1 is equal to date2, including time |
|
equalsIgnoreTime (date1, date2) |
Boolean |
Returns true if date1 is equal to date2, ignoring time |
|
dateBetween (date1, date2, date3) |
Boolean |
Returns true if the value to check is between start of range and end of range (inclusive) |
Between Function for Numbers
Oracle CPQ supports a between function for numbers in conditions and loops.
|
Function |
Returns |
Details |
|---|---|---|
|
between (number1, number2, number3) |
Boolean |
Returns true if number1 is between number2 and number3 |
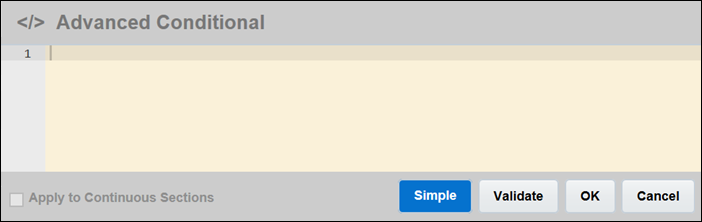
Administrators can convert a Simple condition to an Advanced Conditional that displays in XSL format. An Advanced button displays on the Conditional dialog. After opening the dialog, administrators can go directly to Advanced mode by clicking the Advanced button.
The following image displays a Conditional dialog without a Simple condition.
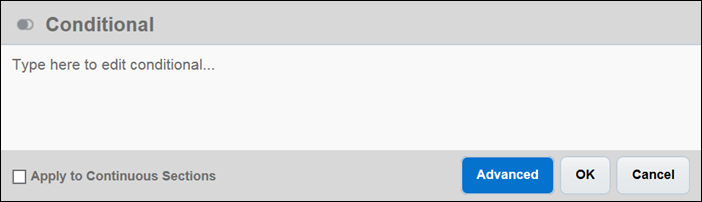
If a Simple condition does not exist in the Conditional dialog, clicking Advanced will load the Advanced Conditional dialog with no XSL content.
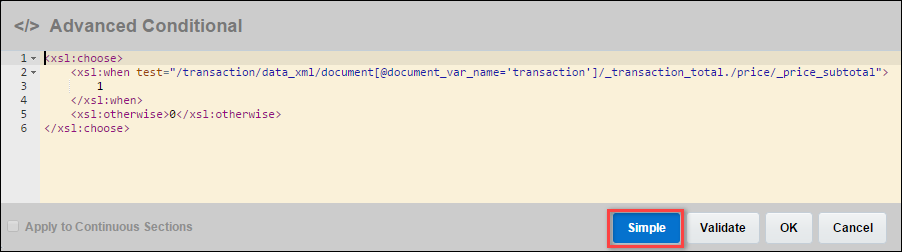
When the Conditional dialog contains a Simple condition, administrators can click Advanced to convert the Simple condition to XSL. The following figure shows a Simple condition.
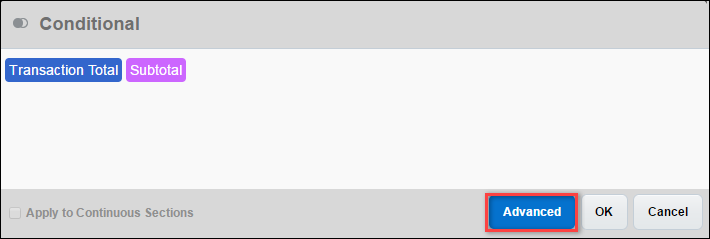
The Advanced Conditional dialog shows the Simple condition converted to XSL. The administrator can return to the Simple condition that displays in the Conditional dialog (shown above) by clicking Simple.