Overview
Products in Oracle CPQ are structured in a hierarchical fashion.
Setting up Product Families involves defining and configuring Products and Catalogs. This allows you to manage your Configuration Models, including the product hierarchy, attributes, and rules.
The first step in Product Definition is to create Product Families. Product Families are broad classifications of products, typically based on industry standards, rather than a single company standard.
Product Family classifications should take into consideration how you want to merchandise your products, or how you want users to navigate through the catalog.
Administration
Product Family Set Up
Step 1: Create and Deploy a Product Family
 Navigate to the Product Family List page.
- Click Admin to go to the Admin Home Page.
-
Click Product Definition in the Products section.
The Product Family List page opens.
-
Click Add.
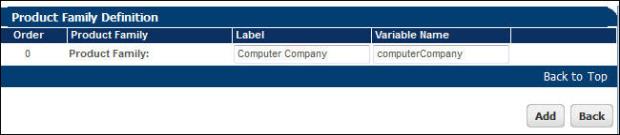
The Product Family Definition page opens.
-
Enter the name of the Product Family in the Label field.
The Variable Name field populates automatically. Variable names can only contain alpha-numeric characters and underscores. The entry can be changed before saving, but after saving the value is read-only. However, it must be alpha-numeric and without spaces or special characters.
-
Click Add.
The Product Family List page opens, with your new Product Family listed.
- Navigate to the Product Family List page.
- Click Admin to go to the Admin Home Page.
-
Click Product Definition in the Products section.
The Product Family List page opens.
-
For the Product Family you just created, choose Deployment Center from the Navigation drop-down and click List.

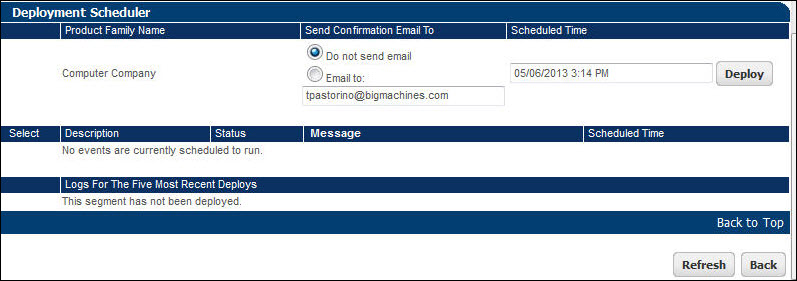
The Deployment Scheduler page opens.
- Optionally, select Email to to send confirmation emails every time a Product Family is deployed, and enter a valid email address.
-
Click Deploy.
You can schedule a time for future deployment in the text box next to the Deploy button.
Step 2: Activate a Product Family
-
Navigate to the Supported Product Families page.
- Click Admin to go to the Admin Home Page.
-
Click Catalog Definition in the Products section.
The Supported Products page opens.
-
Confirm that Product Families is listed in the Navigation column, and click List.
The Supported Product Families page opens.
-
Click Add.
The Add a Product Family page opens.
-
Choose the Product Family you created in Step 1 and click Add.
The Supported Product Families page opens. All supported Product Families, including your new Product Family, are listed.
-
For your new Product Family, select Deployment Center from the Navigation drop-down and click List.
The Deployment Scheduler page opens.
- Optionally, select Email to to send confirmation emails every time a Product Family is deployed, and enter a valid email address.
-
Click Deploy.
You can schedule a time for future deployment in the text box next to the Deploy button.
Step 3: Deploy the Home Page
- Navigate to the Home Page Set Up page.
- Click Admin to go to the Admin Home Page.
Click Home Page in the Style and Templates section.
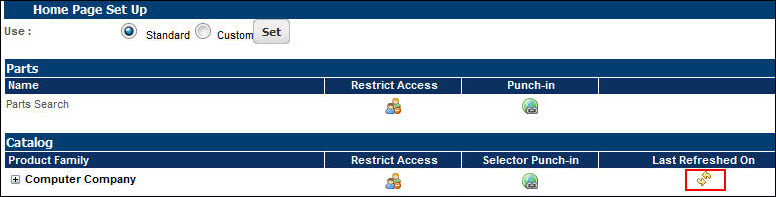
The Home Page Set Up page opens.
-
Click the Refresh icon next to the Product Family you want to deploy.
- Click Deployment Center.
The Deployment Scheduler page opens.
- Optionally, select Email to to send confirmation emails every time a Product Family is deployed, and enter a valid email address.
-
Click Deploy.
You can schedule a time for future deployment in the text box next to the Deploy button.
Step 4: Add or Edit a Product Line
-
Navigate to the Product Line Administration List page.
- Click Admin to go to the Admin Home Page.
-
Click Catalog Definition in the Products section.
The Supported Products page opens.
-
Confirm that Product Families is listed in the Navigation column, and click List.
The Supported Product Families page opens.
-
For the Product Family to which you want to add or edit Product Lines, confirm that Product Lines is selected in the Navigation drop-down and click List.
The Product Line Administration List page opens.
-
For an existing Product Line, click its Name to edit it. To create a new Product Line, click Add.
The Product Line Administration page opens.
-
Enter a name in the Name field.
The Variable Name field populates automatically. Variable names can only contain alpha-numeric characters and underscores. The entry can be changed before saving, but after saving the value is read-only.
-
Enter a description, or click Edit HTML to open the Content HTML Editor.
In the Content HTML Editor, you can customize the description, add images and hyperlinks, and much more.
The Content HTML Editor is similar to a Rich Text Editor. In the Design Mode, you can perform standard functions: save, search, print, find and replace, spell-check, cut and paste, redo, undo, and so on. You can also add and modify text.
To modify the content with HTML, click Source Mode and begin writing your HTML script.
Click Save to Save your changes and close the Editor. Click Close to close the Editor without saving changes.
-
Click Add.
The Product Line Administration List page opens, with your new Product Line listed.
Step 5: Add or Edit a Model
-
Navigate to the Model Administration List page.
- Click Admin to go to the Admin Home Page.
-
Click Catalog Definition in the Products section.
The Supported Products page opens.
-
Confirm that Product Families is listed in the Navigation column, and click List.
The Supported Product Families page opens.
-
For the Product Family with the Product Line for which you want to add or edit Models, confirm that Product Lines is selected in the Navigation drop-down and click List.
The Product Line Administration List page opens.
-
For the Product Line for which you want to add or edit a model, confirm that Models is selected in the Navigation drop-down and click List.
The Model Administration List page opens.
-
For an existing Model, click its Name to edit it. To add a new Model, click Add.
The Model Administration page opens.
-
Enter a name in the Name field.
The Variable Name field populates automatically. Variable names can only contain alpha-numeric characters and underscores. The entry can be changed before saving, but after saving the value is read-only.
-
Enter a description or click Edit HTML to open the Content HTML Editor.
In the Content HTML Editor, you can customize the description, add images and hyperlinks, and much more.
The Content HTML Editor is similar to a Rich Text Editor. In the Design Mode, you can perform standard functions: save, search, print, find and replace, spell-check, cut and paste, redo, undo, and so on. You can also add and modify text.
To modify the content with HTML, click Source Mode and begin writing your HTML script.
Click Save to Save your changes and close the Editor. Click Close to close the Editor without saving changes.
-
Click Add.
The Model Administration List page opens, with your new Model listed.
![]() Removing Support from a Product Family
Removing Support from a Product Family
- Navigate to the Supported Product Families page.
- Click Admin to go to the Admin Home Page.
-
Click Catalog Definition in the Products section.
The Supported Products page opens.
-
Confirm that Product Families is listed in the Navigation column, and click List.
The Supported Product Families page opens.
- Select the checkbox for the Product Family or Families from which you want to remove support.
- Click Remove Support.


