Guided Selling
Overview
A search flow, or selector, offers more granularity and flexibility in navigating the product hierarchy, prior to entering the Configuration Flow. The selector can guide users to the correct model when they do not already know what to configure. For example, this would be necessary if the users do not know the products or if there are complicated calculations required to select the model.
Administration
 Step 1: Creating a Search Flow
For information about search flows, see the topic Search Flows.
Step 2: Set Up a One-Node Flow
-
Click List under the Rules header for your Search Flow.
For more information on creating search flow rules, see the topic Search Flows.
Selectors can have multiple flow nodes, just like configuration. This is useful when the fields for the user change significantly based on some input. Recommendations, constraints, and hiding rules can also take effect in selectors.
-
Select Define Function as the Result Type.
This script determines which model punch-ins will appear to the user, based on any condition attributes that you have added to the search flow.
-
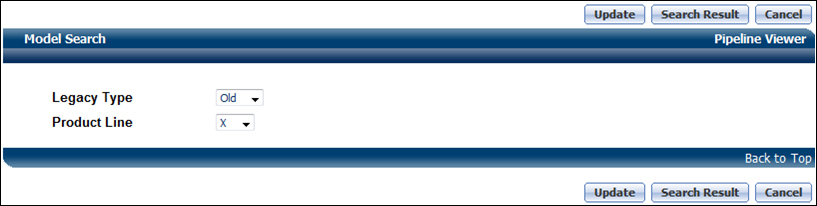
In this example, Legacy Type and Product Line are single select menus.
Their values (New, Old and X, S, NL) determine which models appear, depending on whether the model is New or Old and whether it belongs to the X series, S series or NL series.
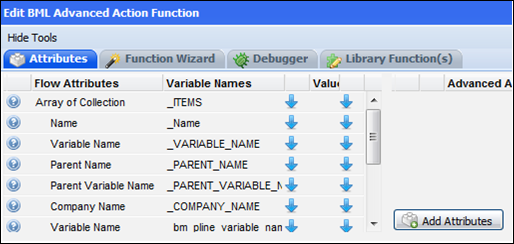
The BML script automatically imports the catalog attributes as parameters. Not all of these may be relevant for your use case.
- There are a few special attributes of the XML tags:
- button=’yes’: For product line or model, show as a button. ‘No’ will show as a link.
- configuration=’yes’: For model, destination of the button or link will go to configuration. If ‘no’, it will go to the Model Profile page.
- configuration=’yes’: For model, destination of the button or link will go to configuration. If ‘no’, it will go to the Model Profile page.
- sort=’yes’: This attribute is sortable on the Selector Results page for the end user.
- numeric= ‘yes’: Define the sort behavior as numeric, so values are 1.0, 2.0 10.0 rather than string sort of 1.0, 10.0, 2.0.
-
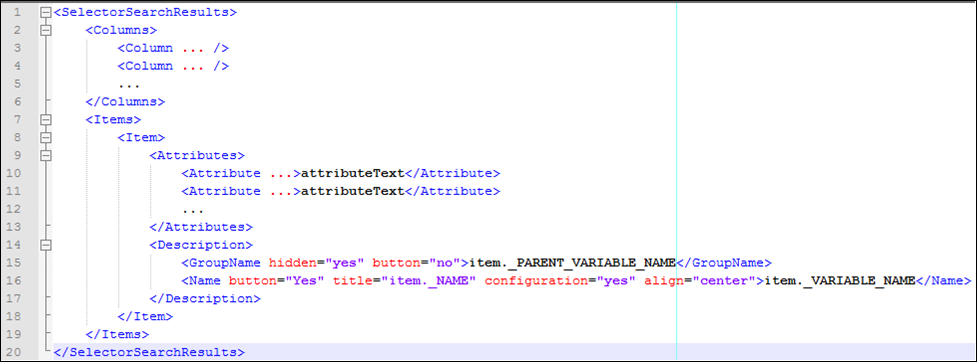
The BML script returns a string containing XML. The XML has to conform to a specific hierarchy.
Click here for an example.
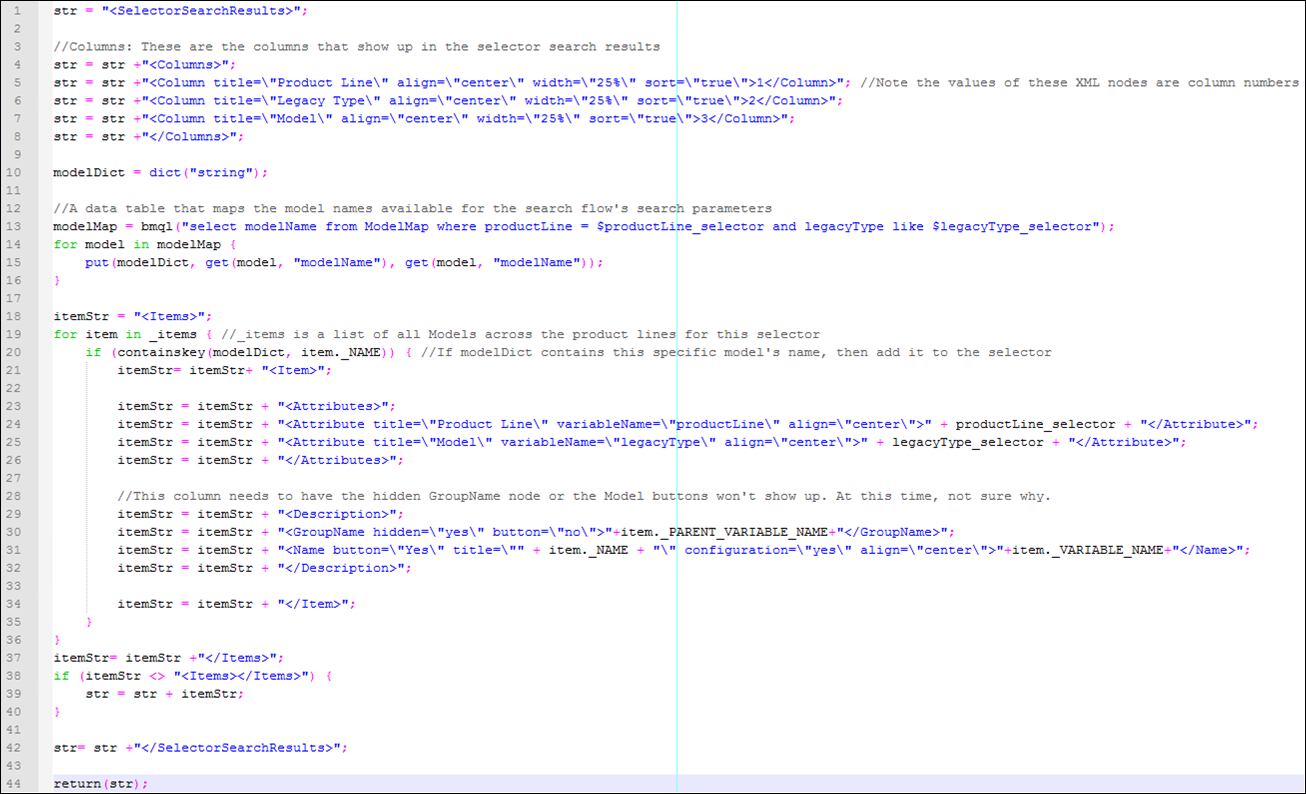
-
Click here to see the full script used in this example, with comments.
-
Refresh and deploy the home page.
-
Then, from the home page, enter the Selector. You will see a screen like this:
-
And entering the Search Result screen:

You may need to deploy regularly in Configuration if the BMI instance you are working on has its Configuration Cache turned off.
Step 3: Changing the Homepage UI and the Models that Your Selector Can Access
When you create or modify your search flow, choosing its Type affects the corresponding layout on the home page to a certain degree. In most cases, you will probably choose " Choose models across product lines ". Upon selecting this option and deploying the home page, a selector will be generated for each product line.
So, if you have 7 product lines, there will be 7 punch-ins to 7 selectors, each of which is only capable of accessing the models that belong to that specific product line. This is probably not what you had in mind.
Additionally, you are probably averse to having what looks like 7 identical punch-ins cluttering the home page.
By default, a selector punch-in is generated on the home page only for each product line. So, you will need to go to the Home Page Set Up page and create a selector punch-in for the entire product family.
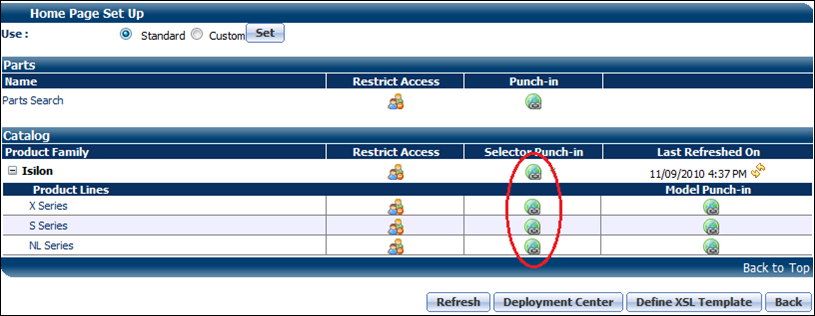
Pay attention to the items circled in red. There is a selector punch-in for each product line in the product family, and by default this is probably what gets generated when you first refresh and deploy the home page. To create a selector that can access all models across all product lines, create a selector punch-in for the Product Family.
In this example, you will have to click on the selector punch-in icon that corresponds to "Isilon". This will bring you to the selector punch-in list for the Isilon product family. A punch-in for the product family has already been created. In this case, you need to create a new one. Name it anything you like.
You may run into an error message that pops up saying something similar to "search group not available for this selector".
The following steps are a workaround for this error:
- Return to the Search Flow.
- Change its type to " Select product lines ".
- Unselect all product lines.
- Deploy Config.
- Return to the Home Page Set Up page.
- Create a selector the entire product family: this should now work.
- Deploy the home page.
-
Return to the search flow and change its Type back to what it was before.
Remember to select the product lines again.
- Click Admin to go to the Admin Home Page.
-
Click Home Page in the Style and Templates section.
The Home Page Set Up page opens.
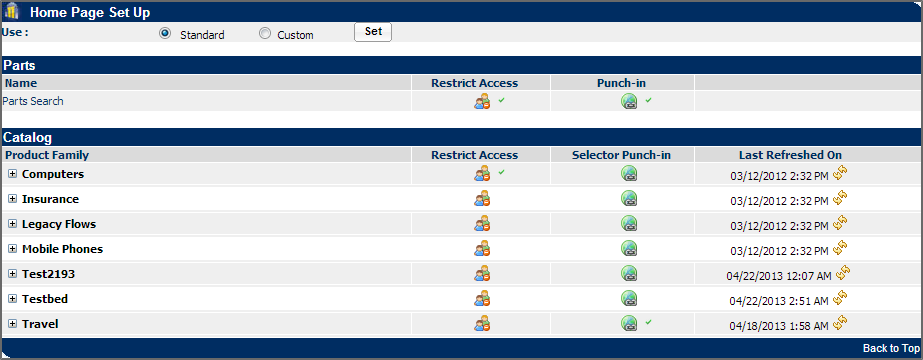
- For Use, select either Standard or Custom and then click Set.
Related Topics
See Also


