Commerce Rich Text Editor
Overview
The Rich Text Editor includes more text formatting options than the legacy text editor. Features include undo/redo, images, links, table tools, and functions with the browser's native spell check.
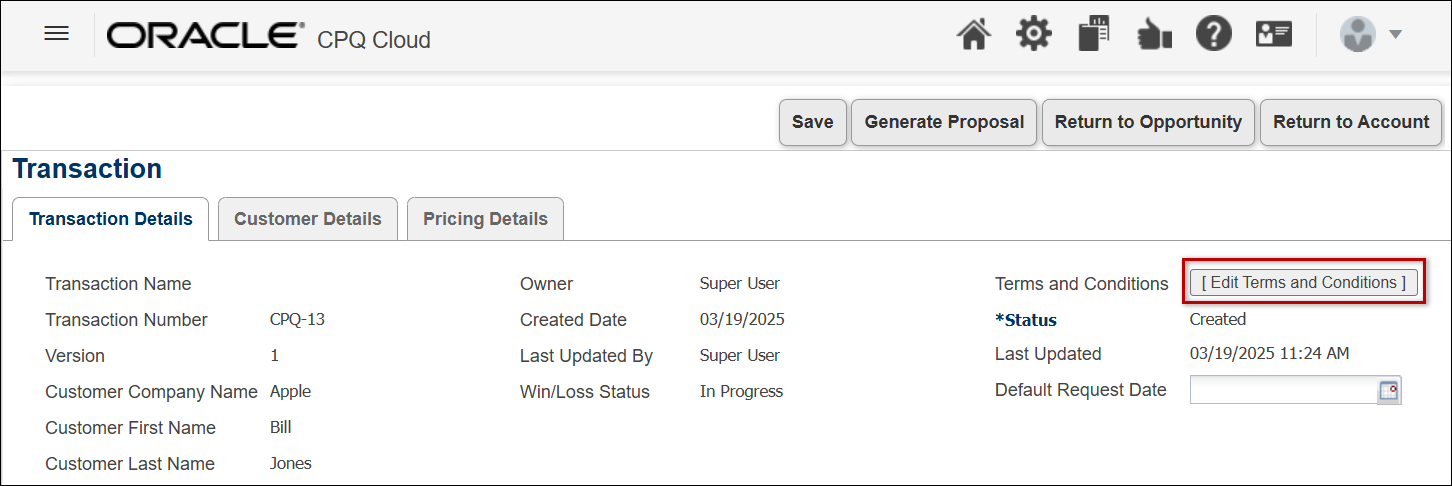
 Editing RTE Attributes in the Legacy Transaction UI
To edit RTE attributes in the Legacy Transaction UI, click the button next to the applicable attribute to open the Rich Text Editor.
Editing RTE Attributes in the JET Transaction UI
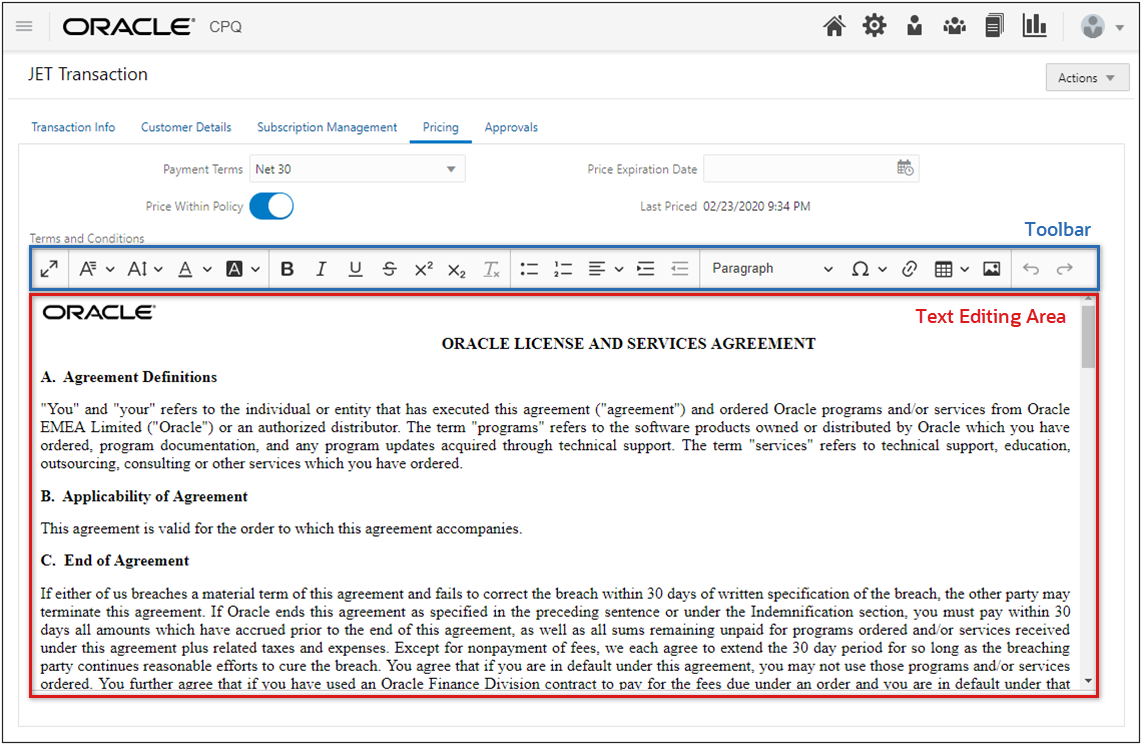
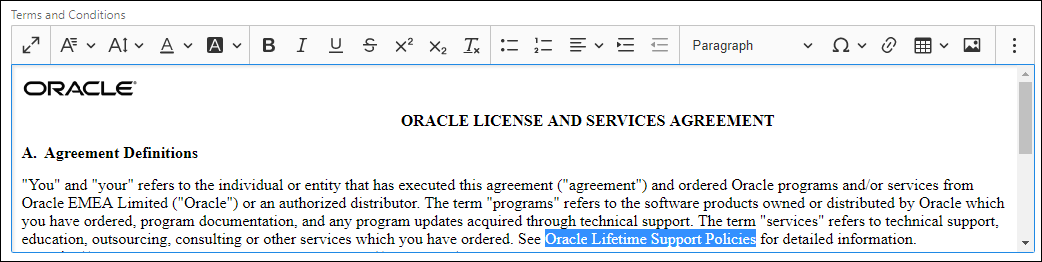
RTE attributes can be edited inline in the JET Transaction UI. Users can also click the  to maximize the Rich Text Editor.
Using the Rich Text Editor
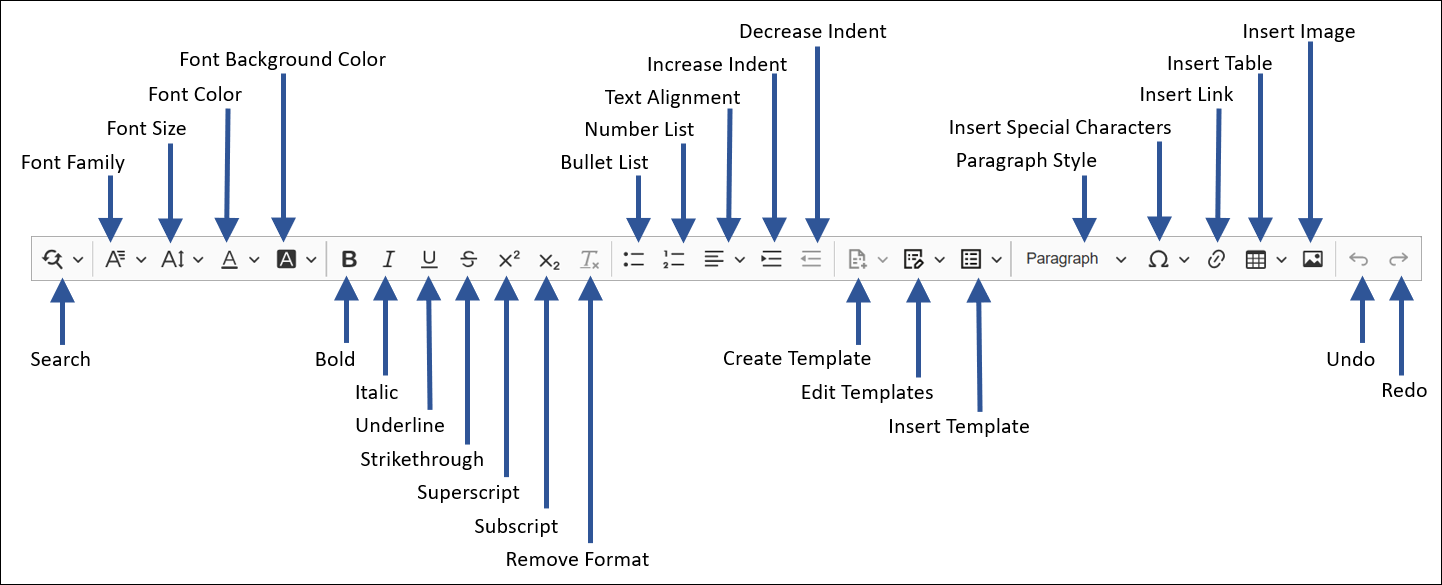
- Text Editing Area - The user can edit content in this section. The actions in the Toolbar act on the selected content within this window.
- Toolbar - The editor toolbar displays above the text editing area and sizes responsively based on the page size. The following editing functions are available for the inline editor. Function tooltips display when users hover over the toolbar icons. The Maximize function allows users to increase the editor screen to a full-page view.
Administration
Insert a Table
To insert a table into a rich text document, click the' Insert Table' icon and select the number of columns and rows.
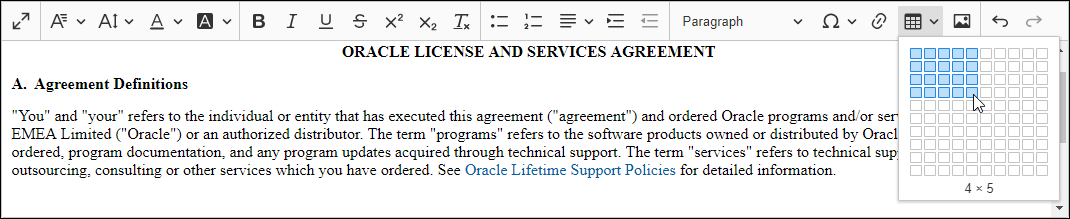
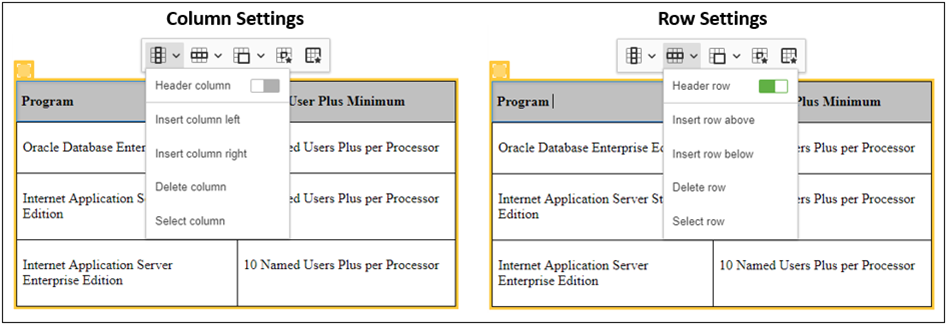
Table Editing Functions
When users click inside a table in the editor, the table toolbar displays above the table. The table toolbar provides access to column and row settings, cell and table properties, and merge cell controls.

The column settings allow users to designate a column as a header column, insert a new column, delete a column, and select a column. The row settings allow users to designate a row as a header row, insert a new row, delete a row, and select a row.
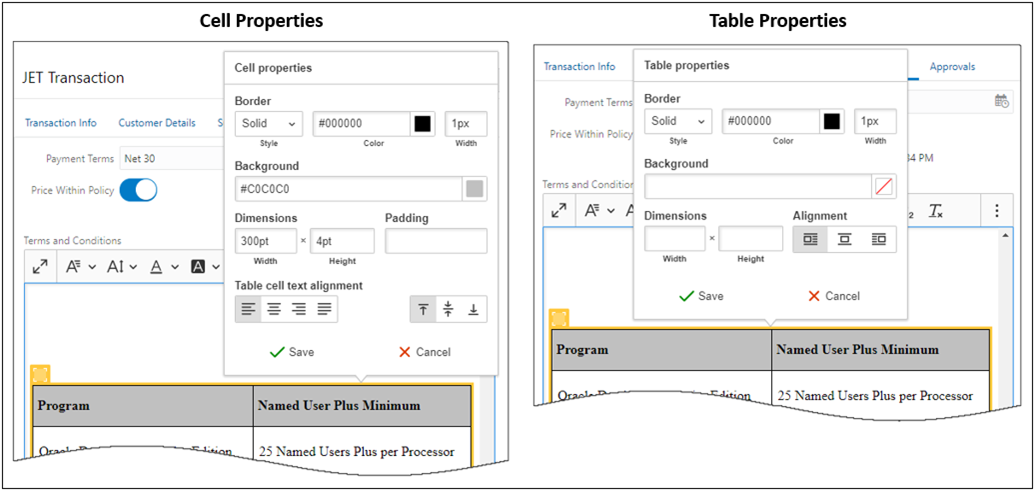
The cell properties provide cell format, size, and text alignment options. The table properties provide table format, size, and alignment options.
Insert a Hyperlink
Complete the following steps to insert a hyperlink into a rich text document.
-
Select the text where the hyperlink will be inserted.
-
Select the 'Link' icon.

-
Enter the hyperlink address in hyperlink pop-up.
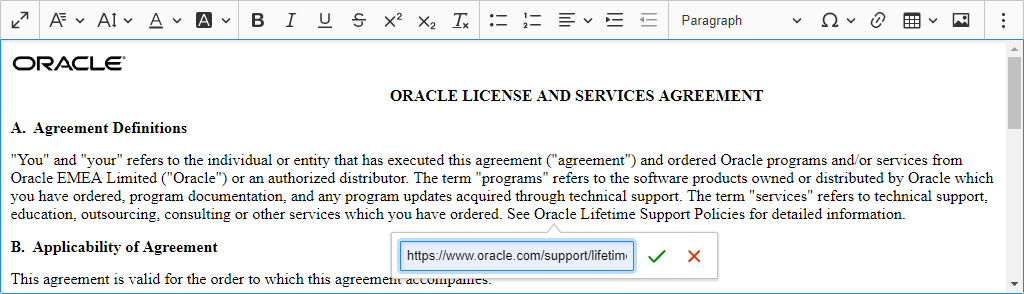
- Click the checkmark to save the hyperlink address.
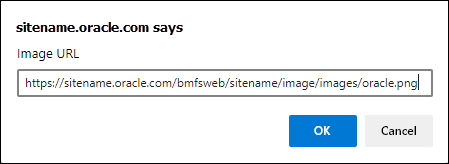
Insert an Image
Complete the following steps to insert an image into a rich text document.
-
Click the 'Insert Image' icon.

-
Enter the image URL and then click OK.
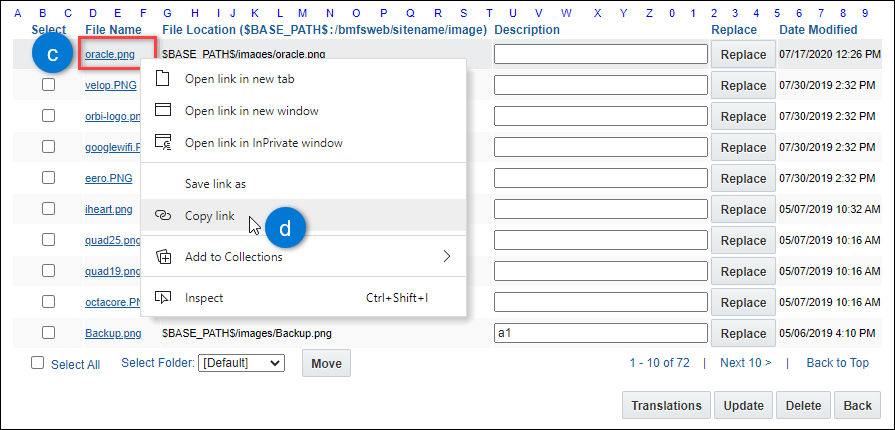
View instructions for Image URLs in the File Managers
-
Navigate to the File Manager.
Admin > Utilities > File Manager
- Navigate to the applicable folder.
- Right-click on the image filename.
- Select Copy link from the drop-down.
-
Right-click on the image to select alignment options.

RTE Templates
Oracle CPQ provides user-specific templates for the Rich Text Editor. With this new functionality, users will be able to:
The following RTE template functions are available from the inline editor. Function tooltips display when users hover over the toolbar icons.

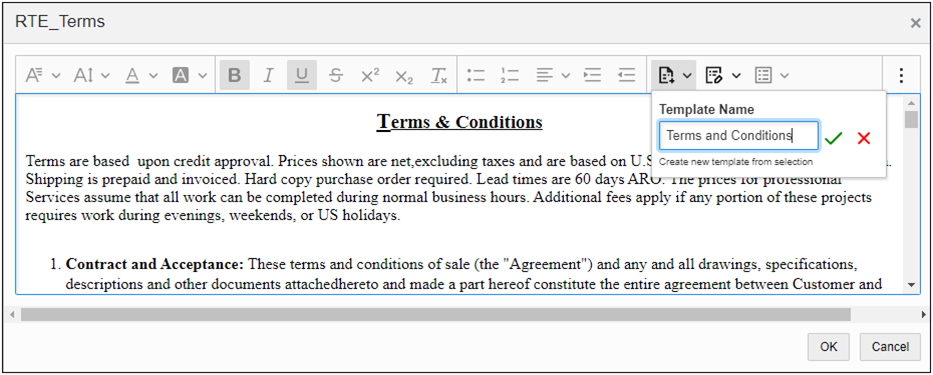
Create a User-Defined RTE Template
Users can perform the following steps to create a user-defined template in the Rich Text Editor.
- Enter text in the RTE inline editor for a Commerce RTE attribute.
- Select the text for the template.
- Click the Create Template icon (
 ).
).
- Enter the template name.
- Click the Save icon (
 ).
).
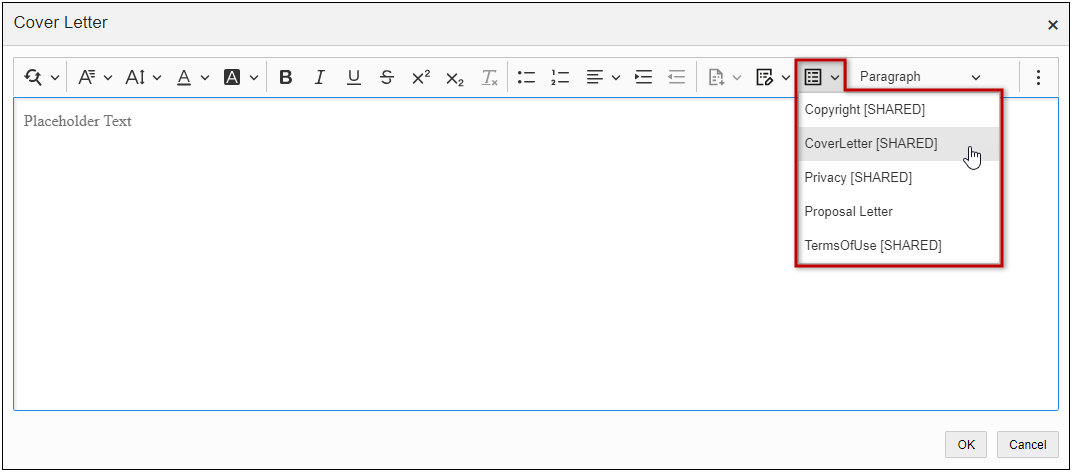
Insert an RTE Template User-Defined, Administrator-Defined, or Legacy Template
Users can perform the following steps to insert a user-defined, administrator-defined, or legacy template.
- Open the RTE inline editor for an existing RTE attribute.
- Click the Insert Template icon (
 ).
).
-
Select the appropriate template name.
The [SHARED] nomenclature is appended to administrator-defined RTE templates.
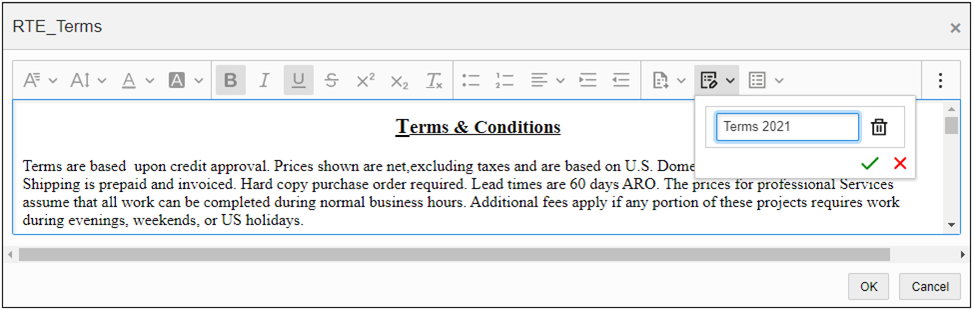
Rename an Existing User-Defined RTE Template
Perform the following steps to rename an existing user-defined template.
- Open the RTE inline editor for an existing RTE attribute.
- Click the Edit Template icon (
 ).
).
- Select the appropriate template name.
- Enter the new template name.
- Click the Save icon ( ).
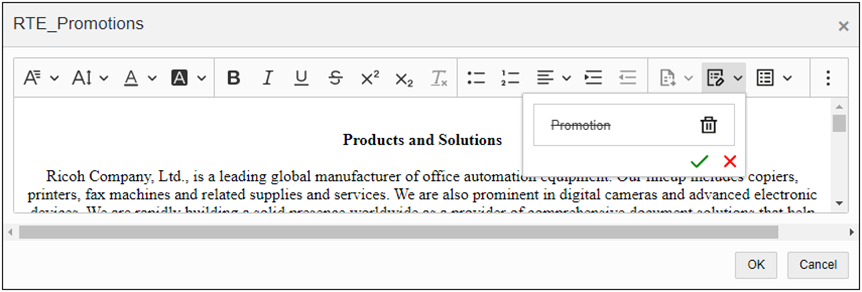
Delete a User-Defined RTE Template
For information about shared templates, refer to Create a Shared RTE Template and Access Shared RTE Templates.
Notes
Notes:
- Templates selected to display as the default value are supported.
- JET Transaction UI inline editor user-defined RTE templates cannot be shared with other users.
-
Some of the formatting options will be hidden if the layout width of a Rich Text attribute is not wide enough to display the toolbar for the JET Inline Rich Text Editor. To view all functions the user must maximize the editor screen to a full-page view. Placing an RTE attribute into a multi-column layout can cause this issue, therefore it is recommended that RTE attributes are placed in single column layouts.
Related Topics
See Also
 ) for the template you want to delete.