File Manager
Overview
File Manager is an integral part of Oracle CPQ. You can upload any kind of file to the File Manager, organize files into folders, and access files from anywhere on the Internet. The File Manager is used for:
- External images
- JavaScript files linked to various areas on the site
- CSS Stylesheets for Configurations Flow Templates
- Excel spreadsheets (to hold master data)
 Example of File Manager
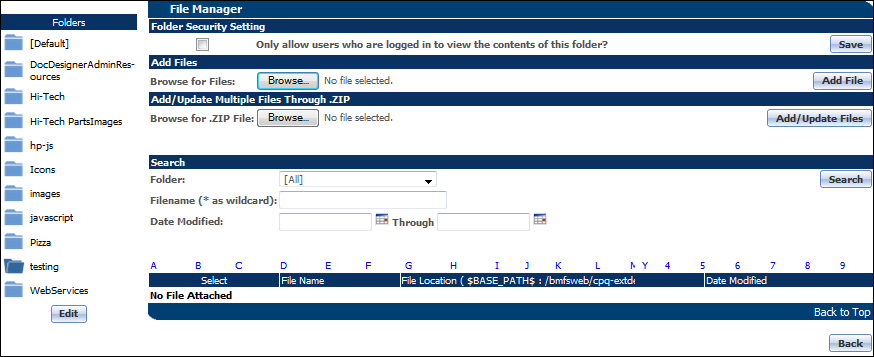
Searching
Pagination functionality and categorization of files by alpha-numeric indices allows you to easily navigate through a large number of files. Search and paging functionality are available within image selector pages in Configuration and Commerce. File Manager allows you to:
- Search by File Name (including using * as a wildcard)
- Search by Last Modified Date Range
- Search within a folder or across all folders
Administration
Folders
Adding a Folder Watch Video 
- Navigate to the File Manager page.
- Click Admin to go to the Admin Home Page.
-
Click File Manager in the Utilities section.
The File Manager page opens.
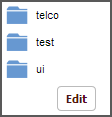
-
Click Edit at the bottom of the Folders list.
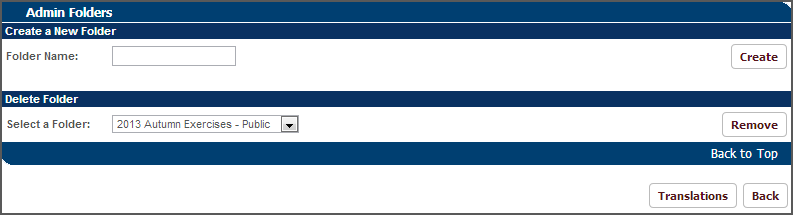
The Admin Folders page opens.
-
Enter a Folder Name.
-
Click Create.
The folder is created.
- Click Back to return to the previous page without saving changes.
Deleting a Folder
Watch Video
- Navigate to the File Manager page.
- Click Admin to go to the Admin Home Page.
-
Click File Manager in the Utilities section.
The File Manager page opens.
-
Click Edit at the bottom of the Folders list.
The Admin Folders page opens.
-
Select a folder from the Select a Folder drop-down.
-
Click Remove.
The folder is removed.
- Click Back to return to the previous page without saving changes.
Setting Folder Security
Watch Video
- Navigate to the File Manager page.
- Click Admin to go to the Admin Home Page.
-
Click File Manager in the Utilities section.
The File Manager page opens.
- Click the name of a folder.
-
To make a folder secure, select the Folder Security Setting checkbox. Click Save to save your changes.

Once a folder is designated as secure, the File Manager files and folders will appear like the following screen shot:

- Only folders, not files, can be designated as secure. An admin can designate any folder they have added as secure. Once an admin has designated a folder as secure, the security settings apply to all files within that folder.
- When updating a folder’s security settings, the Date Modified of all the files located within the folder will be updated to the current date.
Files
Adding a File Watch Video
- Navigate to the File Manager page.
- Click Admin to go to the Admin Home Page.
-
Click File Manager in the Utilities section.
The File Manager page opens.
- Click the name of the folder that you would like to add a file to.
-
Click Browse to select the file(s) you would like to add to the folder, under either the Add Files or the Add/Update Multiple Files Through .ZIP section.
The File Upload dialog box appears.
- File names are case and space sensitive.
- When adding a zipped file, the contents will replace any existing files in the folder that have the same file name.
-
Select a file and click Open.
You return to the File Manager page, with the selected file listed next to the Browse button.
-
Click Add File or Add/Update Files to add the selected files to the folder.
If you add a file and the file name already exists in the folder, then the system throws an error.
Deleting a File
Watch Video
- Navigate to the File Manager page.
- Click Admin to go to the Admin Home Page.
-
Click File Manager in the Utilities section.
The File Manager page opens.
- Click the name of the folder with the file(s) you want to delete.
- Check the Select checkbox for the file(s) you want to delete.
- Click Delete.
Referencing File Locations
Use the file location to refer to your File Manager files from another location.
Copy these values to access the files from anywhere on the web:
Example URL path:
mysite.bigmachines.com/bmfsweb/mysite/image/Branding/logo_small.gif
When referencing a File Manager file anywhere on the site (for example, in Config HTML Templates) use the $BASE_PATH$ shorthand URL:
$BASE_PATH$/Branding/logo_small.gif
Be careful when removing files. The File Location changes when this happens. If the file is referenced anywhere on the site, the link will be broken.
Notes
- When migrating, the security settings from the source folder will be transferred to the target folder.
- If the security settings on the target and source site do not match a particular file or folder, then the checkboxes will be disabled for those files. The text "Security does not match the source" will be displayed next to the folder whose security settings do not match.
The File Manager supports the following file types: bmp, csv, css, dat, doc, docx, dot, dwf, dwg, dxf, gif, htm, html, js, jpeg, jpg, mdb, mpp, odt, ods, pdf, png, ppt, pptx, ps, rtf, tif, txt, vsd, vss,vst, vsw, xla, xlc, xls, xlsm, xlsx, xml, xsl, and zip.
Related Topics
See Also


